Very, very smelly
This week: Breaking stone; A complete manual failure; Friday finish and clean up; Very, very smelly;
We are in the middle of the spring weather tussle, when the warmer weather moving up from the south is trying to dominate the colder weather moving down from the north.
This always means that there are fine, sunny and warm days interspersed with cool or cold wet days.
When the sun has shone, it has been beautiful. Everywhere there is the verdant new growth f spring.
Daffodils nod their yellow heads in the breeze and bird song fills the air.
On cold wet days like today, you need to be in front of the fire to keep warm.
We have another week or ten days of this unsettled weather, before the warmth of spring really arrives.
Breaking stone
With a very unsettled weather week this week. I have made progress on my “hole in the hall wall”.
That said, it has not been easy, or particularly clean.
The way my home was build is the traditional way with Dalmatian stone buildings. Large and very large stones form the outer walls, bonded with lime mortar.
The wall thickness is anywhere from 60 cm for internal, walls to over a metre for external walls. Most are around 80 cm thick.
The gap between the outside and inside stones is filled with smaller stones and stone chippings, loose infill and more limestone mortar.
The wall I am working on in my hall, where the network cabinet will go, is extremely dry. This means that every time I use a lump hammer and chisel, dust dislodges, along with the stones I am trying to remove.
I have used a small breaking hammer and chisel to loosen the mortar and remove the small and medium stone infils. By Wednesday I had removed 20 builders buckets of debris.
Even being careful, a talcum powder fine layer of dust has settled on everything in the hall. It could be worse, it could be a thick layer of dust.
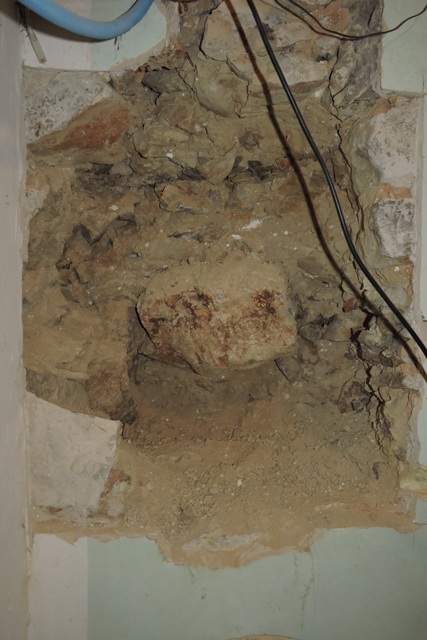
With the edges of the hole more or less rectangular, there were just two very large stones left in my hall hole. One is a type of shale, so with the hand and power chisels, working along fault lines in the stone, I removed chunks.
The largest stone at the back was a different material, perhaps a type of granite. I used a diamond tip masons drill to cut holes in the stone, and then the power chisel to try and open up fractures.
This worked to a degree. But in places the stone just does not want to fracture.
There is also a problem in using a large masonry drill in a confined space. Powerful electric drills have powerful fans to cool the motors.
The drill bit creates a very fine cloud of pulverised stone, which the air from the fan then spreads everywhere!
Working on a plank over the stairs means I have limited safe working space to exert force with my tools.
I will not use my Stihl stone saw because of the dust it creates. Outside you need full PPE: Inside it would be unbearable.
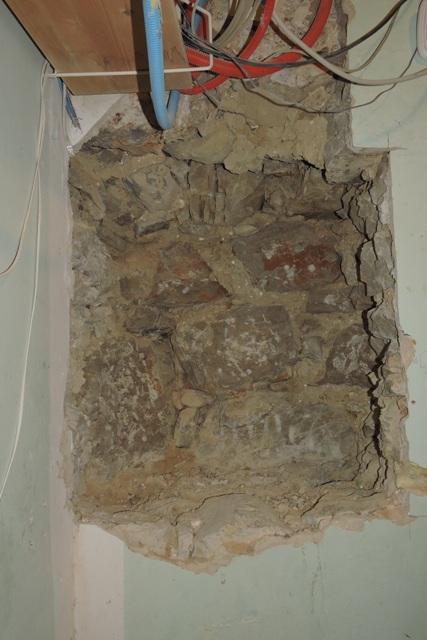
So working all day, after four and a half days and 30 buckets of stone, I have completed the hole in the wall, ready to take the network cabinet.
A complete manual failure
Removing small stones and lime mortar from the hole in the hall wall has not been difficult.
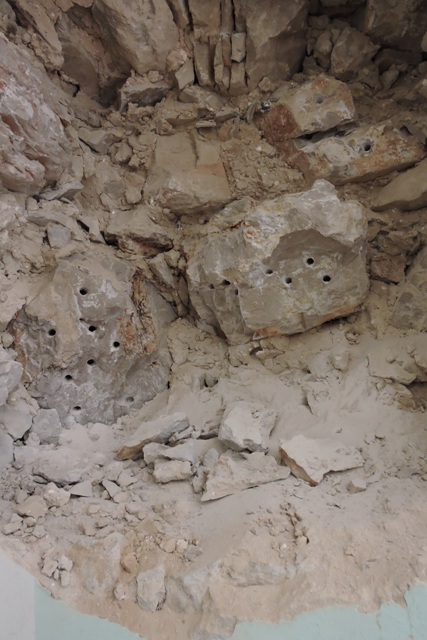
Three large and extremely hard lumps of rock, which go completely through the width of the wall have presented difficulties though.
The only way I found to break these was by drilling multiple holes in the rock, then splitting the rock with a pointed chisel in the hole.
This took time and was very hard work.
I knew the rough dimensions of the network cabinet, but thought I would assemble it, whilst taking a break from breaking rock.
The manual on A4 paper was not very good, but the company said they had youTube videos! Oh great! I do like visuals…
I found their site, however there were no assembly videos for my cabinet model…
There was a bag with lots of bolts and washers, so I sorted them all out into their different types.
But when I went back to the manual, it only mentioned one of the bolt types.
Starting the assembly, I followed the pictures exactly. Except what I was assembling, when it was done, didn’t look like the drawings or photographs.
So much so that the cabinet wouldn’t actually fit together.
It was at this point that I decided I needed a cup of strong coffee.
I am used to IKEA pictograms, well thought out, easy to follow, perhaps even “idiot proof” instructions. This manual was the diametric opposite and was completely useless.
Assembling the four corner posts and the top and bottom sections, I measured the external dimensions exactly, then put everything back in the boxes it came in.
The actual assembly will have to take place on another day!
Once I had the accurate measurement, I then made an outline of the cabinet, to scale, but with hardboard and wood.
This I used to test the size of the hole in the wall. The outline slid in and out with a few centimetres to spare all round, which was exactly what I had planned.
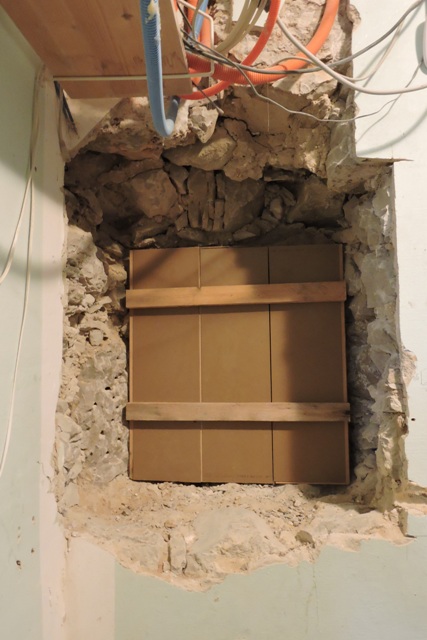
There is a large gap at the top which will be filled with stone and concrete once the cabinet has been installed.
Friday finish and clean up
I find I work a lot better in the morning, after a good night’s sleep. Especially when the task at hand is physically demanding.
On Friday, with the last few chunks of the hardest rock to removed, I started again with the drill, followed by the chisel and had soon filled more buckets with debris.
By lunch time I had the hole in the wall deep enough to take the cabinet.
After lunch I started the clean up.
Although I have used power tools sparingly, doing as much work as possible by hand to minimise dust, there is still a talcum-powder fine layer of dust over everything which I haven’t covered.
With all the tools put away, I vacuumed out the void then removed the planks and swept the stairs.
I am very happy with the result of my week’s work.
The next job will be to mix a small batch of concrete and make a level base for the cabinet to sit on.
Once I have the cabinet in place, I will fill in the sides and behind with more concrete, after I have run the various conduits I need for cables which go in and out of the cabinet
All that can wait though. For now the hard work of opening the void in the wall is done, and the worst of the mess is behind me!
Very, very smelly
It is raining again as I write this on Saturday afternoon, but I had already seen that on the forecast.
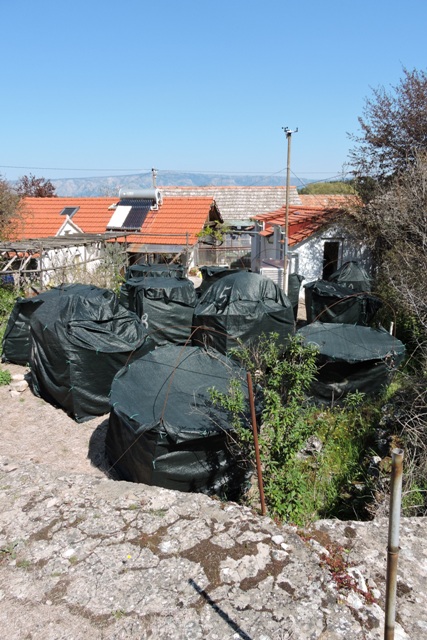
My vet – err, let me re-phrase that, my felines vet, also farms chickens and turkeys and has a lot of compost.
He delivered 150kg of compost for me in sacks, just before Christmas.
I have mentioned many times before, that my soils are poor, stony and have been worked to death. So I want to try and add natural compost to improve them.
On a sunny Friday afternoon, I shovelled compost around the bases of the plum, cherry and pistachio trees in the Top Orchard, knowing that it will get well watered in this weekend.
I also added compopst to the side border, which has a number of flowering shrubs in it.
This really was my first application though, targeting the compost on my newest trees. I must say that the compost is very, very smelly.
This did bring back childhood memories for me. An aged Aunt used to say when we were out in her car, in a rural area, “Breathe deeply children: Fresh farmyard smells.”
Next I added compost to the trees in the courtyard, a greengage, damson and flowering cherry.
The damson is covered in blossom this year. The first time it has really had a lot of flowers on it since I planted it four years ago.
When I remove the shade netting from the citrus trees, I will apply compost around them as well..
Removing the netting is a job which I usually do in March, once the days are warmer, towards the end of the month. NCG