Painting yourself into a corner
This week: Nightingales, Chuks and orchids; Making stencils; Laying tiles; Painting yourself into a corner;

We have a long spring season here in the Adriatic and it is my favourite time of year.
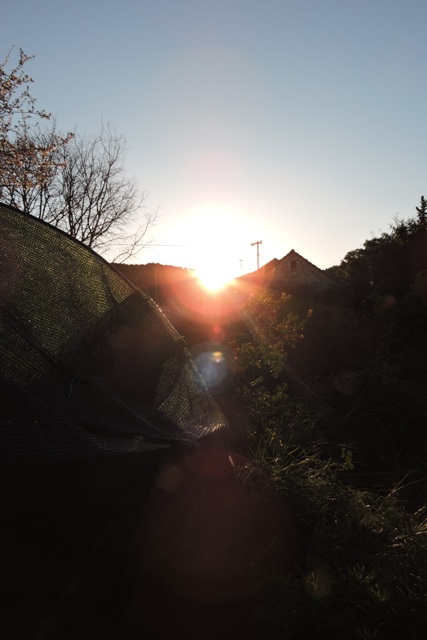
This week I have been up with the sun every morning, which means around 06:00 at the moment.
In Europe the clocks do not move forward to summer time until the 31st March, in 2024 the latest date the clocks change. It is always the last Sunday in March, so I am getting ready and resetting my body clock for the change next week.
Wednesday the 20th was the Vernal Equinox and it is always nice to see the sun rise above the hills to the east of my home at this time of year.
With the advancing season, the Nightingales have arrived back from their over-winter home in central Africa and on Tuesday evening I heard the first Scops Owl calling from a nearby tree. In Croatian they are called “Chuk”, an approximation of their call.
It is easy to note and record the arrival of our seasonal visitors. However I hadn’t noticed the departure of our Robins and Wrens, which migrate north in the spring to breed and to avoid our hot and dry summers.
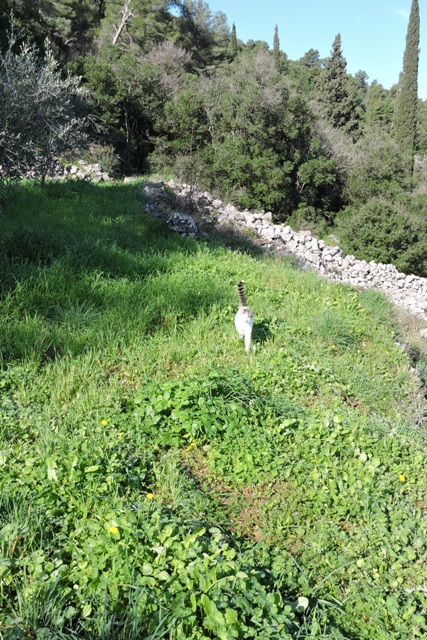
I have been out in the Maquis early too, usually accompanied for the ramble by some of the felines.
This week I found a group of a dozen or so new orchids growing at the edge of an old terrace on the hill.

I have not yet been able to identify it yet from my books.
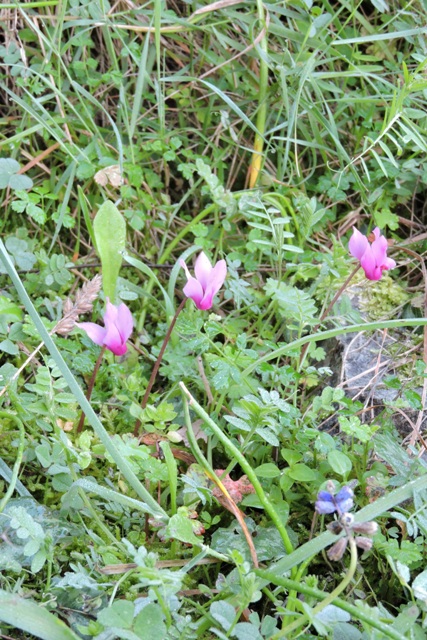
What I had been looking for were the Wild Cyclamen, which I found a plenty.
In the Citrus orchard, I have removed all the top covers which have protected my citrus trees during the winter.
The covers are in two pieces. A curtain which attaches to rails around each tree, and a separate cover over the top of each frame.
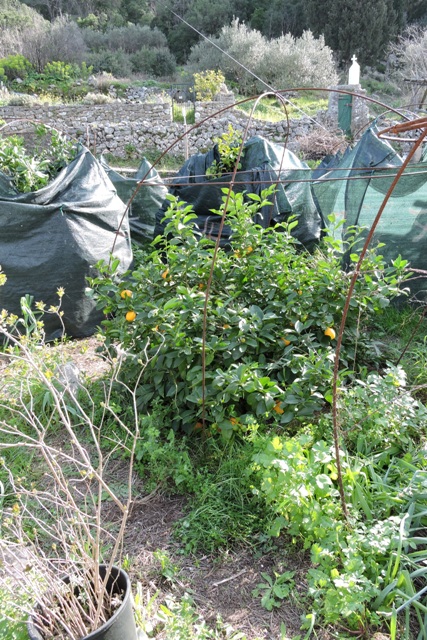
I have started to remove the side curtains, but have run out of time this week to finish the job.
There is always lots to see and do here in spring…
Making stencils
I have lost count how many times in these blog pages I have complained about the lack of square corners and parallel walls in my buildings.
150+ years ago it really didn’t matter.
Now it would make life easier, but the problems are not insurmountable. You just need to be a little inventive!
I like the look of the old stones in my wall, their textures and colours. It is worth all the effort to keep their natural beauty.
Each row of tiles I am laying in my Konoba is 6.6metres long. Even with a laser, it is difficult to keep every tile row in a perfect line, so I have also drawn “tram tracks” in pencil, to help with the horizontal alignment.
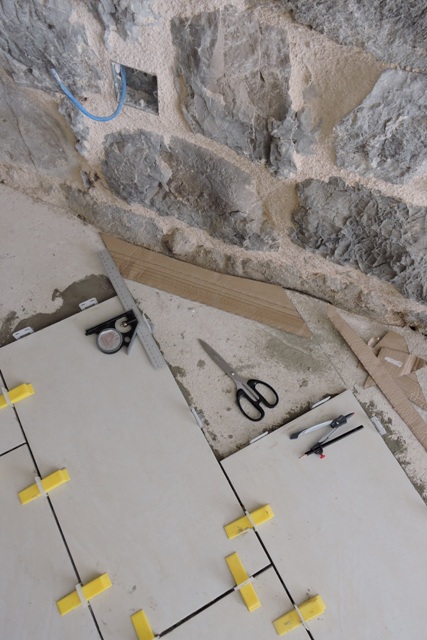
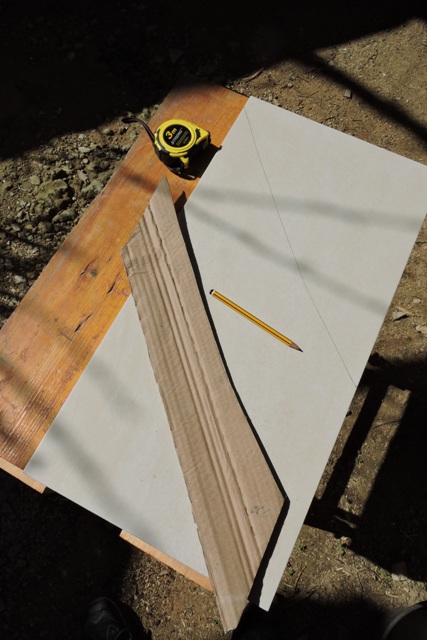
I decided to use these together with the cardboard packing each box of tiles comes in, to make an individual stencil for both ends of the rows of tiles.
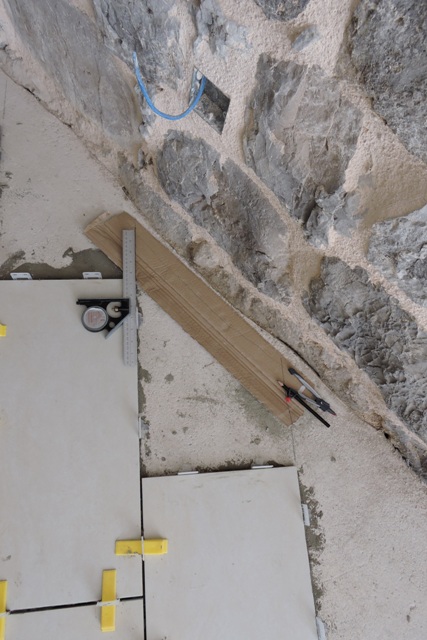
Digging through my study desk I found an old set of compasses, which when run parallel to the wall, would mark the card for cutting.
The extended tram tracks would act at the reference point so the stencils matched the tiles.
After cutting each stencil, I checked it against the wall and made any fine adjustments.
It really is a “Heath Robinson” method, but it works. The stencil is then applied to a tile and a pencil is used to mark the cut.
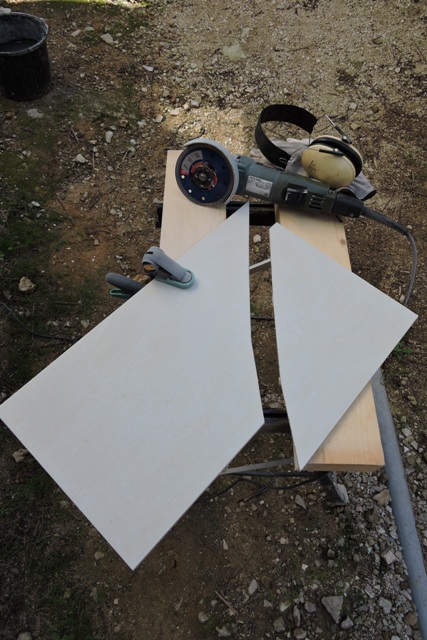
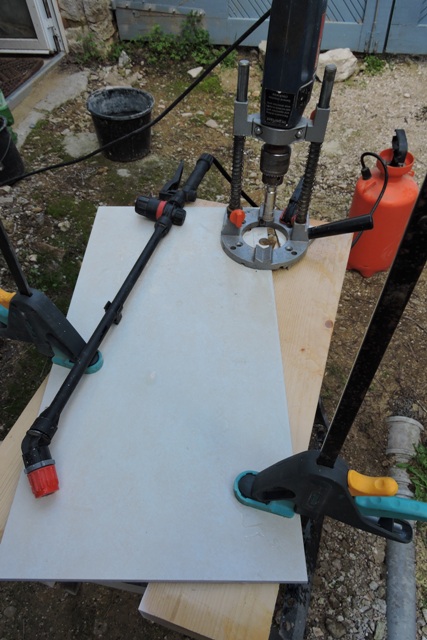
Once marked, I use a diamond tipped rotary cutting disc to make the often intricate cut where the tile will meet the wall.
I am calling these ‘stencils’ rather than ‘patterns’ because I am keeping them for reuse. Because the tiles run diagonally, I have found I can match a stencil, with perhaps a little adjustment in other places along the uneven walls.
The final job is to check the tile and then apply adhesive before setting it in place.
There is a lot of work involved, but the result is in my opinion worth all the effort.

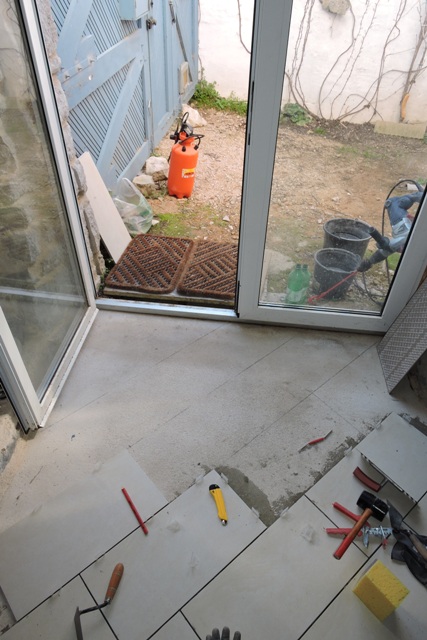
Laying tiles
The floor area of my Konoba is 42 square meters, and I have 38 boxes of tiles, enough and some 10% extra to allow for wastage from the offcuts.
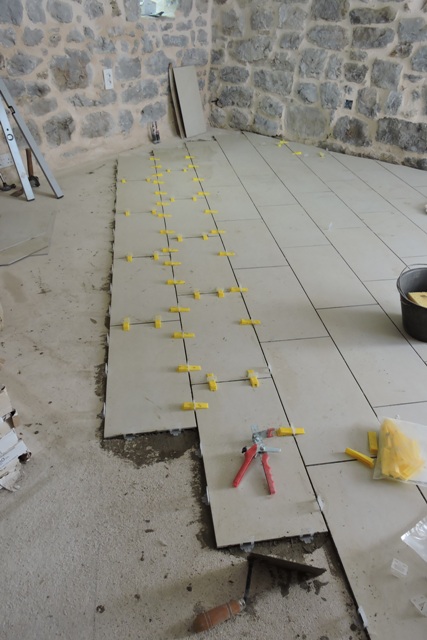
After laying the first row of tiles last week and letting them dry, this week I have made good progress with the job of laying successive rows.
I had worked out that theoretically I could lay between three and four square meters a day. This allowed for a couple of breaks, but basically starting at 7.30 and finishing at 4pm.
Please don’t forget I am a one-man-band!
I am doing all the measuring, marking, fetching and carrying, adhesive mixing, laying and cleaning up afterwards!
In practice I found that I can lay around 3.5 square metres in a normal working day, and it has got easier as the week has progressed.
I have developed a “system” with ready prepared amounts of adhesive and water, to make mixing easy. I have also developed a working method using the laser to make sure all the row of tiles remain symetrical.
There are underground pipes for the central heating radiators which also need to have access holes cut for them.
Careful measuring is essential if you want to avoid mistakes. This is one of those occasions when you just cannot have too many measuring rules available to help.
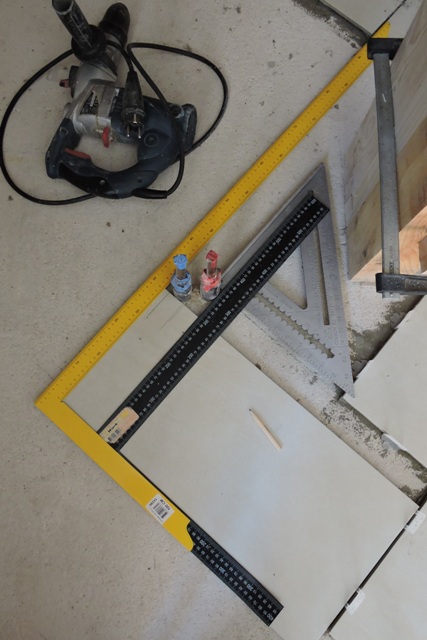
Once the position of the holes has been marked and checked – I measure three times and cut once – then I use a high speed circular cutting die together with a water sprayer, to keep the die cool, to cut the holes.
Once again the holes are checked for clearance before adhesive is applied and the tile is laid in position.
At the end of the week I have laid around eighteen square metres, so I’m well on the way to having the room finished!
Painting yourself into a corner
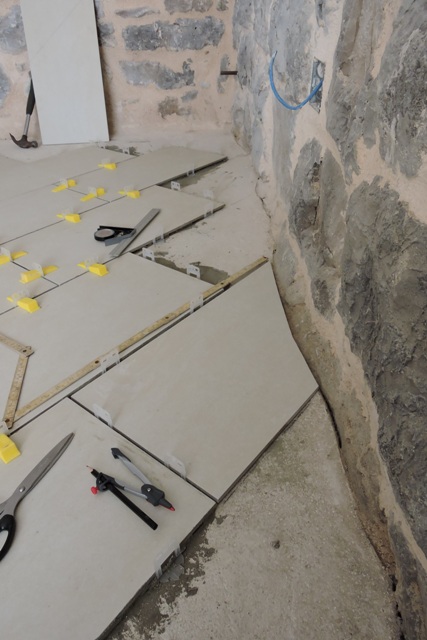
I realised as the completed rows of tiles approached the Konoba doors, that I was going to have to be careful how I laid the tiles in two of the four corners.
Two corners are open and easy to work into, but two are closed, like the one where the doors are and tile laying needs careful planning.
It reminded me of the old saying about not painting yourself into a corner! On Thursday morning, as I planned the process I would folow for laying the full tiles, I realised that I needed to also lay the cut tiles against the wall at the same time.
The problem was that I hadn’t cut any of the tiles. So this opened up another issue, that of cutting tiles to fit the irregular stone walls.
I had drawn and cut the stencils so all that was needed was to apply the stencils to the tiles.
“All”, is one of those fully encompassing words, easy to say, less easy in practice.
The tiles are roughly at a 45* angle. I say roughly because the walls are neither flat, nor straight.
I spent the whole of the rest of Thursday repeating the process, until I had fifteen tiles cut, and in some cases adjusted slightly and then dry fitted.
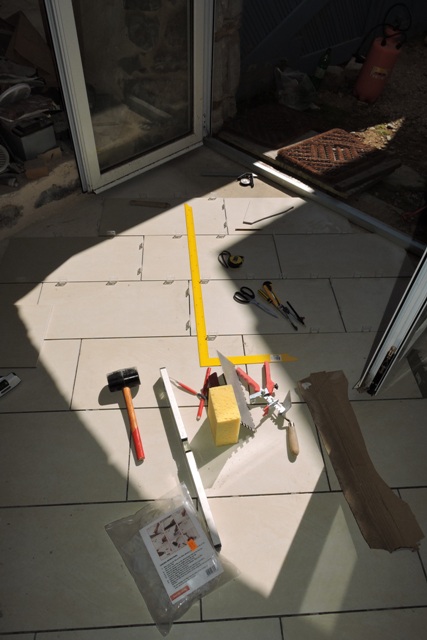
By 4pm, covered in a fine layer of dust, I decided it was not worth starting mixing tile adhesive, so I cleaned up and went for a shower.
Starting on Friday I laid tiles into the closed corner by the door, finishing the job on Saturday morning.
I will now leave the tile adhesive to fully dry, so that I can start laying more full rows of tiles on Monday, mixing outside and using the door for access.
I will not have the floor finished for Easter, which is what I was hoping to do, but I will be very close… NCG