Near enough is… the best you’re going to get
This week: Near enough is… the best you’re going to get; Wood versus concrete; Only leave footprints; Of orchids; Wiring up a light; A different way with seeds;
We have had another week of sunshine and showers here in Dol.
With the temperature just below the average for the first week of May, 2023 is the complete opposite of last year.
I had started irrigating plants and trees in April last year, much the same as I was doing three weeks ago. Then the weather just got hotter and hotter.
The next significant rainfall we had in 2022 was in November.
After a cool spring, April this year seemed as though it was warming up. But then there was a change and everything has become cool and wet.
Cooler, wetter weather does benefit some plants, but in this part of the world, olive tree blossom will not get pollinated when there is rain. And I had so much blossom on my trees this year too…
Meanwhile the weeds all keep growing. This does make the hillsides look nice though.
In a few weeks, when the heat of summer finally arrives, the Maquis will be completely brown. The downside to that is the abundant dry, deep fuel which will be available in the event of a fire.
So with rain and sunshine, I have been working both inside and outside this week.
There are always so many jobs to do, however I find that when the weather is dull and miserable, my inclination is to sit back and read a good book!
Near enough is… the best you’re going to get
Talk to the expats here or look at any of the on-line groups and you will quickly see that there is a lack of qualified craftsmen.
Furthermore, after having had work done, many people are unhappy with the end result.
I have a list of workmen who I will never have back across the threshold. My list way outnumbers those who I would wholeheartedly recommend two to one.
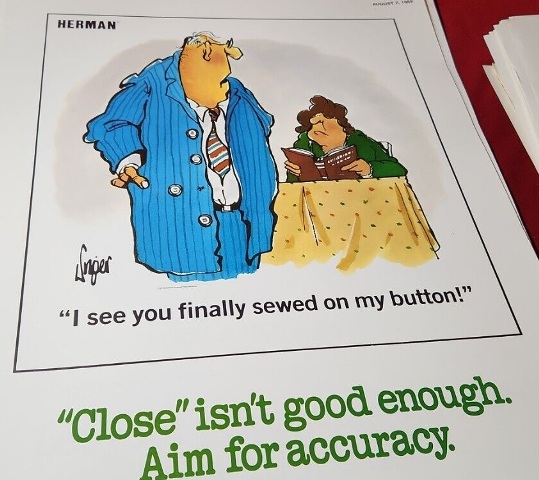
I’m reminded of a flight safety poster “Near enough is NEVER good enough”.
One of the reasons for less than optimum jobs here is that it takes so long to get things right.
Another is that on the island you cannot obtain the materials you want, so have to make do with inferior quality. This week is an example.
I have spent much of the week trying to get the top of the hall floor beams level.

My task has not been helped because one of the 5 x 8 timbers I bought is warped.
I knew it was warped when I bought it. However I thought I could straighten it as it was not too bad – and you should have seen the rest!
Once again I used my home-made marking tool to mark a “cut” line on the side of the timber, so that the bottom will fit the uneven profile of the floor and the top will be level.
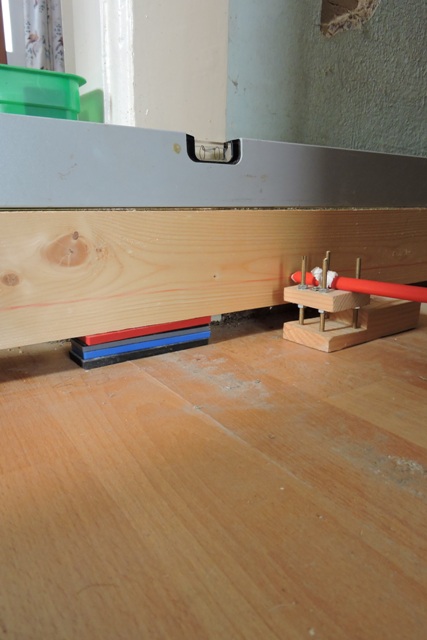
I cut the timber outside in the courtyard, brought it back in and it looked like “so far so good”. At least half the length was level.
However after starting to fix the timber from one end, the piece exactly where it passes a doorway would not lie flat.
No amount of coercion, brute force and long screws would remove the twist in the timber.
So I finished up using an electric plane to take a slice off the top edge, so that when the floor boards are laid on top of it, they will match the boards I have already laid.
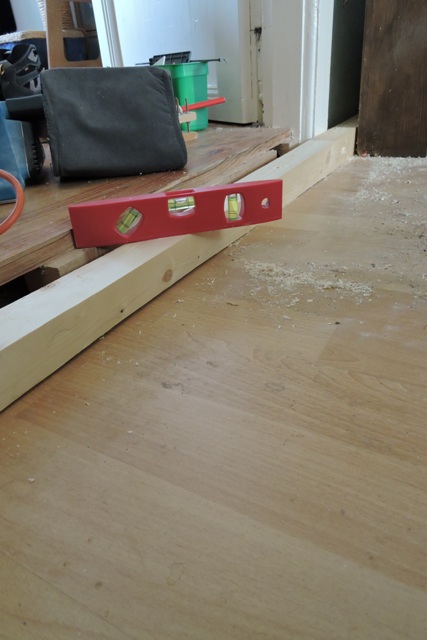
Near enough is the best I am going to get….

Wood versus concrete
A technique I have not seen used inside houses before I moved here, is to replace wooden floors with concrete.
Yes, I know, we use too much concrete and softwood is a renewable resource, when done properly.
However after another week of frustration, with trying to get everything almost level – I decided that perfectly level was an unachievable goal – I now understand why concrete is an easy option.
It all goes back to how buildings were constructed as recently as 80 years ago.
Builders would go up into the forests which surround Dol, select a tall, straight pine tree and fell it.
The trunk would then be roughly hewn square, or would have the bark removed and be left circular, but with a flattish top, cut with an adze.
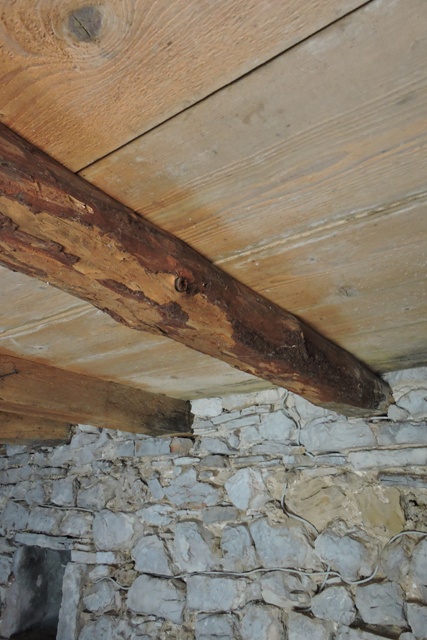
Cut to length, the tree trunk, whether round or square in profile, would then be inserted into the walls of the building, wedged in with stones and wooden boards would be laid on top for the floor of the room above.
Unseasoned wood as it dried would then alter in shape, or with the weight above, would simply bend.
This mean that floors often bow towards the centre, because of no supporting walls underneath.
In terms of time and effort, it is much easier to just rip out the old wooden floors, then build a formwork where the new floor will go, supported by timber and screw jacks.
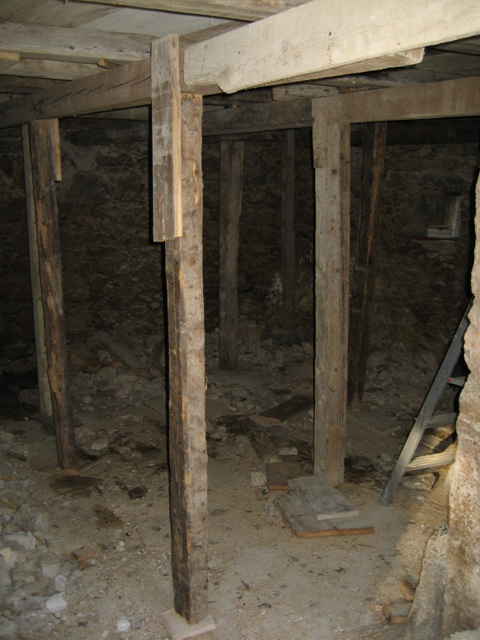
On top of this you make a framework of steel reinforcement, which is let into the thick stone walls. There are even special widgets to hold the steel off the boarding.
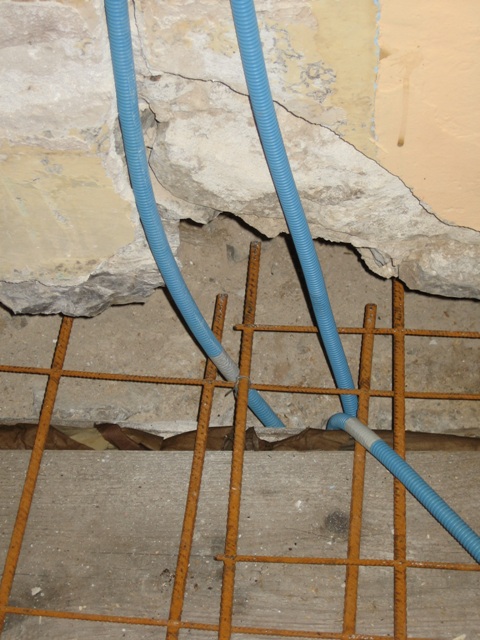
Concrete is then poured and three weeks later when the formwork and supports are removed, you have a new and completely level floor.
Concrete is a good option when the building is derelict or empty, but difficult when you are living on the floor above…
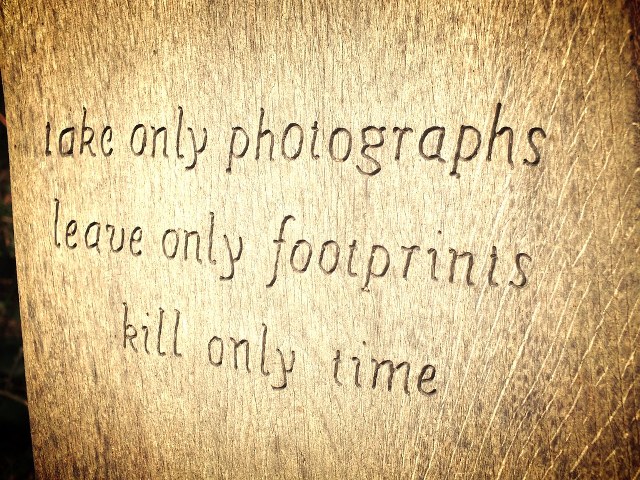
Only leave footprints
On a sunny day early in the week, I snook out of my gate so I wasn’t followed. I was on an Orchid hunt.
I was looking for two species of Orchid I have found in the past, but which were absent last year.
Earlier summer is when a lot of Orchids can be found Dol. However even though they are protected by Law, locals cut them to bring home to put in vases because they look nice.
Although over aeons of time, plants have developed to grow in certain conditions, most will tolerate a wide band of local conditions.
Some like acid soil with a pH of less than 6.5, things like Azalais and Camellias. Others like alkaline soils with a pH over 7.5, things like Lavender and Rosemary.
Most plants will grow, even outside their ideal conditions and despite how gardeners treat them.
However there are some plant species which will only grow in highly specialised conditions and Orchids are one of them.
Who hasn’t tried to grow a Cymbidium orchid at home and killed it with kindness?
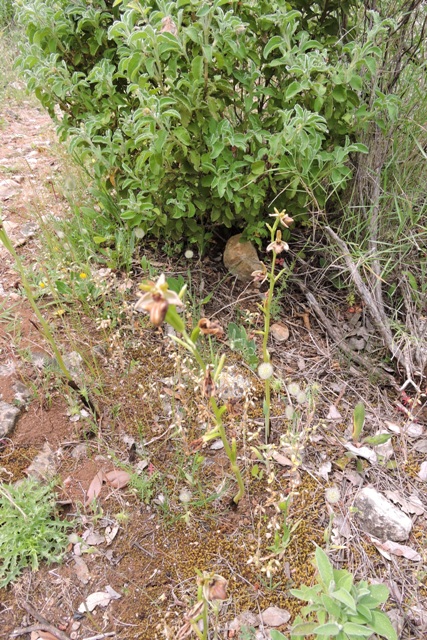
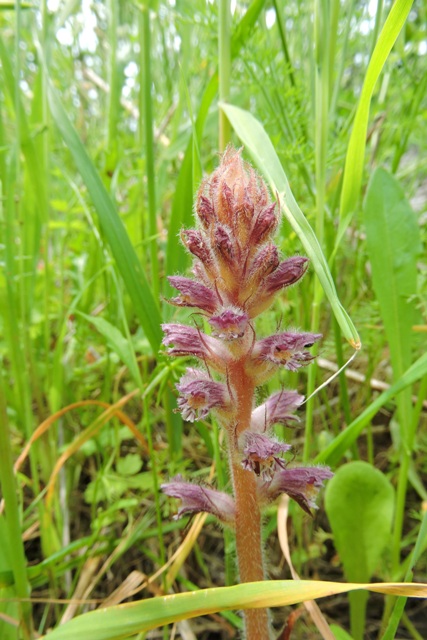
Sadly I didnt find either of the Orchids I was looking for.
However I did find four different orchid species, in different, widely separate locations. Most of these were single plants or just tiny colonies of two or three.
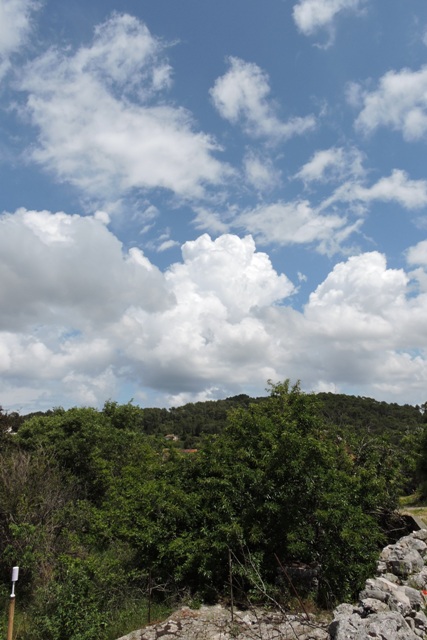
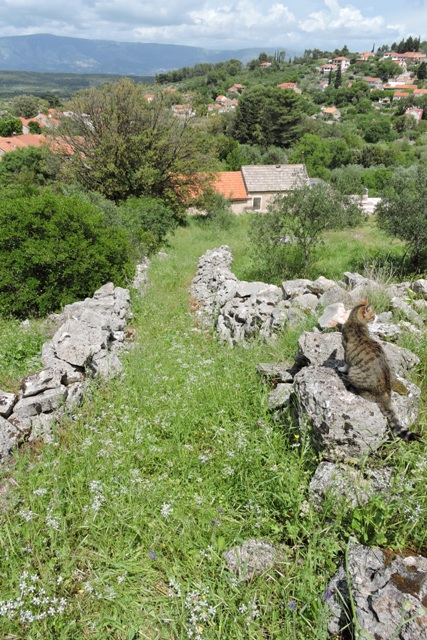
After lunch on Friday, after a morning of thunder and rain, I went up the hill behind my home. I wanted to try and get a nice headline photo for this blog, with clouds, sun and shadows.
This time I wasn’t quick enough in my escape because Tigger saw me and ran to catch up, complaining loudly that I had left him behind.
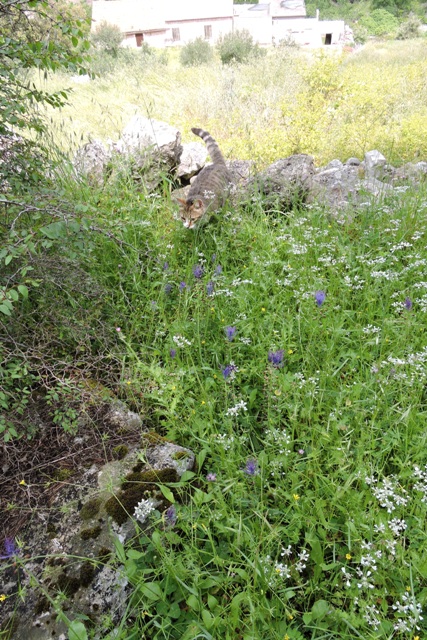
If I was to anthropomorphise any of my felines, it would be Tigger because he just has so much character…
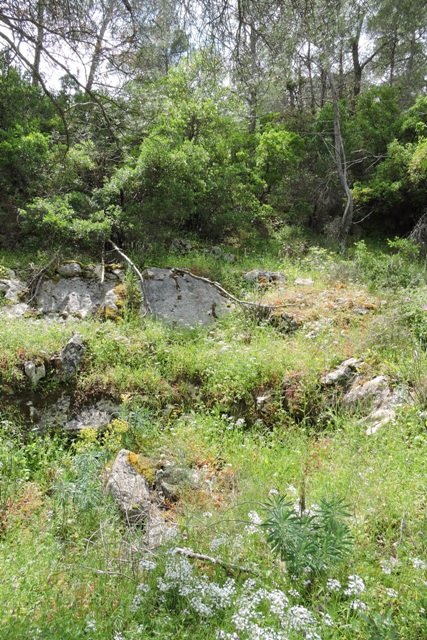
On my way up the hill, I realised it is more than a month since I walked the path. Clearly no one else has been because the long grass was undisturbed.
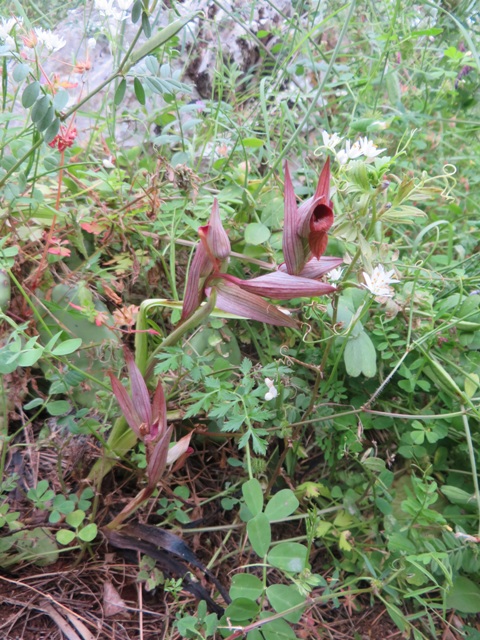
After taking the photographs I looked down, and saw an orchid. There was a whole group of Pink Crowned Orchids when I looked.
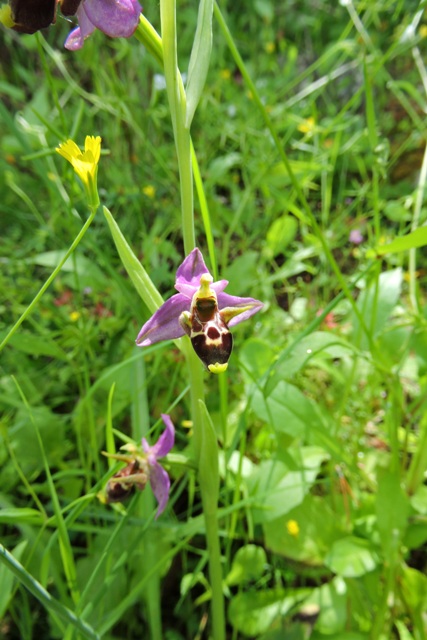
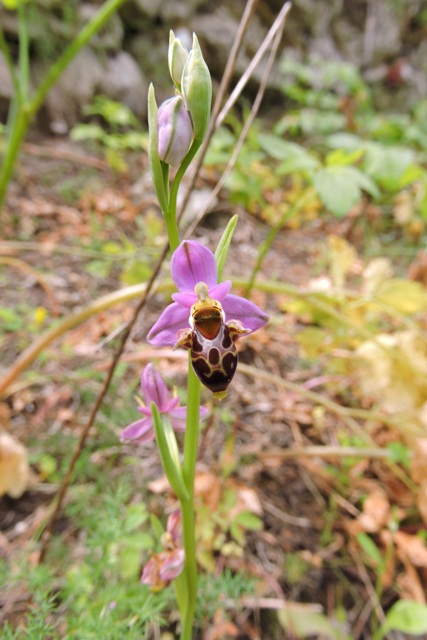
I’ve never searched up here for them, but clearly they like the calciferous soil beneath the pine trees.
Coming back I tried to make sure that I walked in the steps I had made, because I didn’t want to damage any more of the plants underfoot.
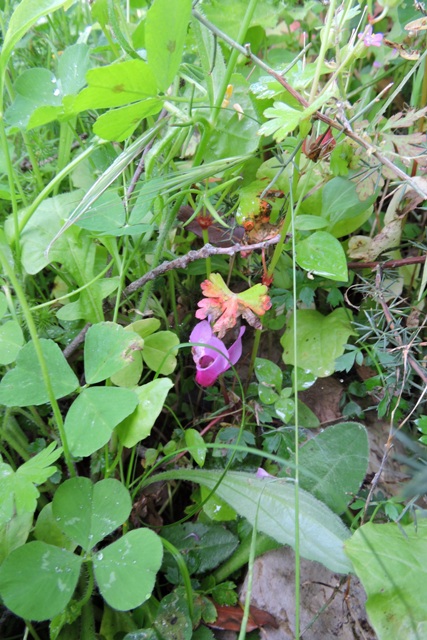
Beneath the grasses, clover and wild flowers were wild Cyclamen.
Tigger walked on the wall tops. He is none too keen on long wet grass!
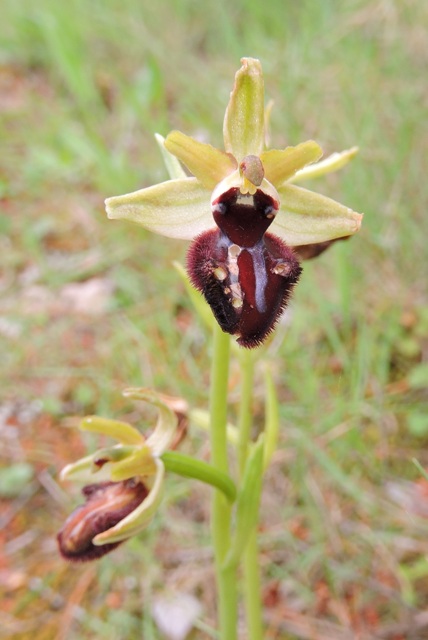
Of orchids
The New York Botanical Garden says that Orchids are one of the largest genera of flowering plants, with about 30,000 species worldwide.
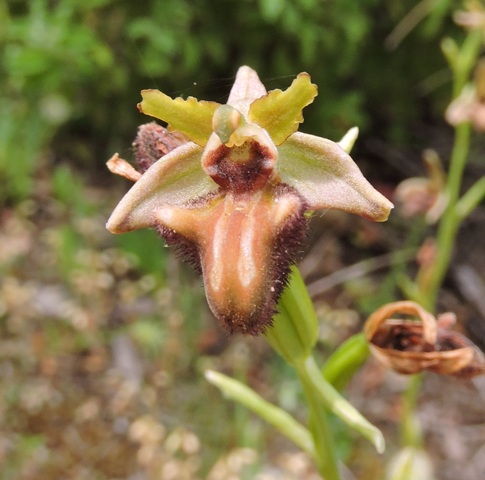
Orchids vary widely in their appearance. Many have stunningly beautiful flowers with stripes and spots, while others are almost ugly with hairs and even warty bumps.
But these flowers have a single feature which identified them from other flowers.
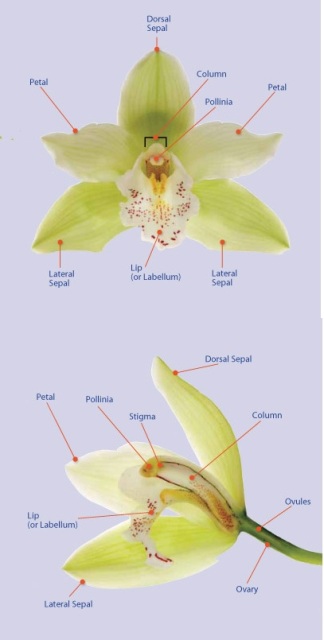
Botanists generally agree that there is one feature above all others that defines the orchid and differentiates it from virtually all other flowering plants.
This is the fusion of the male portion of the flower (stamen) and female portion (pistil) into one structure called the column—often visible protruding from the centre of the orchid flower.
On the way back down the hill, I was watching where I was walking, trying not to tread on Tigger, who was also using my footprints in the grass when I saw another, different flower.
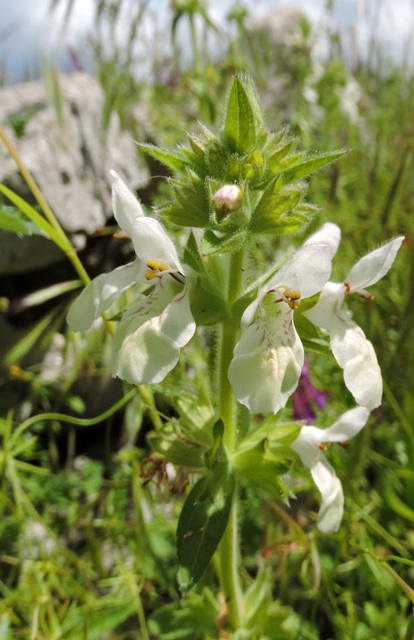
I walk up this small path tens of time every year, yet I have never noticed these white flowers before.
In the field, literally, I was not sure whether they were Orchids, or a flower engaging in Orchid mimicry .
The Encyclopedia Britannica has an interesting article on how orchids engage in mimicry.
There are a number of good guides about how to identify orchids .
What I cannot find in any online literature, is a reference to a non-orchid species whose flowers mimic a real orchid.
So enlarging my closeup photo, I think, on the balance of probabilities, that my white flower is not an Orchid. I just can’t find it in my on my books to identify what it is.
I rely on photographs because I never pick wild flowers, following the Countryside Code.
Wiring up a light
Doing DiY in stages because you are waiting for something else to happen first, is not the best way to work.
However in my home, it is a necessity because little happens in the order or timescale that you have planned.
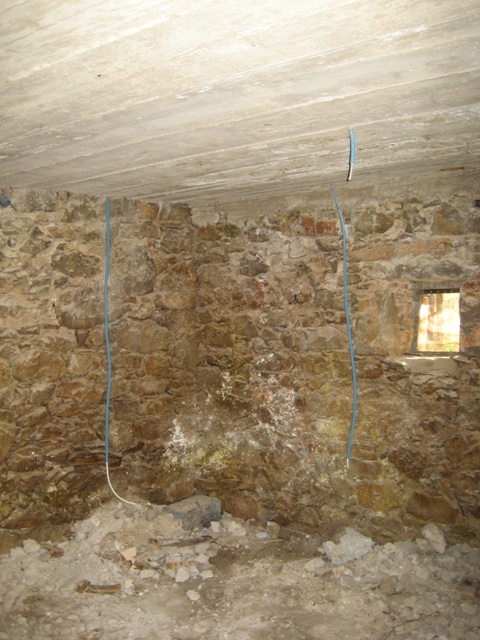
So when I moved the bookcase in the hall, I was slightly surprised to find two coils of lighting cable behind it.
I had forgotten that when I was wiring the lights into the Konoba ceiling, I had planned ahead, knowing it would be some time before I completed the floor in the hall, and added cable ready.
The other end of the coiled cable goes to the switch unit, which I confirmed was live with a circuit tester.
But over time, the plans have changed slightly and I now don’t need these extra lights. However as the cables are already partly under the floor, it seems a shame not to use them.
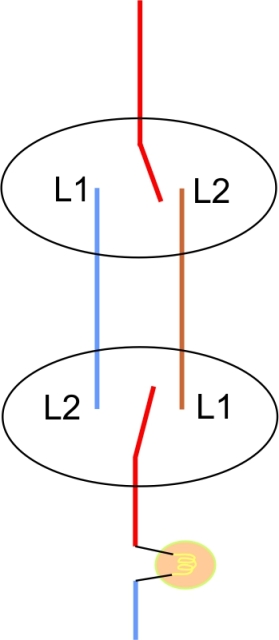
I decided that I would add an extra switch, next to the stairs, with a lamp to light the stairs but which could be turned on and off from either the ground or first floors.
This is what is known as a two way switch. The wiring is actually very simple.
At this stage, it is easy to add an extra cable to make the switches two way.
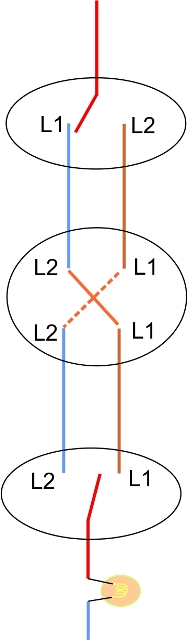
A little more complicated is where you have multiple switches for a single light. For this you need “intermediate” switches which have four instead of three terminals. I have some in my stock cupboard, because they are so useful.
However looking at the forecast for next week, when we will have rain every day, I’m leaving it until then….
A different way with seeds
When I emptied the hall bookcase, I found a tin with some seed packets inside which I had forgotten about.
I usually store seeds in air tight tins or boxes and just for good measure, I add a sachet of desiccant, to stop moisture spoiling them.
The seed packets were marked as expiring in 2019, so they are four years beyond their “sow by” date. This date can be anything up to three years after they were gathered and packed, so their germination rate will be reduced.
Whilst most gardeners and horticulturists know that temperature is important for seed germination, together with the media in which the seed is sown, there are other factors.
Few people actually understand what, in detail, a seed needs to germinate.
A seed is a state of dormancy. This state remains, until conditions for germination are right. However over time, the ability of a seed to germinate decreases, especially if the seed is exposed to adverse conditions when being stored.
Inside the outer coating, there is everything the seed needs to germinate including a food supply. This is called the endosperm.
But the endosperm will break down over time, so even if the ideal conditions are presented to a seed, it may not be able to grow and develop into a plant.
Some seeds need light as a trigger for germination, but most do not.
It is the absorption of water and oxygen through the hard outer coat of the seed, together with temperature which trigger the germination.
There are various ways that you can give a greater chance of old seeds germinating.
Some seeds with very hard shells like soaking in warm water overnight.
Sometimes you can “chit” the outer shell, breaking the hard casing with a nail file or sharp knife, to make it easy for oxygen and water to enter and start the germination process.
Reading up on how to germinate small, old seeds, there is a suggestion that sandwiching between a piece of kitchen roll, in a plastic tub may work.
Another suggestion with larger seeds is to soak in a sugar/water solution, so additional glucose is absorbed to help the endosperm.
This week I thought I would try both methods. So I cut some kitchen towel into strips, dampened them and put them inside plastic tubs in the sunshine to warm.
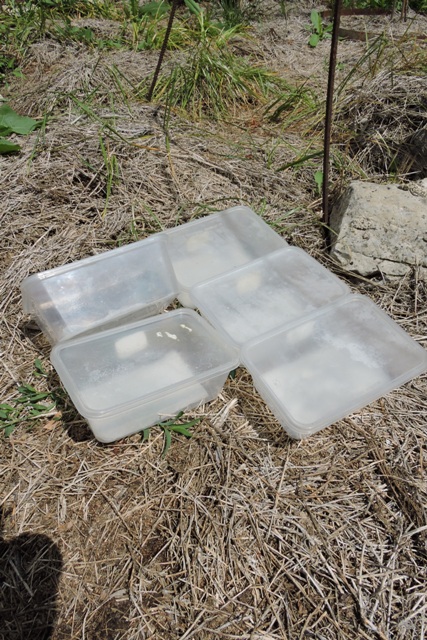
Some very fine Nepeta cataria (Catnip) and Allium tuberosum (Garlic chives) have gone into the first tubs, without soaking.
Meanwhile I have begun soaking some hard seeds of Passiflora edulis Sims, the edible purple passion fruit, ready for planting tomorrow.
It very much depends on the variety of the seed, for how long it remains viable.
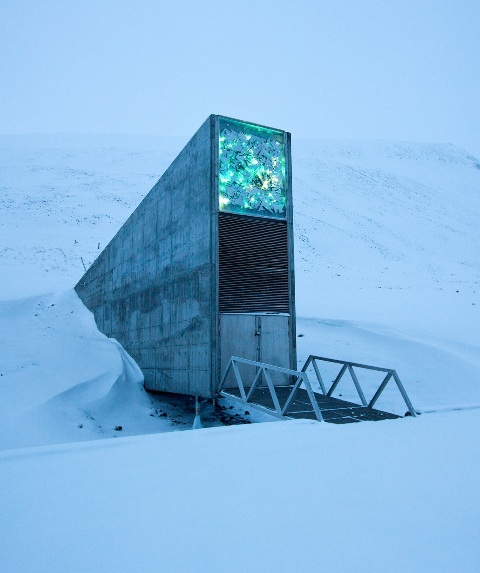
Around the world there are seed banks, where precise storage is attempting to keep them viable using extremely dry, low temperature storage, places like Svalbard in Norway.
Some seeds may be viable for hundreds and even thousands of years.
The oldest carbon-14-dated seed that has grown into a viable plant was a Judean date palm seed about which was 2,000 years old.
It was recovered from excavations at the palace of Herod the Great in present day Israel and was successfully germinated and grown.
I’ll let you know how my experiment goes…. NCG
One Response
Brian
Norman,
Like you, I always strive to get things right in my DIY projects, but occasionally I seek solace in a saying penned by the Bard of Avon (allegedly!):
‘When near enough is good enough, ‘tis folly to be accurate’.