I’m guilty by association
This week: Cold only kills some plants; Difficult work; Complicated cuts; Mortice and tenon joints; I’m guilty by association; Gardening by the book;

In the sun shine it has been lovely and warm this week. However in shady areas, frost and ice has lingered for five days.
For the first time this winter there has been ice on the top of the tubs where my water plants are. Overnight temperatures have dropped to -2ºC.
This is actually absolutely normal for early February. The trouble is that the warm winter we have had has lulled us into a false sense of security.
Sadly a near neighbour passed away suddenly on Sunday. On Thursday I was up at St. Michael’s for the funeral service and committal.
There were some lovely floral arrangements, which will not survive many nights of cold. This made me wonder about how the different cultures and religions celebrate a life and record someone’s passing.

I have divided my time this week between indoor and outdoor projects.
I have tried to stay indoors until the sun was high enough to warm the air to an acceptable temperature. Only then working outside until the air temperature cooled again.
However by this weekend, the temperatures have risen and they will continue to rise during the forthcoming week. So this cold week may well have been our “Winter”
Cold only kills some plants
I know the theory of how frost damages plants, but have never seen it visible to the naked eye before. I thought you needed a microscope!
That is before this week.
Last summer I planted a Pentas lancolata, the Egyptian star flower. I found it in the flower shop in Stari Grad and I had a discussion with the lady about its suitability for Dol.
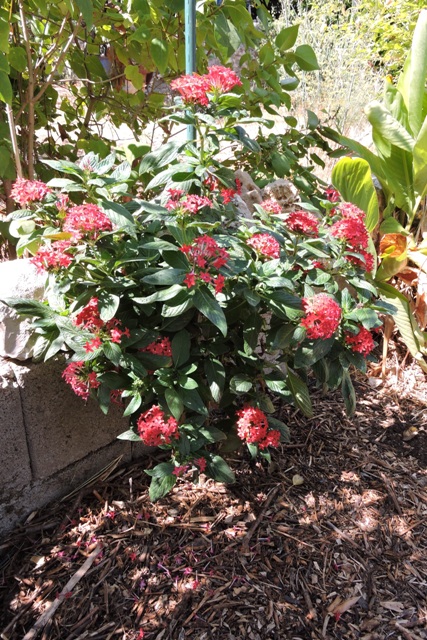
Is is said that it can be grown as an herbaceous perennial in USDA Zones 10 and 11, elsewhere it is an annual. Dol is in zone 10A.
The plant seemed to like the border it was in and was flowering here in January.
After we had the frosts this week I noticed the leaves had been burnt.
As it was in a sheltered corner, under a tree and behind a wall, I didn’t protect it. I think now that perhaps I should have done.
The main damage caused by cold to tender plants is at a cellular level.
The cells contain water and if it freezes, it expands, bursting the cell walls. If the damage is small, the cells can regenerate.
But when the cold extends for several days or has been severe, the plant will die.
I have noticed a couple of times this week that where the sun hasn’t reached, frozen water crystals have been visible all day.
As I walked past my Pentas on Thursday, I thought it had a fungi growth. That is until I looked closely.
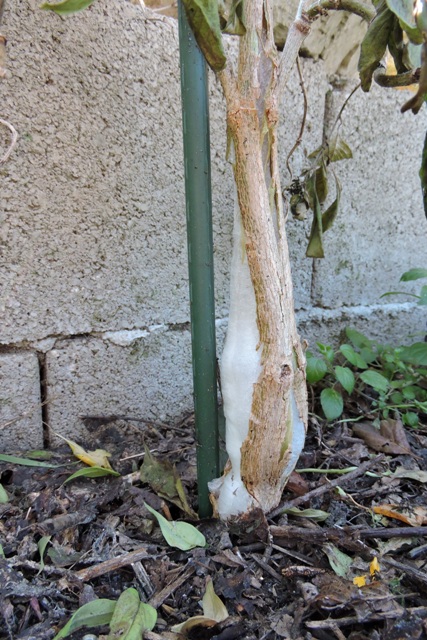
The white is ice crystals which have completely burst the main stem, splitting the woody section into four.
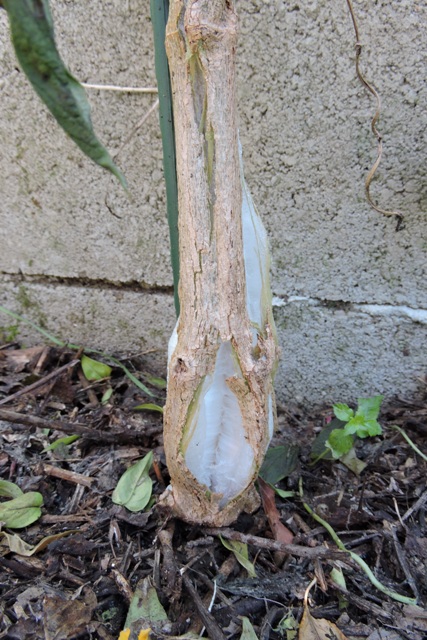
Although the ground and its roots are covered with a thick layer of mulch, I doubt it will survive. What was interesting was that this damage was where it was “protected” by a wall.
Above the wall, stems were still green. Just in case I can propagate them, I have taken some stem cuttings and saved some seed as well.
Difficult work
I have pressed on with the stairs again and have made visible progress.
In the early part of the week I finished the third and last stairs winder. Then I made the various support posts for it and protected all the wood.
With the winder in place I could then accurately measure between the winder and the floor above to work out the run of the final steps to the first floor.
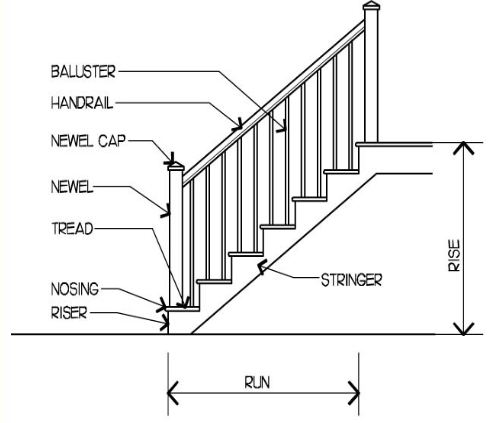
We take steps for granted. Their symmetry is important because when we go up or down a flight of stairs, we do it on “automatic pilot”.
After the first two treads, the signals from our feet to our brain, mean that we don’t need to look down. Our brain calculates where the next tread will be and moves our feet accordingly, without us actively thinking.
However when steps are asymmetrical, worn, narrow, steep and/or uneven, we need to look where the next step is, because our brains cannot do the calculation in the background.
So joiners take great pains to make sure that new stairs are symmetrical and meet the building codes.
In very old properties like mine, where nothing is level, vertical or straight, one needs to make guesses about dimensions at the start of a project and then constantly measure and alter / confirm as you go along.
I think I have had every gauge out of my workshop to make sure that the angles are exactly the same throughout.
Measuring the angle of the first stringers was not difficult.
Exactly 31º degrees, which is exactly the right angle for a flight of stairs.
As I transposed this onto the next run, I realised that it will be a lot easier to fit the stringers, before I do a final fix of the third winder. It would quite simply have been in the way.
Complicated cuts
Isn’t it strange thing things you remember from many years ago?
I remembered the theory of how to put a support between a vertical and horizontal piece of wood, using hidden joints.
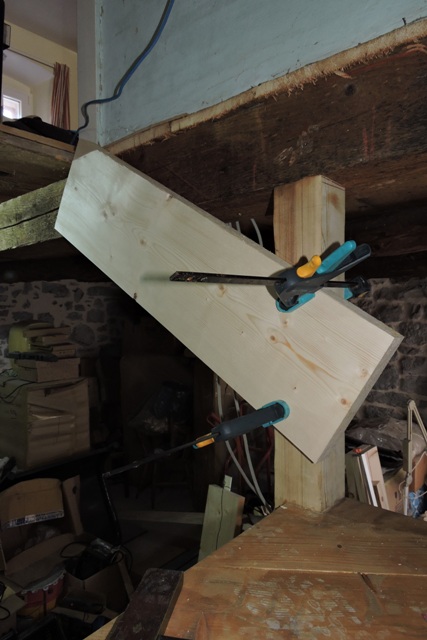
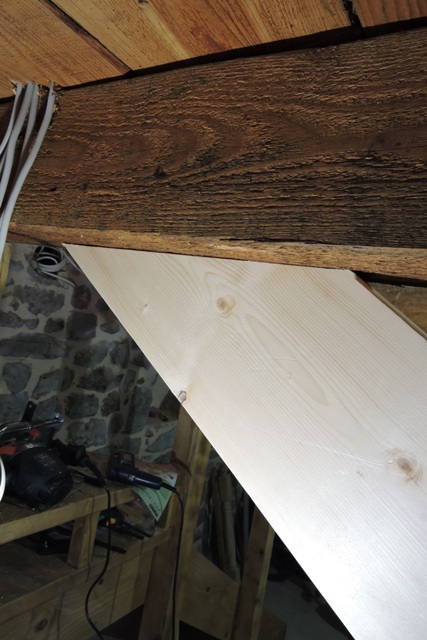
I started by putting the wooden stringer against the two beams and clamping it in place to hold it.
Then I checked the angle, made some slight adjustments. and marked the position lightly in pencil.
More measurements were needed and a calculation about how thick the joints needed to be to support the weight of a person using the stairs.
All the weight of the person needs to be taken by the tenon joint on the stringer. The answer was 42.

OK, I’m joking, that is the answer to “Ultimate Question of Life, the Universe, and Everything”. In my case the answer was 40 (millimetres) because the two has become lost in translation.
I set up the table saw, using fences fixed with millimetre accuracy, to cut the angled tenons on the stringer, then slowly ran the wood through the machine
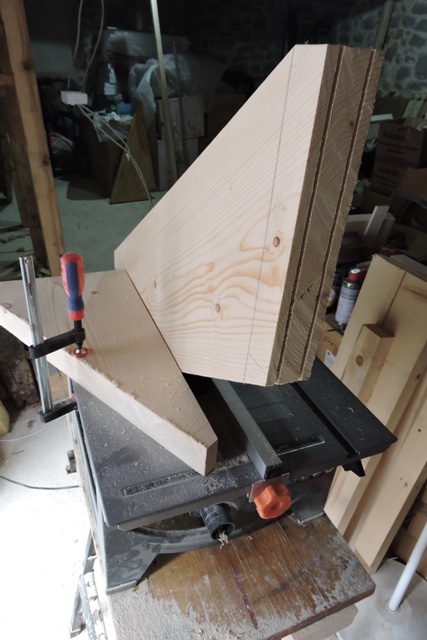
It took several passes to cut all the various pieces, but I was delighted with the finished result.
With the stringer finished, I marked the post and the beam, for where to cut the mortice holes.
I have to say that it is significantly easier to cut mortice joints on a workshop table rather than working on vertical and overhead beams.
Mortice and tenon joints
Plain “mortice and tenon” joints are some of the oldest and strongest wood working joints ever created. However to be neat and tight, they need little work.
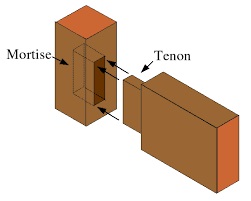
I have used the old joiners trick of boring out the mortice with a wood bit and then cutting the straight edges with a chisel.
Working overhead on the beam was not so easy. Both joints needed a lot of measuring and checking to make sure they were in the right place.
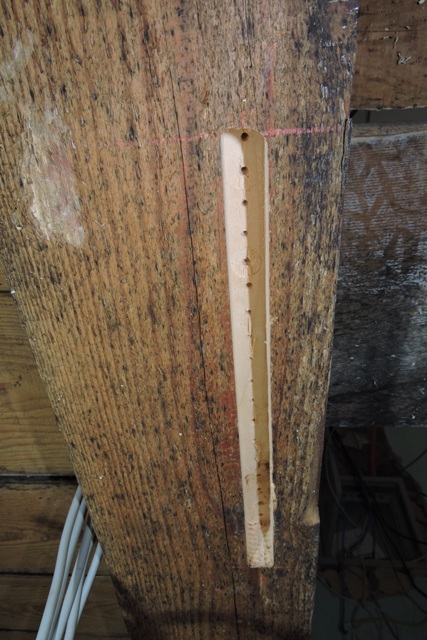
With the centre line of the mortice marked, I drilled 2mm pilot holes for the wood bit and then began cutting.
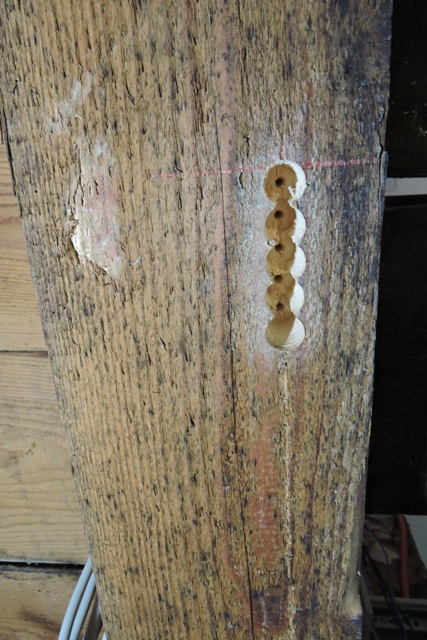
Each hole was checked for a depth of 41 mm – Forty for the tenon and 1 mm for glue. The alignment was also checked after each hole.
I needed to fix an extra light though, because I found I was working in my own shadow and couldn’t see.
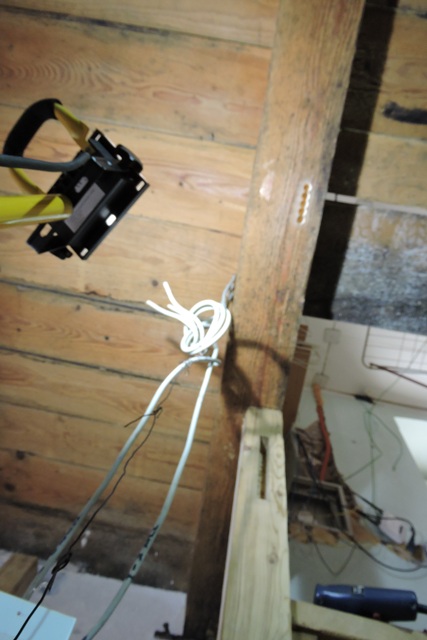
That might also have been because I was wearing full PPE, safety glasses, mask, ear defenders and hat because wood shavings were flying everywhere.
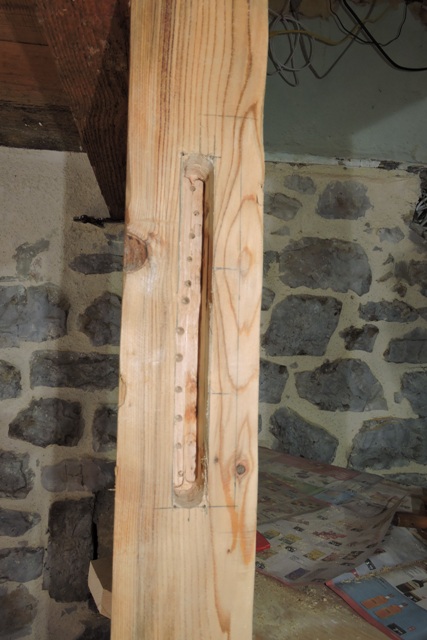
With the holes all bored, I then cut the sides of the mortice and again checked the dimensions.
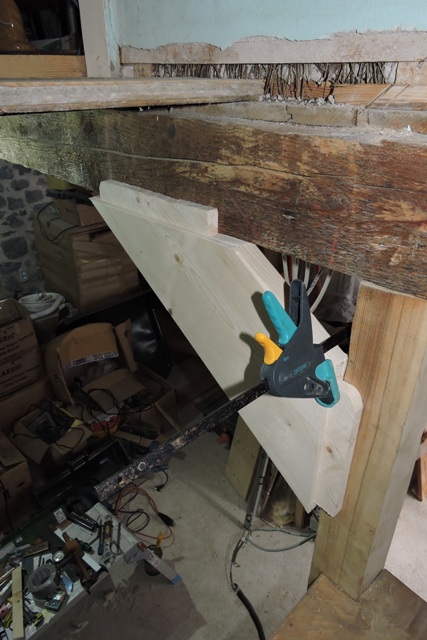
The next test was a first fitting of the tenon, with the stringer facing away from the support post.
It was a perfect fit.
The final job of the week was turning the stringer round and doing a test fit in both the post and beam.
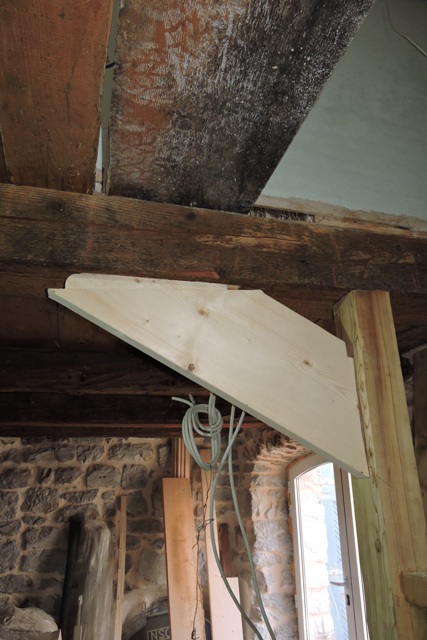
I will be using a resin glue to fix the stringer, so I didn’t knock the stringer completely into the mortice holes. I need to use it as a template for the stringer on the other side. However it is a very tight and exact fit.
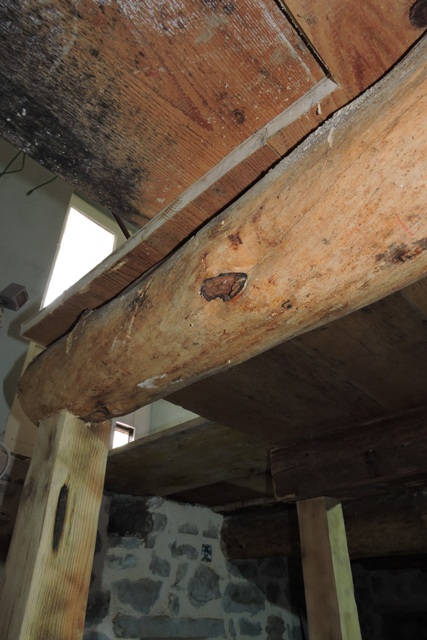
The second stringer will be my first job on next week’s list. It will be a more complex job though, because instead of a square cut wooden beam, the next beam along is a pine tree trunk!
I’m guilty by association
I generally keep a supply of “spares” for things which I use regularly. That can be small drill bits which break easily, saw blades and sandpaper belts.
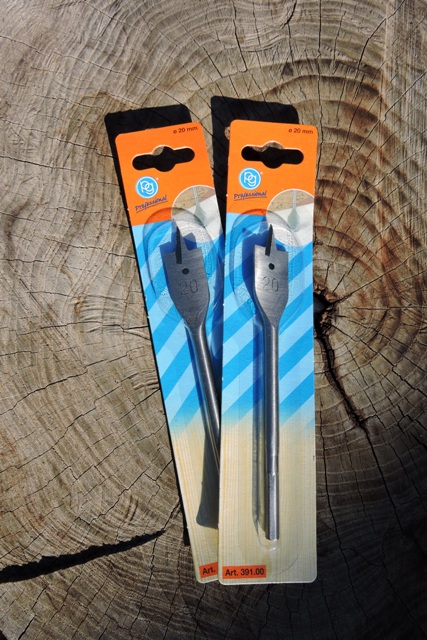
When I started cutting the first mortice joint, I was using a 20mm wood boring bit from my box of assorted size bits. They are not something I use especially often, so I only have one of each.
When I set the bit up in my electric drill, I thought it looked as though it had been slightly damaged. One side of the cutting blade was slightly bent.
This happens when you are boring old wood and the bit comes across a nail or foreign object that hasn’t been removed.
After cutting the first holes, I was concerned that they were not completely true to the line I had laid out. The discrepancy was only a millimetre, but it was noticeable, so I stopped.
The next morning I was in Stari Grad to buy a replacement. In the builders Merchants there was a row of different sized bits, from 5mm up to 60 mm and almost everything in between.
In most cases there were a half dozen or more bit of each size. That is except for the 20 mm bits.
There were just two pieces left. So I bought them both.
There would have been a time when I would only buy one, because I needed just one and so there was still one for the next person. But no more.
So many times here on the island, I have bought only what I needed and then when I wanted another item a few days later, they had all gone.
So I feel I am guilty by association of taking the last item in the shop. It does mean I have a spare bit, and 20 mm is a common size, so if I damage one, it will not stop the work.
As I left though I did have a slight pang of guilt for buying something I really in all honesty didn’t need…
Gardening by the book
At the moment the temperature in the polytunnel swings between a low of 5ºC at its coldest, to 27ºC in the early afternoon. I’ll leave you to guess when I do my work (and drink coffee) inside.
Last autumn I laid underground irrigation pipes for an area of 3m x 4m where I will put a strawberry bed.
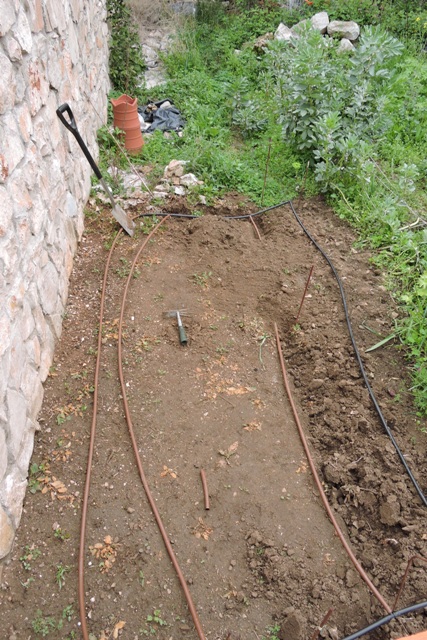
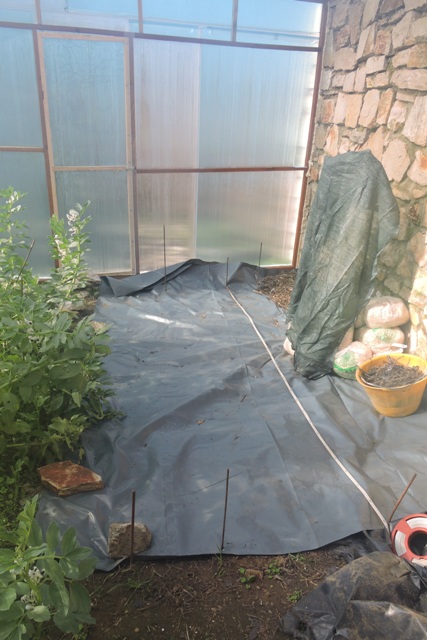
This week I have added the black polythene sheet, through which I will plant the runners I potted up last year.
I have bags of mulch and wood shavings to go round the plants. However for now I am leaving the sheeting uncovered, so that the soil underneath warms up a little, before I plant the potted runners.
In my gardening library I have three books devoted to the greenhouse. A polytunnel is not as fancy as a greenhouse, rather more industrial than decorative, I would say.
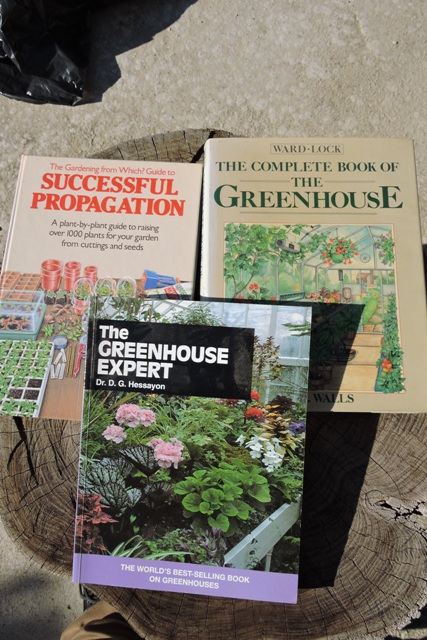
However the principles for growing plants inside both are the same.
According to the books, strawberry runners planted in the greenhouse now, will be producing fruit in May. I will of course let you know what happens… NCG
2 Responses
Marcy
Norman, This article was so very interesting and informative. I can hardly wait to see that staircase finished. You are such a perfectionist.
I love what’s happening in the polytunnel. I’m going to build a greenhouse when I move. Just got the house under contract, so if everything goes as planned, I’ll be going to a much warmer climate in the next six weeks or sooner. I’ll keep you posted.
Thanks again for sharing. Marcy
Richard
Norm,
Was wondering why you did not use a router to cut the mortise.
As to the frozen and split stem, (and you have way more expertise than I do) Can it be wrapped in an elastic type wrap, and when it thaws will bind back together and possibly heal? Just have curious questions.
Stay healthy and really enjoy your blog.