1 mm = 1 litre = 1 kg
This week: 1 mm = 1 litre = 1 kg; No time like the present; Never throw anything away; Pruning spurs; A bit galling;
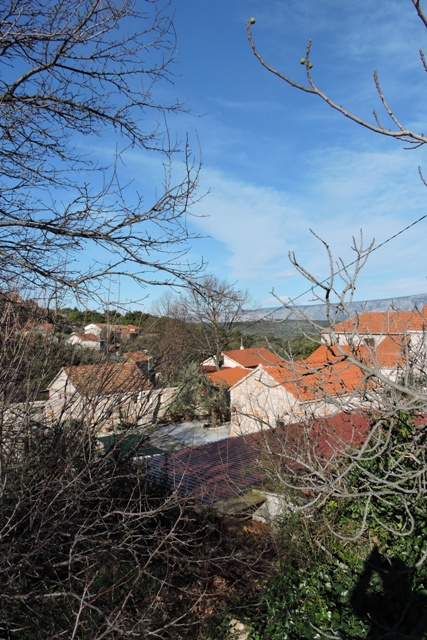
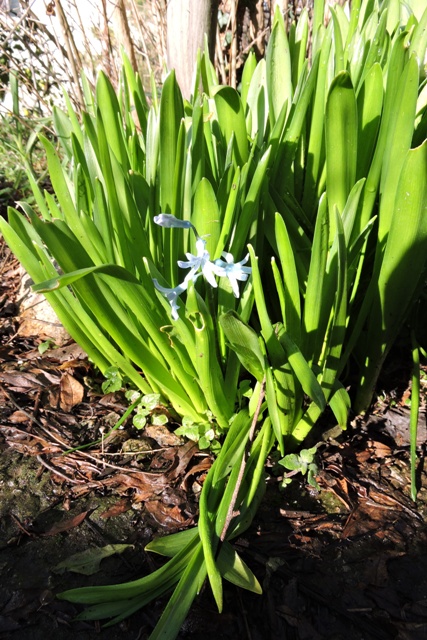
When the sun comes out, it is lovely and warm. There is that hint of spring in the air. The first Hyacinth has burst into flower this week, in a sheltered spot at the foot of a Šipac tree..
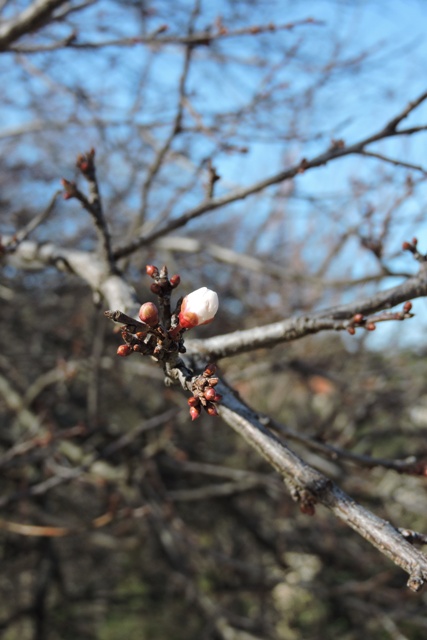
Also there is just a single blossom on my old Myrobalan plum.
This is an outlier though. It will be the end of February before the tree really comes to life, when it will be covered in white flowers.
Thursday was a nice sunny day. As I walked across the terrace at sunset, the full moon was just rising.

Because it is low in the sky, the edge is a bit fuzzy due to atmospheric turbulence. Clear night skies at this time of year also mean temperatures of around zero ºC by dawn.
The warming days have allowed me to have coffee outside on the terrace on a couple of mornings this week. It is always pleasant to take a break and sit in the sunlight, contemplating the next job that needs to be done!
1 mm = 1 litre = 1 kg
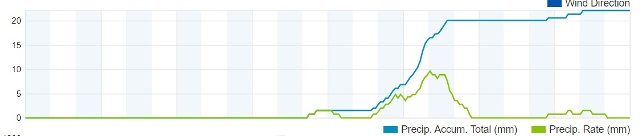
We had 24 mm of rain on Monday, a fraction under one inch in the old measure. It had started raining in the morning, just after I returned from the weekly supermarket trip. However the heaviest rain was in the afternoon.
I’ve mentioned before that until moving to Dol, I have not come across the way of expressing precipitation in a total per square meter. It is very simple to both visualise and understand.
One millimetre of precipitation equals one litre per square meter. 10 mm is 10 litres etc.
In the standard metric system of measures, one litre of water weighs one kilogramme and so on.
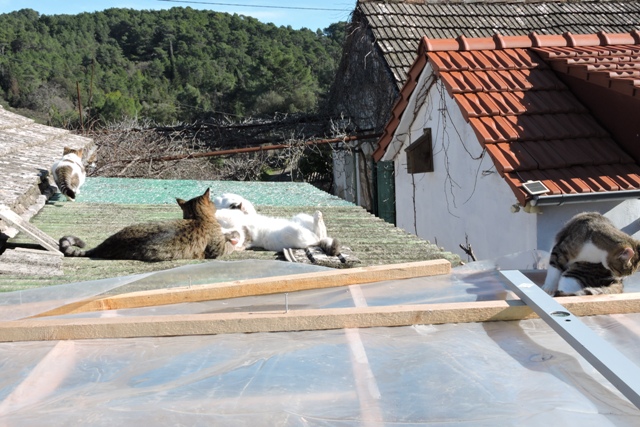
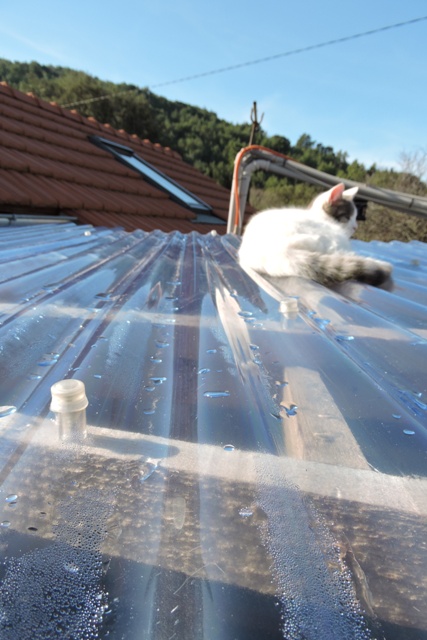
I found that this level or rainfall was too much for my new roof.
Where the felines have been playing, the plastic has stretched, so my carefully created fall, to allow rainfall to run off, has instead created paddling pools between the support bars.
On Monday afternoon, they were full and bulging. At its peak the storm was delivering 5mm per hour, rising to 10 mm for a thirty minute period.
So with and area of 9 square meters, that is a combined weight (at 5 mm per hour) of 45 kg / hour. Little wonder the wood in the unsupported centre of the roof was sagging somewhat.
I have a tool to push the water out between the support bars and into the guttering. This volume of water showed that far from there just being one or two holes that needed patching, there were actually many. In fact there were tiny little holes all over the place which had opened up.
It doesn’t happen often during the year, but when we get heavy thunderstorms, a rainfall rate of 10mm or more per hour is not unusual.
Following on from my conversation with the architect last week, I suspect the chance of getting the building licence in time to build this spring is between remote and a minus quantity.
With this in mind I decided I had better make a more permanent roof. This was my “Plan B”.
No time like the present
While the rain was still coming down outside, I had a good search on the Bauhaus website looking for plastic roofing sheets. Eventually found what I was looking for and at a sensible price too, “Valovita ploča” – which translates as corrugated plates.
So through Volat in Stari Grad, I ordered four sheets.
Because of COVID their truck is not making daily trips to the mainland at the moment, so I had to wait until Friday to collect the “plates”.
Tuesday dawned fine, dry and sunny, so I was up on the ladder undoing the screws I have used to fasten the securing battens.
I am always so grateful that I use screws and not nails to fix things. An electric screwdriver makes disassembly just as simple as assembly.
Meanwhile, the Five Musketeers, led by Lieutenant Gizmo joined me in the sunshine on the roof either to watch, or help make some more tiny holes in the plastic!
I undid enough screws to make it easy and quick to remove everything once the roof sheets arrived, but still holding the plastic to keep rain at bay.
Never throw anything away
With rain forecast for Friday, after collecting the sheets and some more battens, I started work on removing everything. I refixed some battens so there would be support for the sheets and also to give a reasonable fall, to drain the rain rom the roof.
The work went well and skipping lunch, I was able to secure three of the four sheets, before the rain started on Friday afternoon.
We were back to bright, warm spring sunshine on Saturday after another 24 mm of rain on Friday evening.
So far we have had 111 mm of rain this month with more to come tomorrow.
January 2021 has definitely been a very wet month, but it is only just above the average.
The new roof withstood the rain well, but in a couple of places rain had pooled so I packed some short battens underneath the sheets.

The fourth sheet needed a corner cutting away, so it will fit snuggly against the odd shape of my buildings. I measured and marked the cut with a spirit marker and then used my oscillating cutter, with a fine plastic blade, carefully cut the corner off..
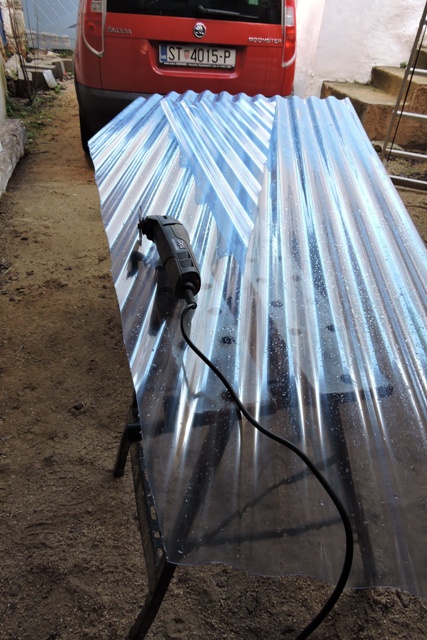
With the final sheet cut to size, it was back up onto the roof to fit the two pieces. The corner offcut was just the right size to fill the remaining small gap.
When I ordered the plastic from Volat I didn’t even try and get the correct roofing screws as well. I know what the answer would have been!
However I wasn’t especially worried because I had a drawer in my screws and fixings cabinets with some 30 Corrobit roofing screws, spacers and caps.
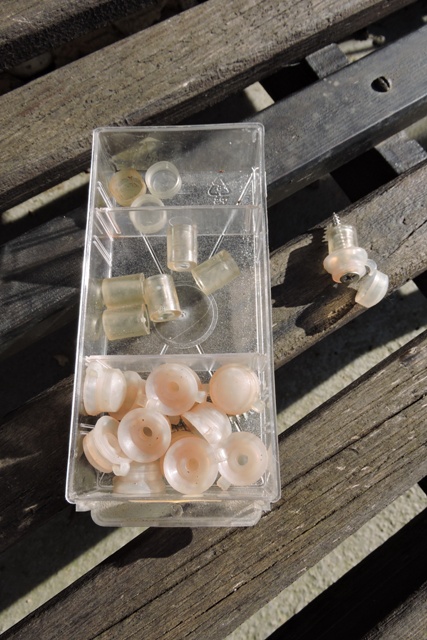
One of my faults is that I never throw anything remotely useful away!
The result is that I have a lot of left-overs from previous projects, neatly filed, just in case I need them again.
Some things I do use quite quickly and some remain in their drawer for years.
I think it is at least 35 years since I built a car port in front of the garage alongside my UK home. So these fixings are at least thirty five years old.
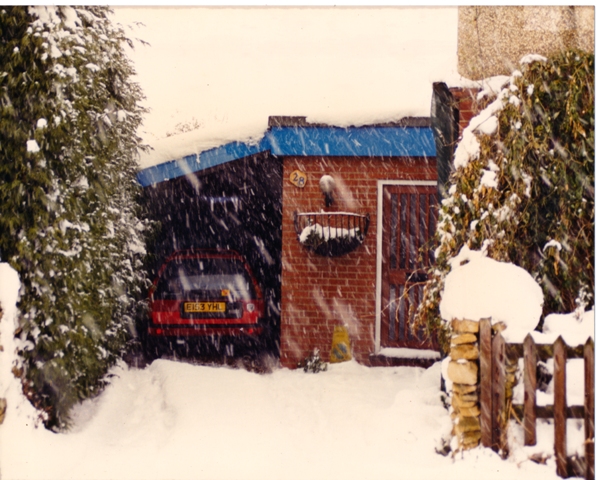
These Corrubit fixings come in packs of 50 and these were what was left over from the car port. They have been in the drawer ever since. There are now not many left.
The unknown quantity is how they will stand up to the Mediterranean sun. They are sold as being UV safe, but here we have very strong UV for most of the year.
The the plastic was still pliable and I was able to fix the roofing panels and slot the caps over the screws without any geat difficulty.
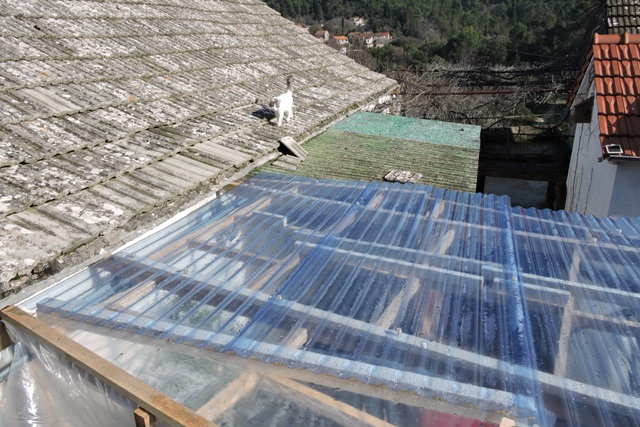
The result is a covered walkway, at first floor level, between my buildings.
It should be remembered that these are 130+ year old, traditionally constructed buildings. They were built at a time when the humans lived upstairs and the animals lived in the downstairs Konoba, so it is quite normal to have an elevated walkway to move between buildings.
At least I now have some weatherproofing. I almost can’t wait for the next storm, to see if I need to make any more adjustments anywhere…
Pruning spurs
With more than 40 different fruit trees, of various sizes, from waiting to be planted to fully mature, pruning and maintenance is an all year round task.
Some are pruned in winter for the first couple of years, then in summer. Others like apples and pears are always winter pruned.
Then I have columnar trees which require a special pruning regime to keep their shape and also citrus.
I have finished pruning the apples and pears this week, but I couldn’t remember exactly when I should be doing the apricots, peaches and plums.
So over coffee one morning, I started to write down what I know. I should say that it didn’t take long.
Then I developed this into a list of all the various fruit types, and what I should do to which and when.
There are things like where fruit is carried to be considered. Apricot trees flower on 1 year old wood. Apples and pears can either flower on two or three year old tips or spurs.
Then there are varieties of apple called “partial-tip bearers” just to confuse things further.
Tip-bearers produce very few spurs. Fruit buds are found at the tips of long shoots produced the previous year.
Several of my apple cultivars are partial tip-bearers, producing fruit on the tips of the previous year’s shoots and also on just a few spurs.
Spur-bearers produce fruit buds on two-year-old wood, as spurs (short, branched shoots) on the older wood.
I did find this week a super photographic guide to the different stages of fruit and leaf bud development in common fruit trees. You need to be able to recognise the different kinds of bud, so you don’t prune away your fruit.
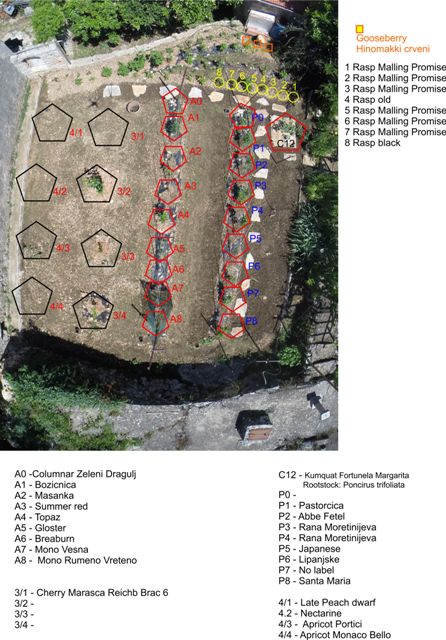
I have a good plan of all my fruit tree types and varieties. What I added last year was annotation about whether they are tip or spur fruiting.
There is what is known as the 1-2-3 method of renewal pruning. This has been pioneered in Australia and it is easy to understand and follow.
This is the pruning regime that I follow.
1-year-old laterals are called pencils. These laterals are 300 to 400 millimetres long and a little thinner than a pencil.
The buds at the tips are often fruit buds. These are never shortened. If there are too many, I space them out and keep the ones that are horizontal and as thick as a pencil.
The 2 refers to fruiting wood that is now 2 years old.
This 2-year-old wood may have had one or more fruits at the tip last year and has now spurred up.
The fruit bud at the tip has also grown one or two bourse shoots. About one-third of the renewal wood on the tree should be 2 years old.
The 3 refers to 3-year-old wood that was cropped when 2 years old and sometimes at 1 year old. I rejuvenate the 3-year-old wood by cutting it back hard.
This way the tree will generate new laterals, and the cycle starts again. You may leave some good young fruiting spurs on this 3-year-old wood, but you must cut back hard to get new laterals.
A bit galling
In the Top Orchard I have a Skinsiki Asian Pear, Pyrus pyrifolia. I have to walk past it every day.
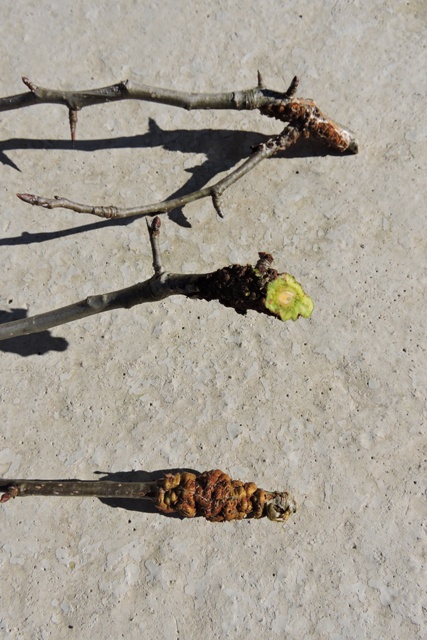
I noticed last month, when the leaves had fallen and the branches were bare, that there were three swellings on different branches.
Asian Pears are lovely fruit but grow very slowly. This particular tree is three years old, but is yet to fruit.
I cut out the Galls. They are often equated to a cancerous growth, which causes disfigurement of the tree and if left unchecked, will eventually kill it.
The Asian Pear is a cross between a variety of Apple and a Pear. They are not known for suffering from diseases, so this has me mystified.
I cut open one of the Galls and in cross section you can see the dense green abnormal growth, like a tumour.
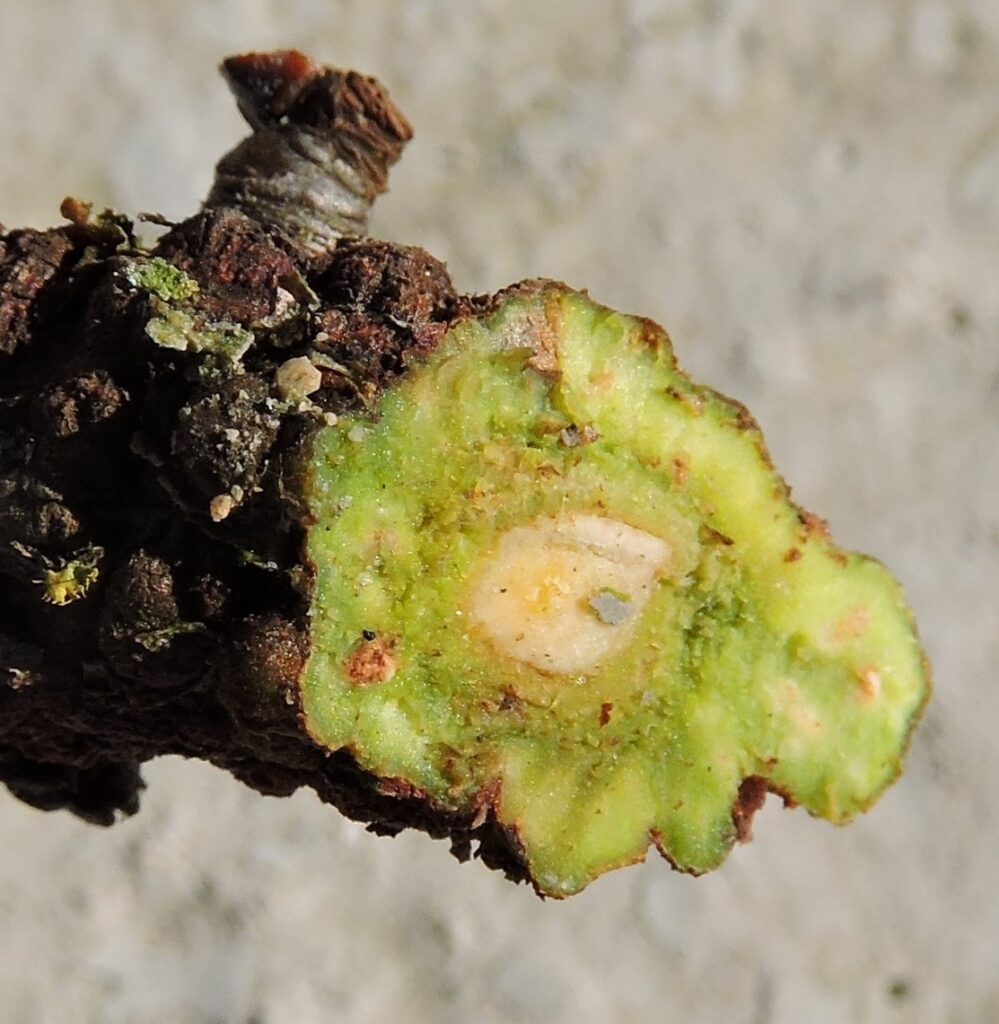
Using a high power magnifier, I was hoping to identify a larvae inside, but I couldn’t see anything.
Every Friday afternoon I always listen to the BBC Gardeners Question Time (GQT) programme. There is always something of interest and the experts opine on gardener’s problems.
I would rather like to know what might be causing this Gall and how to prevent it reoccuring, so I have emailed a question with the photographs.
It may be a few weeks before I get an answer, but I’d really like to know how to prevent a reoccurrence. NCG
One Response
Tony Griggs
You talk about rain Norman. Several weeks back we had 140mm here in one day! Watered the garden and filled the tanks! We’ve had a wet summer in southern Australia and La Niña is the cause, but we aren’t complaining! Enjoy the longer days.