Make do and Mend
This week: Make do and mend; Broken windows; The insect detective; Quick, quick, slow; Preparing for pavers; The chain gang;

Medicane Lanos this week in the Ionian Sea, to the south of the Adriatic, made landfall in the Peloponnese causing power cuts, flooding, property damage and three deaths.
Being on the extreme edge of the cyclone has meant a little day time high altitude cloud and some colourful sunsets and sunrises.
It is just another example of the erratic weather we have been experiencing. With day time temperatures still over 30ºC a neighbour with two wood burning stoves for household central heating told me that normally in September they have to light a fire for a little evening heat.
This year they are running the Air Conditioning instead. Wherever in the world you look, you can see the effects of climate change.
The same neighbour also said that this year he thinks he will harvest all his olives in a single day, two days at the most. He expects to take less than 100 kilograms to the mill. Last year there was a month of hard work and more than 1,200 kilograms.
Olive oil might be expensive this winter. At the same time my neighbour told me to go and cut timber on his parcel of land behind my house, so I have sufficient fuel for my wood stove, in case the winter is cold.
Make do and Mend
Every home owner knows the feelings when something breaks.
First there is annoyance that it has broken. Then there is the search for the reason why and whose fault it is. Finally there is the need to fix it, getting a tradesman if necessary, with all the problems that come with that course of action.
Or simply obtaining and assembling the parts needed to do the repair yourself.
When I turned the irrigation on in the citrus orchard on Sunday, it had not been on long when I heard the sound of running water. A small spring had appeared next to the Arbour path and water was bubbling up to the surface.
This is the underground irrigation system that I installed in April 2016.
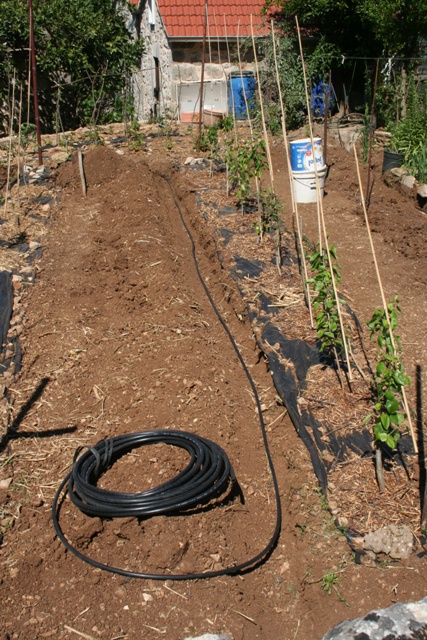
I let the area around the burst dry and on Monday cleared away the soil to reveal the pipes. It was as simple as an over pressure in the pipe having blown a 90º elbow out of the pipe.
Although the water pressure in my rising main has been restricted to 7 BAR, it only needs a tap to be turned on, then quickly turned off to get an over-pressure event. I hadn’t secured the push fit connectors with wire when I installed the system.
Boiling water poured over the PVC pipes allowed them to be easily pushed fully back into place. This was followed by some plastic coated 5BA wire to crimp the pipe, securing it on the elbow.
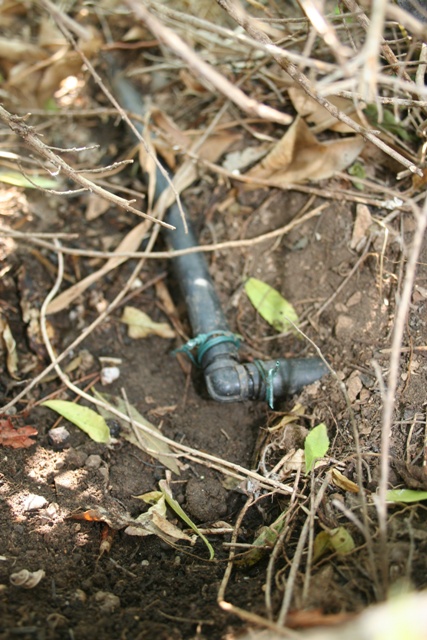
Doubtless I will have other occasional leaks like this, because I didn’t lock wire any of the pipe joints, but I was quickly back in business.
A similar very quick repair was to a dripping outside tap. Here taps are generally ball valves, so you cannot replace a washer. It meant a new unit. With PTF tape wrapped around the thread and the old tap removed, it was just a few minutes job to replace it.
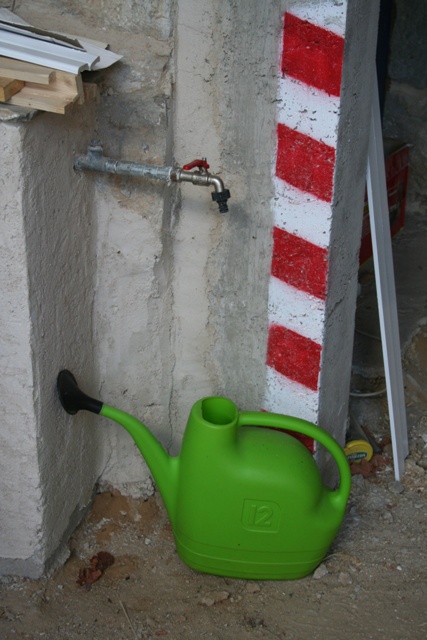
This tap in the courtyard is in a corner, so the entension pieces allow a 12 liter watering can to be easily placed under the outlet for filling. It isn’t the neatest looking fitting, but it works!
Broken windows
This is another of those jobs I have been getting around to do for some time.
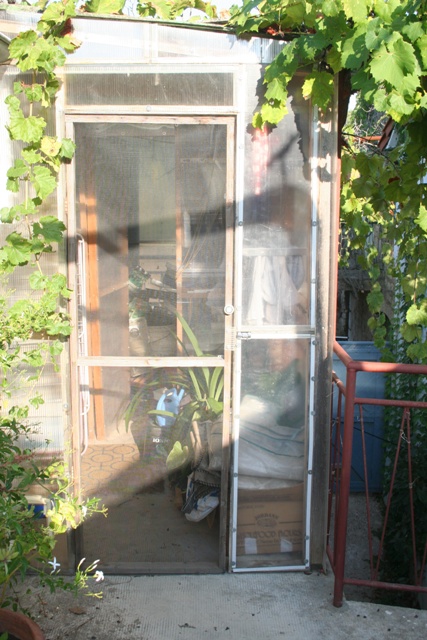
A long time ago (actually November 2015) I started to build a storm porch to protect the main door into one of my buildings.
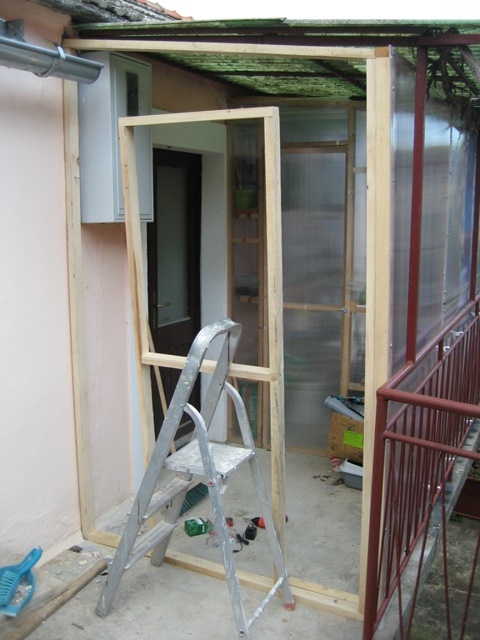
The idea was that it would slow winter winds and act as a temperature buffer between the outside and the inside.
I was planning that my buildings would soon be joined together, to obviate the need for shelter, at which point the temporary structure would be removed and a nice conservatory built in its place.
I built the porch with “cheap and cheerful” materials, rather than with materials that would last a lifetime, just using unprepared timber, without sophisticated joints.
Five years later, I still don’t have the buildings joined up and the storm porch has been successful beyond what I ever could have expected.
What I hadn’t expected was the effect that UV and solar radiation would have on the Perspex I used for the side windows. The large sections of plastic covering are Polycarbonate tripplewall, which when installed correctly, has the outer, UV stabilised wall, facing the sun.
I didn’t have enough of the tripplewall left, so just purchased some polycarbonate sheet from Građa Maestral in Stari Grad.
Over time this has yellowed and gone milky, caused by being exposed to the harsh Mediterranean sun. Then last winter I noticed cracks were appearing around where I had fixed the sheet to the wooden frame.
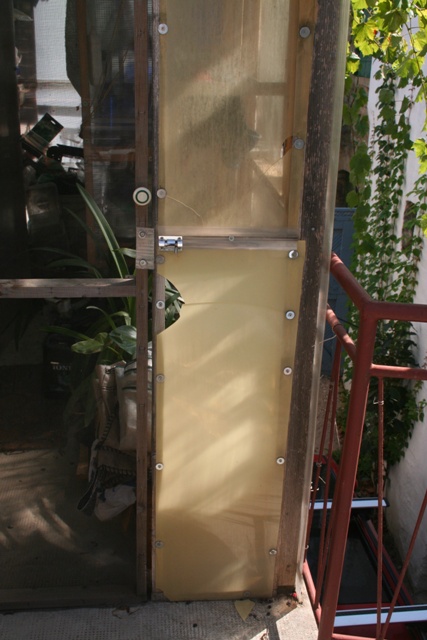
This summer, the cracks failed as the sheet expanded and contracted and small triangles started to fall out. Time to do something.
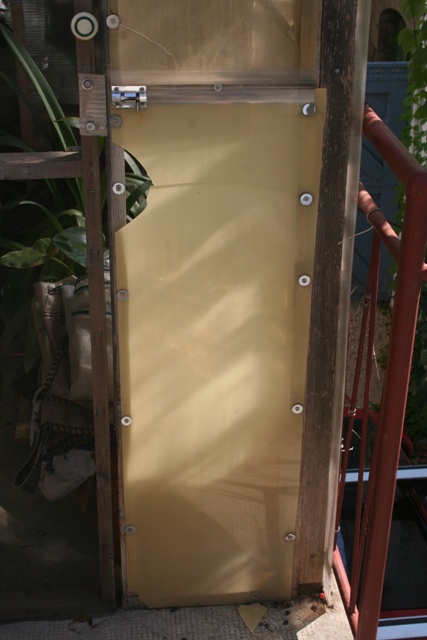
This week I removed the two sheets and took them to the plastic recycle bin, then I cut two 40 cm wide lengths from 50 x 100 mm polycarbonate sheets.

With still no clear date when I am likely to get the upper buildings joined up, this time I am anticipating the plastic being there for two or three years more, so planned accordingly.
I used a foam backing strip between the wood frame and the polycarbonate, to absorb movement caused by expansion and contraction. But I also enlarged the holes for the fixing screws.
Throughout I have used SPAX 25 x 4 TORX screws, with a ha’penny washer, to ease pressure on the plastic. This time, I predrilled the holes for the screws using a 5.2mm bit, so there is room for expansion.
Finally, when I fitted the sheets into place, the screws and washers are barely more than finger tight, so the polycarbonate is held in place, but without stress around the screws.
This will not stop the suns UV rays from yellowing the plastic, although I have left the shrink wrap protection in place to afford a bit more protection. But I hope with the changes I have made to the way they are fixed, there will not be the stress which caused cracking and failure in the original pieces.
The insect detective
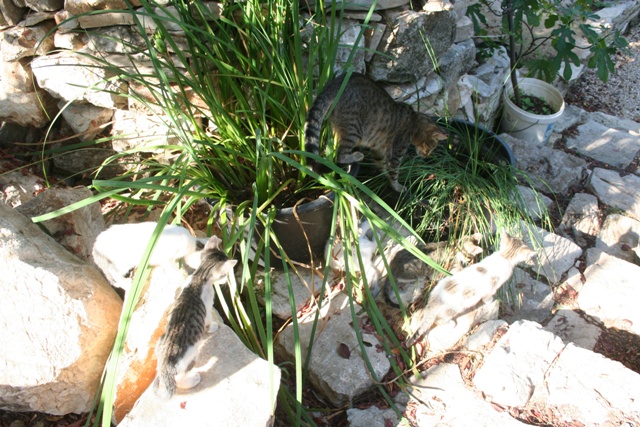
As the kittens grow, it is interesting to watch how Isabijela is training them in the ways of the world.
At nine weeks old, they are still small, with the two smallest weighting under 900 gms. Their day consists of eating, sleeping and playing then repeat, but not necessarily always in that order.
They are using the litter trays when inside and have learned how to use the cat flaps, so essentially they now have their own doors to come and go as they please.
Both day and night though I am watching for birds of prey. Even Mum is a small frame cat, only slightly larger than a domestic rabbit, so would be a quick meal for one of the eagles or the other large raptors.
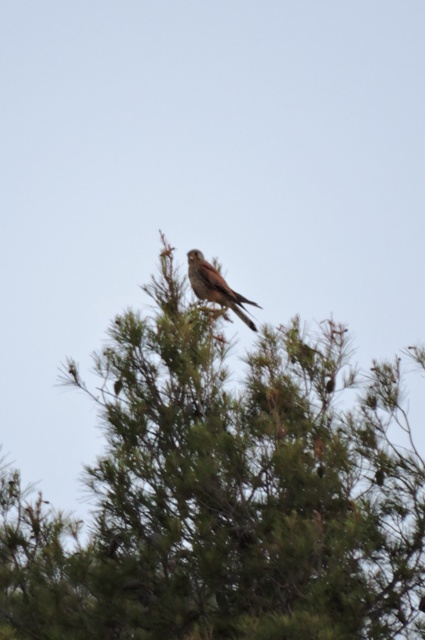
Then at night we have our resident Eagle Owl, which would take a kitten in each talon given the chance.
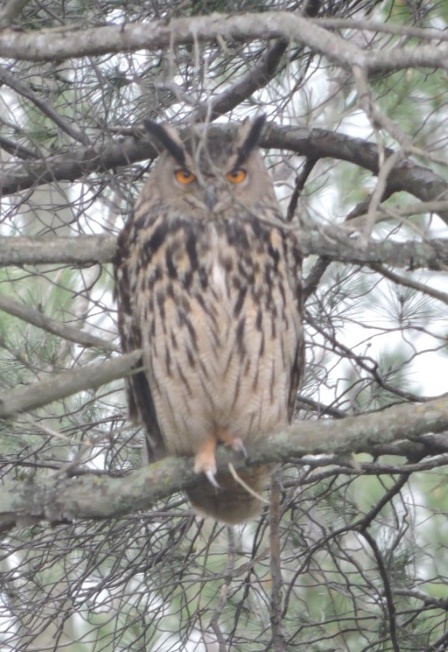
So Isabijela is teaching them to use cover and not to be too conspicuous. She has also been bringing prey in for them to learn about.
Even though they are happily eating five square meals a day, from Whiskas, Felix and supermarket ‘own brand’ packets, Mum has been trying to get them interested in prey.
I am pleased to say they have almost universally been completely disinterested in the process. Just one, Argent, has attempted to take on a young rat which appeared one evening on the floor. The others looked, turned round and went back to sleep. Good kitties – I want to preserve wild life, not create highly efficient hunting machines (rats and mice excepted).
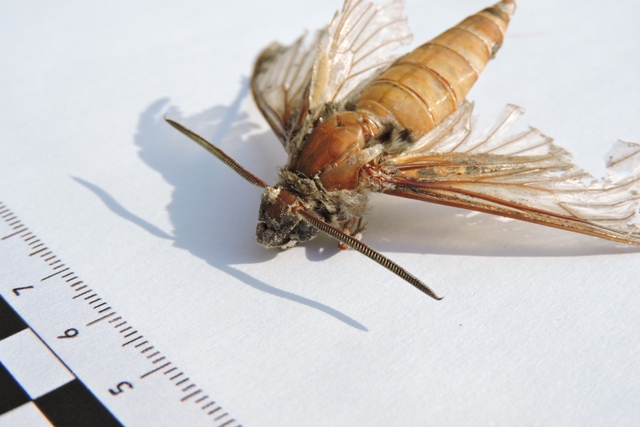
On several mornings, I found sets of transparent wings on the settee or cushions in the study. They were large, but unattached to any body so I had no idea what they might have been from.
Isabijela did bring a live hawk moth in one evening, which I scooped up and released back into the wild, somewhat shaken but otherwise unharmed. Then one morning this week I found a whole moth on the floor, with the same large, transparent wings.
I’ve not seen one like it before, so I started to try and identify what it was. Going through my books, the closest I could get was a Narrow Bordered Bee Hawk Moth, Hemaris tityus.
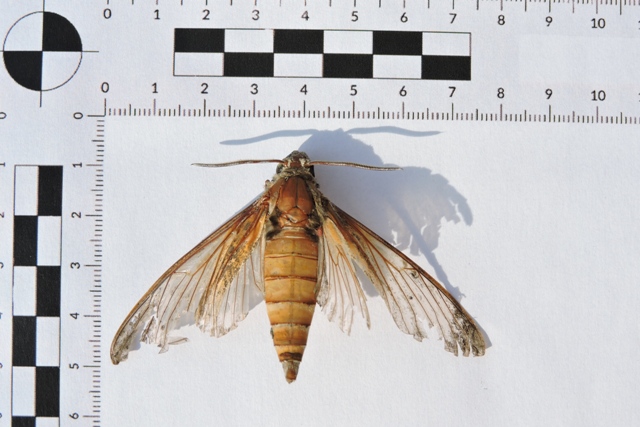
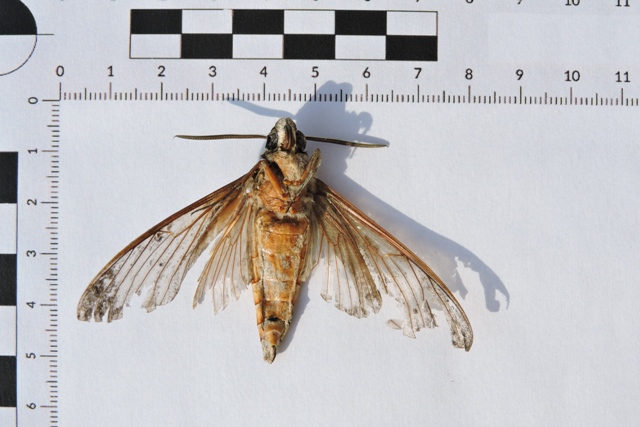
Then when I was photographing it in close up, I realised it wasn’t.
The hind wings are almost complete and have no banding. My neighbour Steve suggested a Large Bee Fly, but the lack of bats wing wing markings on the fore wings ruled it out.
Given the moth is not in the best of condition, I did a Google image search but wasn’t surprised when it found a lot of visually similar images, but none matched.

After consultations with a number of Lepidoptera experts, we all agree it is a Hawk Moth, but the exact species still eludes me.
Quick, quick, slow
What I thought would be a straightforward and simple job turned out to be an all day ordeal this week.
I had decided to do more work on the path around the new workshop but I discovered that the Bosnian builders had left a piece of the wooden shuttering against part of the concrete ring beam.
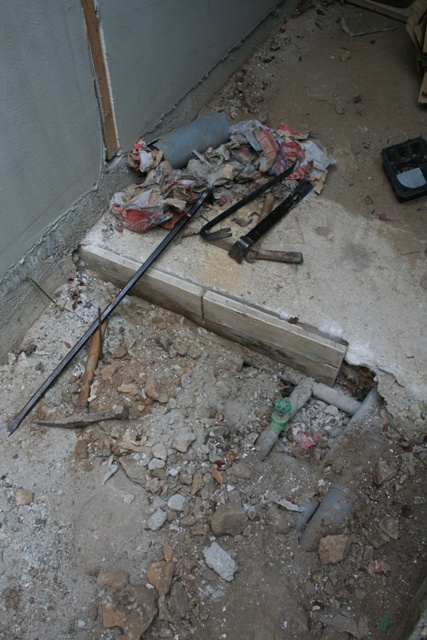
Not a problem, I thought, soon get this out… Wrong!
I presume that because it was so difficult was why it was left and covered up. The wood had been put in tight against the cold water feed pipe to the central heating and then hard concrete had been poured and vibrated down to form a very solid and strong reinforced ring beam.

Starting with a small crow bar and gradually working up to the largest I have, would not move the wood. I next tried to cut a bead with the chain saw to try and lever the wood up.
It only budged a few millimetres sideways.
Going back to the photos I took during construction back in February, I could see the shuttering was 500 mm deep and a metre in length and it was very tightly in place, even before the concrete was poured.
It is against sandstone bedrock on one side and concrete on the other.
I realised that if I kept levering, all I would do is fracture a water pipe, which would then be difficult to repair, so I decided instead to cut away as much as I could and leave the rest.
Starting with a cutting disc, which really only burned the wood and then using the chain saw again, very carefully as contact between the chain and the concrete would wreck the chain in seconds, I cut through as much of the wood as I could see.
I then levered and broke the two section with the big crowbar. In all I have removed about a third of the shuttering, the rest I’m afraid, is destined to remain underground for time immemorial.
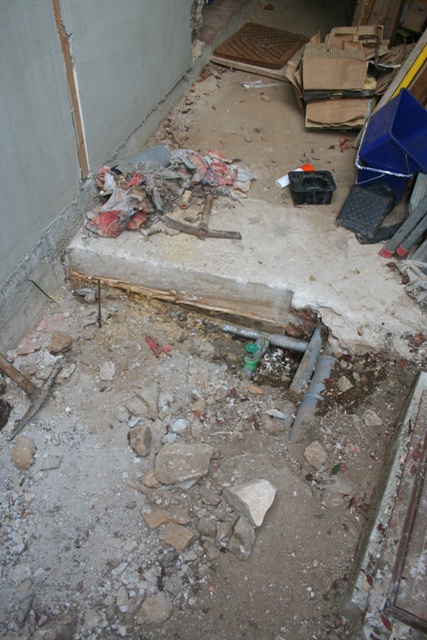
Preparing for pavers
Next I had a look at the brochure for the paving sets I would like to have throughout the courtyard.
They told me the depth of the sets were 80mm, but there was no installation guide. A little bit of online research came up with a diagram showing sets laid on 40mm of compressed sharp sand, which had been laid on 100 mm of well compacted hardcore base.
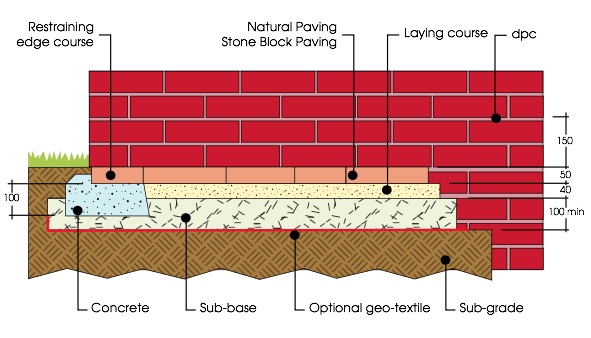
Armed with that information, I marked some pieces of steel rod with wax crayon, showing the various depths and knocked them into the sandstone until the top was at finished floor level.

The Bosnian builders left quite a bit of rubble when they left, so I am now moving this and laying it to form the hardcore base of the path.
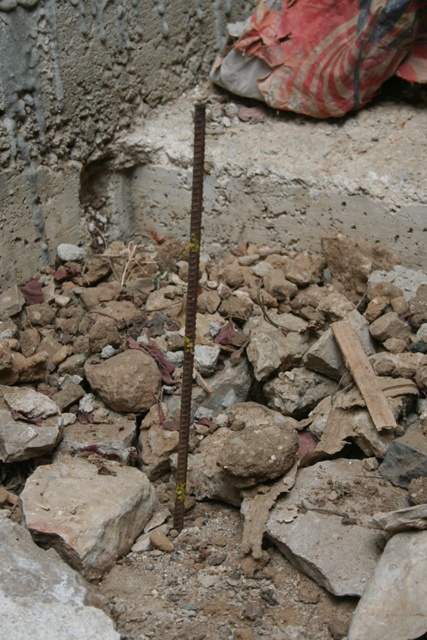
As the sandstone bedrock is just underneath, you could probably run a Chieftain tank over it and the ground would not move far. There is not much room, so I’ll not try.
With the large pieces on the bottom, I then filled in with small stones and rubble, of which I have more than I know what to do with. So after a slow start, by the end of the week I’ve got into my stride and can show some progress.
The chain gang
Having five excitable kittens, often jointed by “Uncle Gizmo” dodging round where ever I am working, does mean it is a bit of a slow-slow-quick-quick-slow process!
There was a comment from a friend that he was surprised I hadn’t used a lawnmower engine and some angle iron to make my own lift for the heavy stones.
The problem is I left two Suffolk Punch lawnmowers in the UK because I knew when I moved abroad, I would never have another lawn.
I do innovate though to move the heavy stones out of the way of the path. Much as the kittens love to “help” by digging holes, they are not a great deal of help when lifting or moving heavy objects. Have you ever tried herding cats into a chain gang?
So I used Egyptian methods to move this 600 kilogram monster out of the way.
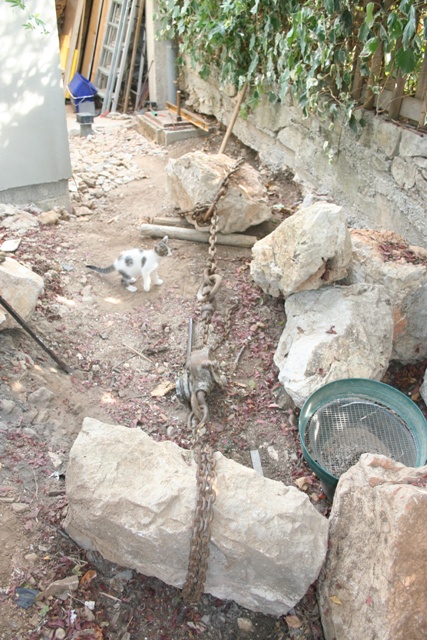
With a length of derrick chain wrapped around the rock I needed to move and couple of rollers underneath, I attached a second chain to an even bigger rock.
Between the two I attached a 1.5 tonne hand winch and started working. Slowly does it, but the rock is now out of the way.
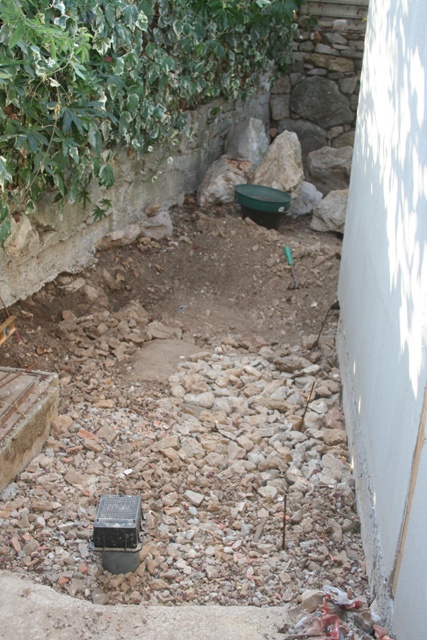
As another week ends, I have an area clear of rocks with some of the hardcore already laid. I just have to move the soil, riddle it and add more hardcore. NRC
One Response
Andy Robinson
Another entertaining read Norman. My goodness you work hard… How you find the time to produce the blog I do not know……. Also you seem to exist on cups of coffee and the odd pie that you rustle up from home produce…. Do you ever have an evening meal and a rest?
…