It’s that corner!
This week: It’s that corner!; The electrics in the corner; The fridge in the corner; Still to do;

Today is the northern Autumnal equinox, so it is all downhill now to winter! Even though we have had a warm and sunny week this week.
This week has been another of those single issue weeks. Most of my time has been spent doing my kitchen reformation.
As well as that, I have had a morning in Grad Hvar and done a few other odd jobs. I am also looking after a kitten for my neighbours. This is Yoda.

If you want to know why, look at his ears!
Writing this on Saturday afternoon, I have the lights on. I have had the lights on for most of the day because it has been raining.

At tea time on Saturday we have had 30 mm of rain, so it has been a useful amount of precipitation.
At lunch time there was a thunderstorm and a torrential downpour, with a precipitation rate of 45 mm per hour.
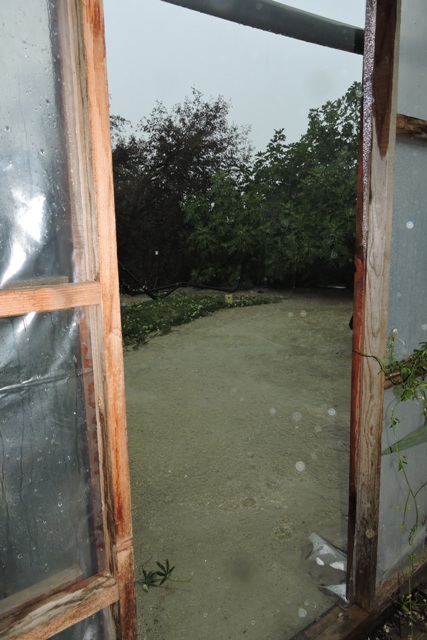
I was pleased that last week’s project of the covered walkway between my buildings has kept the walkway dry.
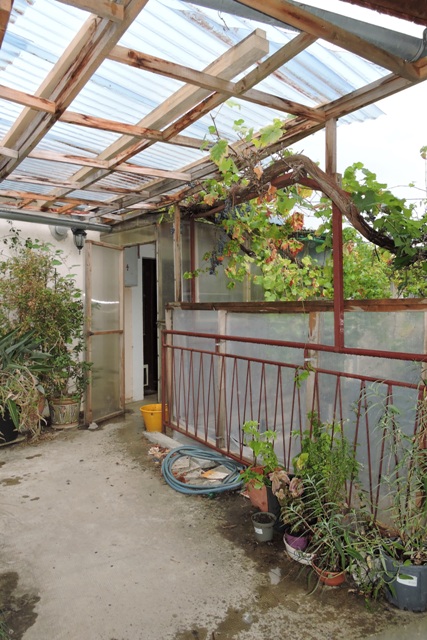
There was some blowback of rain, running off the grapevine which runs around the edge of the walkway, but that was all. I will need to do some slight adjustments, but that is all.
Even when the storm was at its worst, I was still dry under the polycarbonate ribbed roof.
It’s that corner!
Most small kitchen have one, and my kitchen at just 8.8 m² when empty is tiny. I’m talking about awkward corners.
This week I have been working on the corner wherein my fridge lives.
The first job was to remove the old fridge. That didn’t take long, then it was removal of the cupboard door and the worktop.
My kitchen came flat-packed from IKEA, in my container from Abu Dhabi.
I installed everything in December 2014, so it has been untouched for almost 9 years.
It was a mess, with a lot of cobwebs and a few resident spiders and badly needed some paint.
Because I am moving the cabinet I needed to drill new holes for the 100mm screws which hold the carcase in position. It needed some careful measuring and positioning before I drilled the hole.
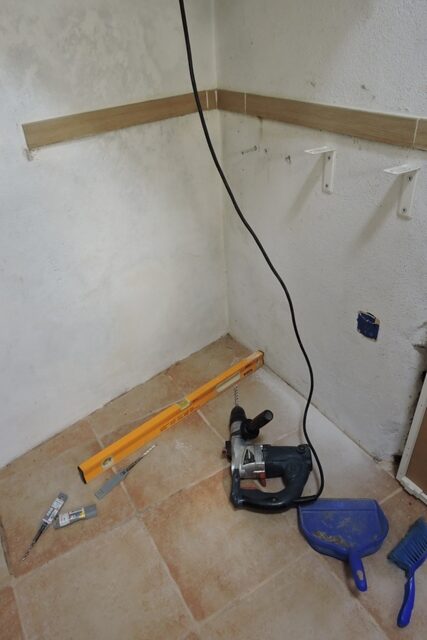
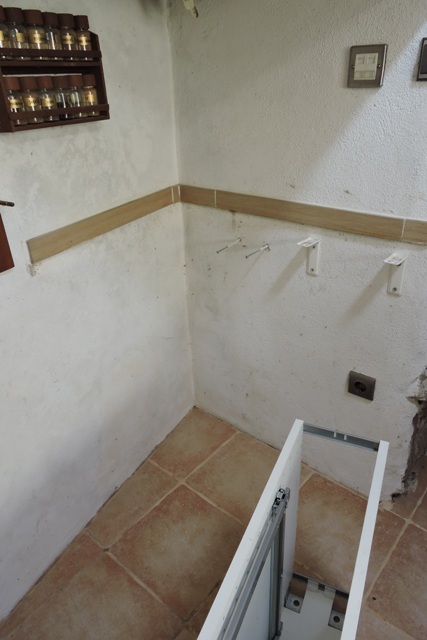
With that out of the way and the old holes filled, I began painting the walls. It is so much easier when there is a “blank canvas”.
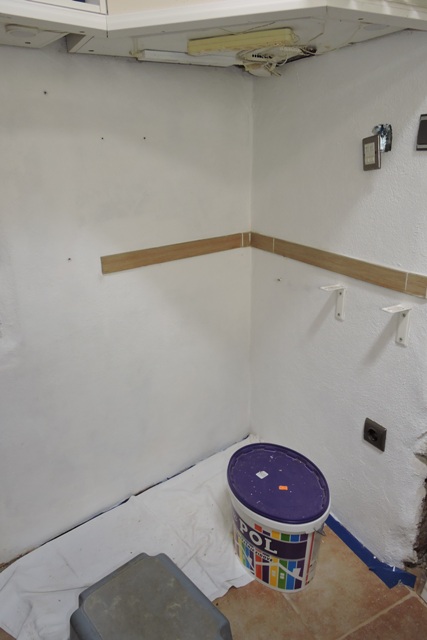
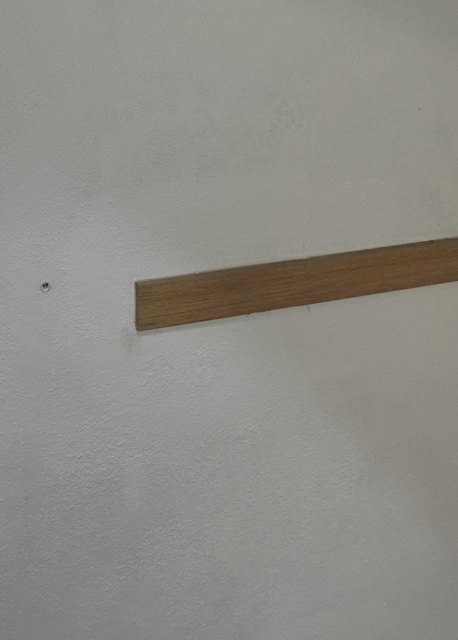
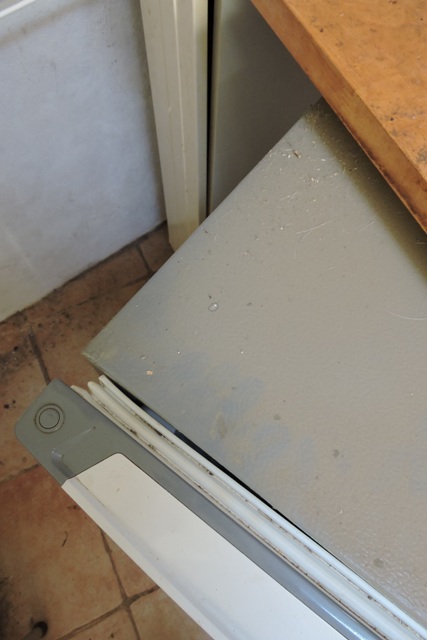
I gave the walls two coats of paint, however on the outside wall, I have had a problem with grey markings coming through the concrete render.
In this photo you can see where around the wall tile I have painted three coats, but above where there are only two coats, the grey marks are still there.
This meant that on the outside wall, I needed to go over the whole wall three times to get a nice, uniform whiteness.
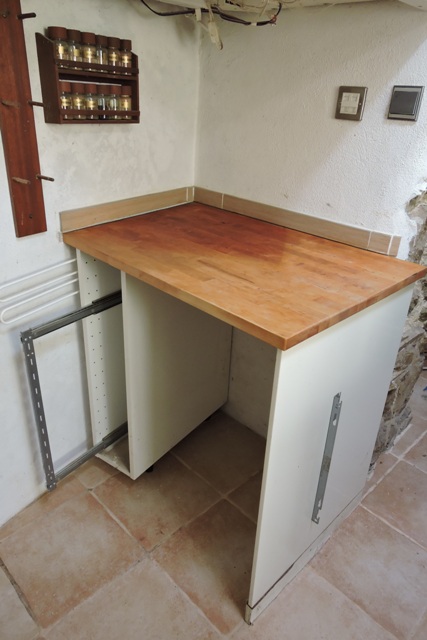
With the walls dry, it was time for a trial fix of the cabinet. It was perfect, so I removed it and then laid the worktop on the floor. I have already treated the underside with sealant.
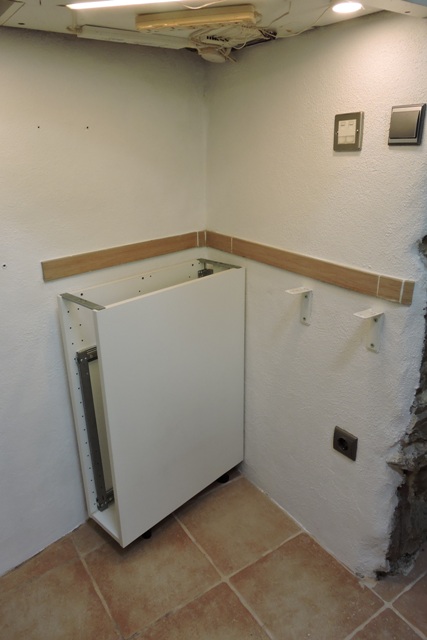
I decided that it would be much easier to fix the narrow cabinet to the worktop, where I could easily access the inside to screw the brackets to the work top, than try and do it with the cabinet attached to the wall.
Turning the whole thing over was not difficult and it slid neatly into place.
I adjusted the feet on the cabinet, checked the worktop with a long level and fixed the cabinet to the wall.
The last job was to run a bead of silicone between the wall tiles and the work top and then leave everything to dry.
The electrics in the corner
Working on the corner was an opportunity to easily fix the wiring for the cabinet lights.
Looking vertically up, you can see the problem I have with dihedral corner angles.

The IKEA wall cabinets only touch on one wall. When I installed them, I had to fabricate wooden wedges at the top to hold them in place.
I installed the cabinet lights later, after the worktop was in place. It is so much easier to now work under the cabinets when there are no obstructions underneath.
As well as the power block for small applianes, like my coffee machine, there is also an RFD control for the low voltage LED lights.
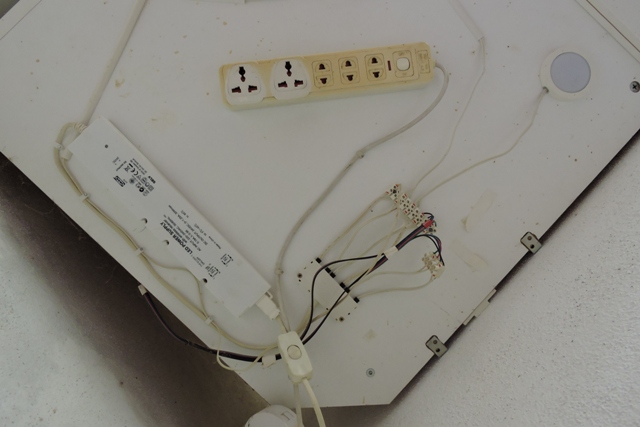
I took the opportunity to tidy up all the wiring and add a couple of cable clips to fix everything in place.
The fridge in the corner
With the worktop and cupboard secured I turned my attention to the new refrigerator.
This kicked off the whole project to revamp the corner because when it was delivered, I discovered it was 2 centimetres too wide for the available space.
I gently eased out the old fridge on Monday and immediately I saw what the problem has been with it freezing and defrosting.
The door gasket has failed at the top, leaving a 5 mm gap in one place.
The top of the fridge has been hidden by the work top and so has been invisible, Because of this I was unaware there was a contact gap in the gasket.
Because the fridge has not been sealing when the door has closed, especially during the heat of summer, it has been working overtime to maintain a cool temperature, and failing.
Being a Daewoo and because there is nothing mechanically wrong with the fridge, I looked on line for a replacement seal.
However the machine is more than ten years old and spare parts are no longer available. I need to see if I can get a generic door seal because I am reluctant to throw away something which works!
I opened the box with the new refrigerator inside. From the factory, the box is thoughtfully labelled “front” and “back”, so you can open it the right way round for installation.
I chose this make and model in particular, because the door direction can be changed.
The position needs a door which swings on a hinge on the left hand side. All fridges seem to come with right handers in mind, which open with hinges on the right!
The hinge was on the right, so after removing the glass shelves and plastic door pockets, I gently laid the fridge on it’s back, supported by the styrofoam packing.
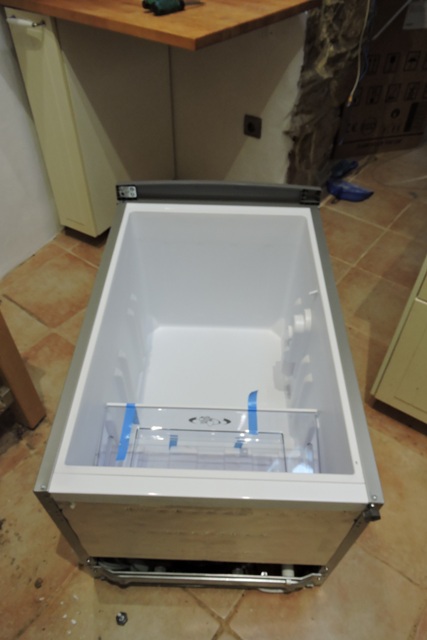
It did not take long to remove the screws and change the top and bottom hinge units over from right to left.
The last job was to right it and slide it into place, still on the Styrofoam tray it came on. Styro slides easily on my ceramic tile floor.
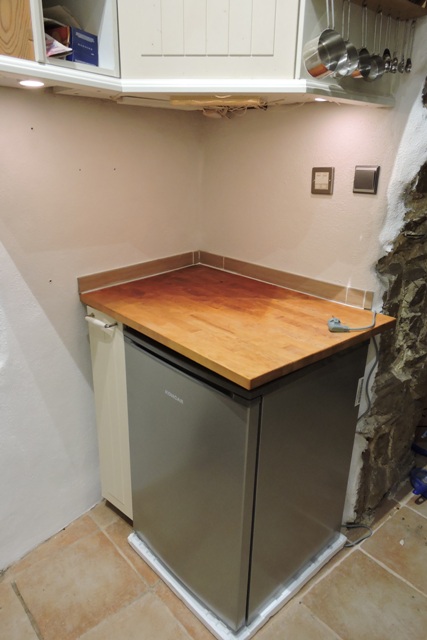
I have ordered four sliding feet, by mail order, so that the fridge will be easy to move in and out of the space under the counter, however they will not be here for a couple of weeks.
Still to do
However much work I do, I always seem to end up with things which have been left to do later.
It isn’t through a lack of planning. More it is the sands of time which slide effortlessly and relentlessly through the hourglass.
The edge board needs fitting, then there is a shaped wooden radiator mount which I will have to make for the stone wall.
A couple of easy jobs are the fitting of the spice rack to the wall and the rack for coffee and sugar jars.
Another job is the top worksurface of the work top. It needs to be lightly sanded and then oiled.
But of course I have to leave myself something to do next week!! NCG