Getting wound up
This week: NOT like LEGO; A bit of trial and error; Mark then fix; Getting wound up; Where am I on the scale; Flower power;
The first week of the New Year always seems a little strange, but this year has been doubly so.
After the holidays of the Christmastide, it always seems to take a while for things to get into gear again.
Things like the postal service for example. I’m waiting for a parcel which has been shown as “Out for Delivery” since the 29th. However there has been no postman all week.
Then there is the change from Kunas to Euros. I only went shopping once this week and was told the price in Euros, paid with my remaining Kunas and got Euros as change.
It is still mild, warm even in the sunshine. Sufficiently warm to enjoy morning coffee outside every day and even lunch outside on the terrace today.
I took the Christmas lights down on Thursday. Traditionally they are removed on “12th Night” but a day earlier doesn’t matter.
Friday was the 6th January, Epiphany or the Visit of the three Kings . This is a big religious public holiday here and at the end of a week when things really hadn’t got started again, everything stopped.
So I’m looking forward to next week when everything should be returning to normal, that is except for the weather!
The weather remains strangely warm, considerably warmer than average. However every day of spring in January is a day less of winter!
NOT like LEGO
Monday was the first working day of the New Year and I could hear the difference from Sunday.
There was a large JCB breaking stone on the hilliside opposite my home. In the other direction a petrol machine was in use and my neighbour had his chain saw out.
This wasn’t intrusive noise, more of a background hum to say that things are returning to normal.
Here in Croatia, when a public holiday falls on Sunday, like the 1st January, no extra public holiday is provided on the day immediately following. So Monday the 2nd January was a normal working day.
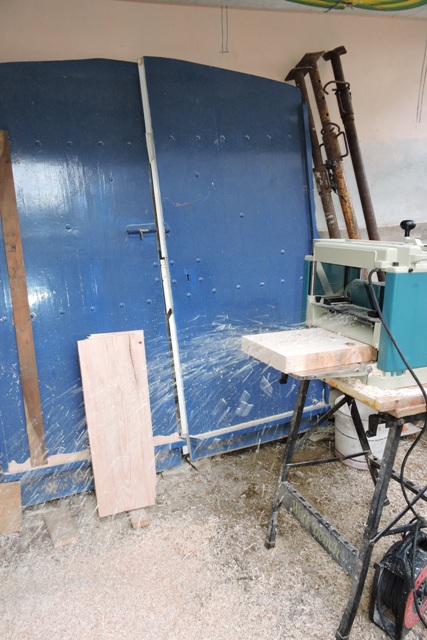
I decided to bring the woodworking tools out into the courtyard and power them up.
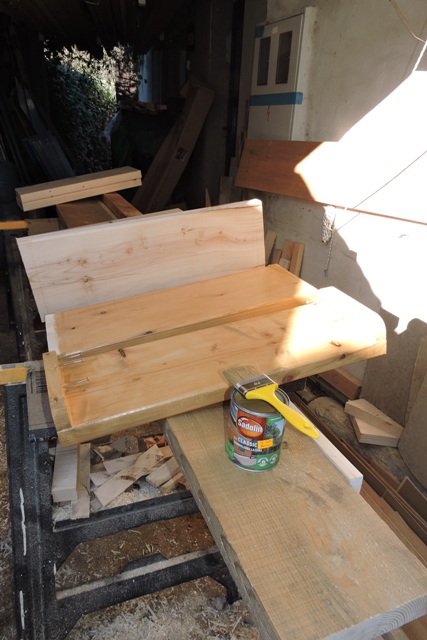
The first job was to run wooden 5 x 3 lats through the thicknesser to get them square. These became the ledges on which the wooden steps will sit.
Then I ran stair treads through the machine as well.
All the wood shavings have been saved and bagged and will be used under my strawberries. NOTHING is allowed to go to waste…
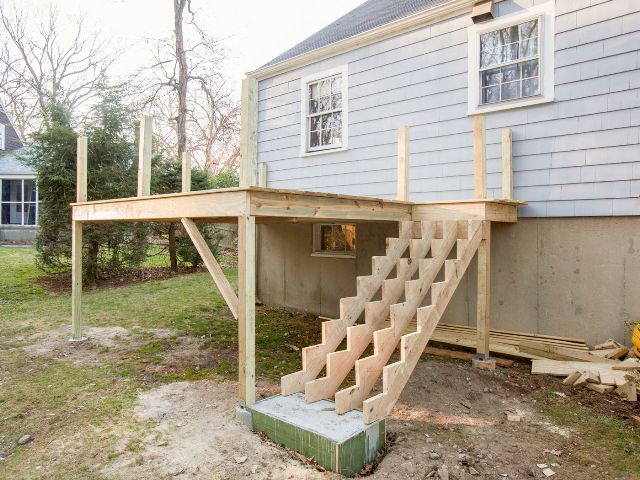
There are various ways to construct stairs. One is to use stringers which have rectangles cut out of the stringer and the wooden treads sit on the cut-out. This is the example in the following photograph.
A second way is to rout the stringer and the treads. This is a nice but time consuming process.

A third way and my method of construction is to sit the treads on ledges glued and screwed to the stringers.
When you are dealing with uneven walls, ledges makes it much easier to adjust the treads before fixing.
With the ledges cut, I accurately measured the offset angle of one stringer and cut the first step. It was a liitle too large, which is good.
I follow the advice of cabinet makers: Measure three times and cut once.
It is also much easier to cut a sliver of wood off, that trying to stick a liver back on. Or worse still, filling the gap with plastic wood and hoping no one notices!
With the ledges cut, I then shaped the edges into a curve using my band saw so the will look nice. For me, I want these stairs to really look good when the Konoba is finished…
What I have realised though, is the reason why why most wooden staircases are made “off site”.
They are manufactured using cutting jigs and then assembled, with everything else being built around that stairs. That is like building with LEGO.
Unfortunately in my old buildings, I cannot use that method!
A bit of trial and error
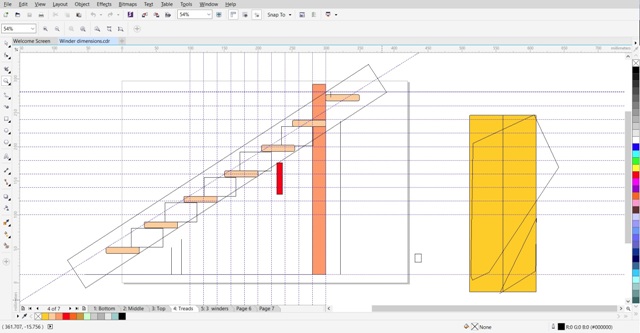
I use a drawing and graphics programme called CorelDRAW and this week it has come into its own again.
When personal computers became “the thing” and Windows 2.1 was the operating system, CorelDRAW came on four Floppy Discs. I still have mine too.
Today it is a cloud based system, although I have the last 150 Gb downloadable version, X8, which is more than adequate for my needs.
I can draw to an accuracy of 1/100 of a millimetre, which is light years beyond anything I can measure and in a different universe to my wonky walls and rhomboid rooms.
However when I was trying to work out exactly where the treads would go on the stringers, it was more than up to the task.
I knew the height of the first step, the height of the landing and that there were five intermediate steps. A little maths gave me a vertical spacing of 185 mm, however as I tried to fix the longitudinal spacing, I struggled.
Even trying to fix two steps, it became apparent that my measuring was out, so it was back to the computer drawing board.
A little later after I had moved the step treads around on the screen, I had the ideal spacing for each tread.
Mark then fix
I used a spirit level, accurately marked, to carefully transfer the height of each ledge to the stringers.
Knowing they will be glued and screwed to both the stringers and the treads, I made a template and pre-drilled the holes on each ledge.
This made the installation easy, with one side installed, checked for being completely level, before being repeated on the opposite stringer.
Finally I did a cross check with a long level to make sure they are all absolutely square.
Most of the wood in the Konoba is 80 years old, having replaced the timber when the building was burnt down 80 years ago this week by the Facista on 3rd January 1943. (The burning of Dol Blog)
During the passage of time and the use of the Konoba as a functioning winery, the roughly hewn tree trunks have mellowed to the colour of Amber.
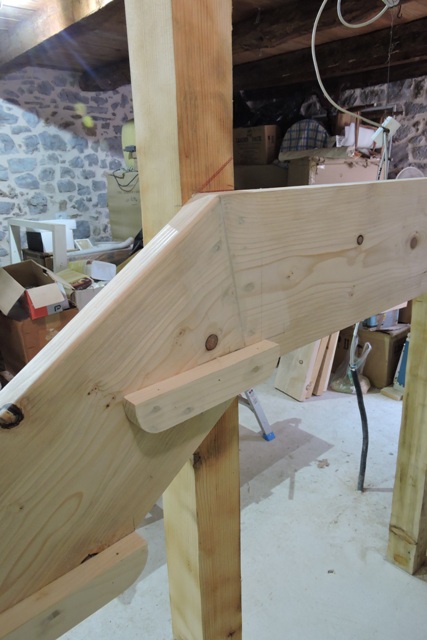
I took a piece of one of the beams we removed to match against the Sadolin wood stain chart at Volat. . I found that number 57 light Oak was an almost exact match.
In the foreground the stringer is in bare wood. The one behind, against the wall has been given its first coat.
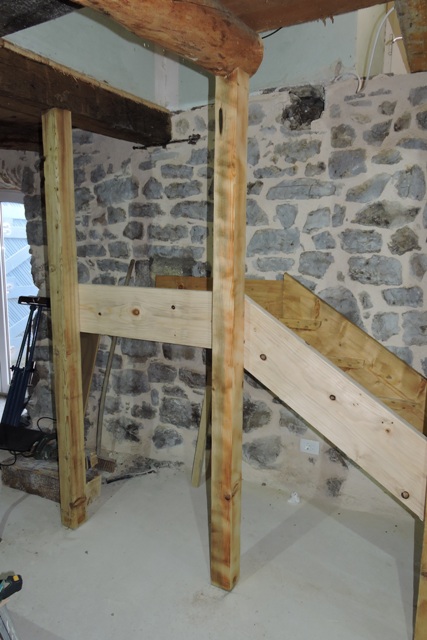
I’m really happy with the colour match against the old upright posts we installed to hold the beams up.
Getting wound up
With the treads treated with Sadolin and drying, my attention turned to the winders.
This is the technical name for the treads which change the direction of the stairs by 90º.
Once again I used CorelDRAW to design the shape of the treads.
It is easy to draw on screen the outline of the landing area, to an accuracy of +/-1 mm and then draw the shape of the winders. The darker colours are the upper winders.
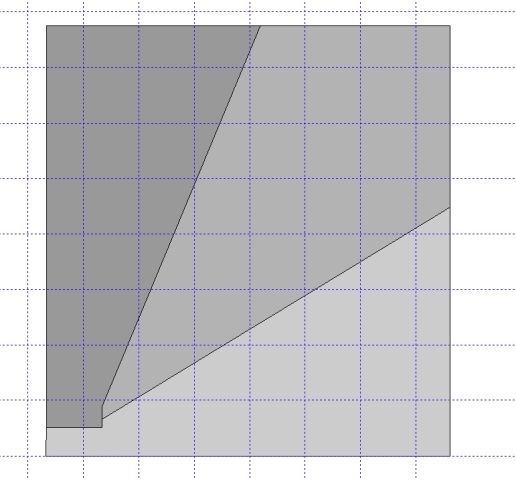
Then the shape was overlaid onto the Puntižela timber boards I had to decide what I needed to cut.
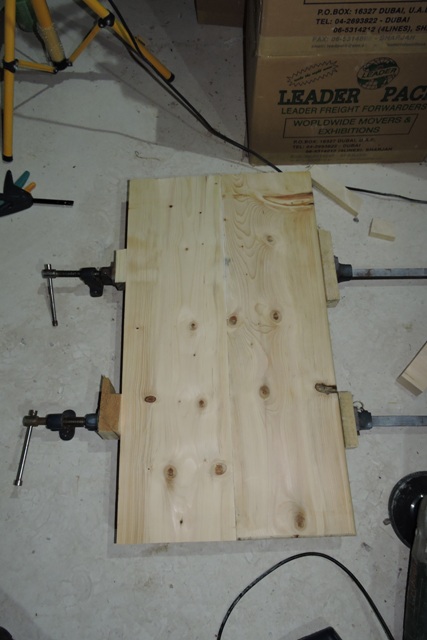
By joining two lengths of boards along their long edge, I could make the winders.
I have a joining tool, which allows wooden dowels to be inserted into the board edges before they are glued together and clamped tightly.
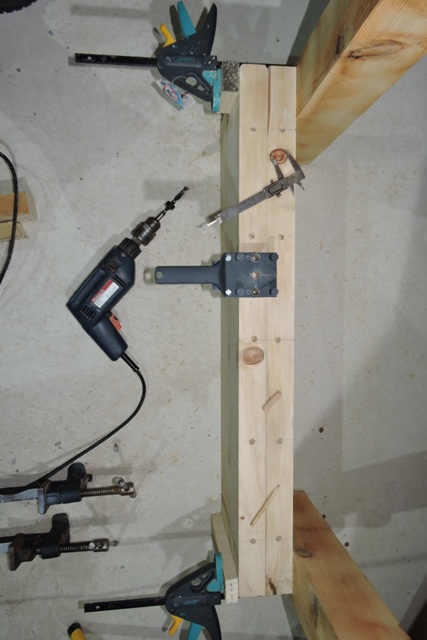
With five dowels inserted into the 900 mm long board, I used my largest frame clamps to wind the two boards and the wooden dowels together with the full length of the joint glued. This has been left for 24 hours for the glue to dry.
Where am I on the scale?
As I contemplated a 1.5 mm gap between two pieces of wood which shouldn’t be there, I was trying to work out how it had happened.
There are degrees of expertise involved in constructing things out of wood.
At the very bottom end there are the “wood butchers”.
This group usually has a large hammer and sees every problem as being solvable by using nails.
When you have a hammer in your hand there is a mindset that every problem resembles a nail. They probably have a circular saw to cut wood and go with the adage that “It fits where it touches”. Their material of choice is MDF.
DIYer’s feel they are “Jack’s of all trades and masters of most”. There are many videos of DiY disasters!
The next grade and the first “professional” wood worker is the joiner. They understand the theory, have a range of tools, enjoy working with wood and making things.
As the name suggests, they ‘join’ pieces of wood together and make things which last.
The next level up is a Carpenter. This person, as well as doing Joinery, will use different methods and practical joints to not just make something, but make the finished product look nice as well.
Towards the top of the woodworking tree is the Cabinet Maker.
This person is the master craftsman. Yes, they will have all the modern tools, but will also have the old hand saws, chisels and mallets. For centuries they have produced masterpieces, which last for centuries…
Dry fitting my stair treads before painting was more difficult than I expected.
I checked they were square and they were. There was no problem with the outward leaning stringer, because I had cut the end at an angle of exactly 2.5º from the vertical.
I made a tool to exactly measure the distance between the two stringers and then cut the treads to an acuracy of 1 mm.
But each time, I had a gap of 1½ or 2½ millimetres, so I went and made myself a coffee.
Coming back, I again checked that the right hand edge was perfectly square. It was, so I laid the tread on top of the stringer and looked down. I immediately saw where the problem was.
Although both stringers are symetrical and have an exact slope of 32º, one is 8 mm further forward than the other.
In the old imperial units, that is about 5/16″ or 0.31″. This is because of the walls and old ceiling beams being uneven.
It really isn’t much, but it has thrown the treads out by 2.5 mm, which is enough to annoy me!
When we were setting up the stringers with my laser, they appeared to be perfectly in line, but it was difficult because of the uneven stone wall. Neither of us noticed the discrepancy before the stringers were fixed.
I’ve known for years that one of my character flaws is being a perfectionist, and now in a couple of places I will have to use filler to hide the gap…. Grrrrr.
Flower Power
With bright morning sunshine, I have been torn between doing jobs in the gardens and orchards and working on the staircase In most cases, the staircase has won.
However I have been out and about because it has been just too nice to spend all day inside.
I was surprised to see that my Poppy Anemone, Anemone coronaria, have produced flowers and I didn’t even notice the buds appearing.

The climate breakdown and almost continuous mild weather is wreaking havoc with the natural world’s biological clock.
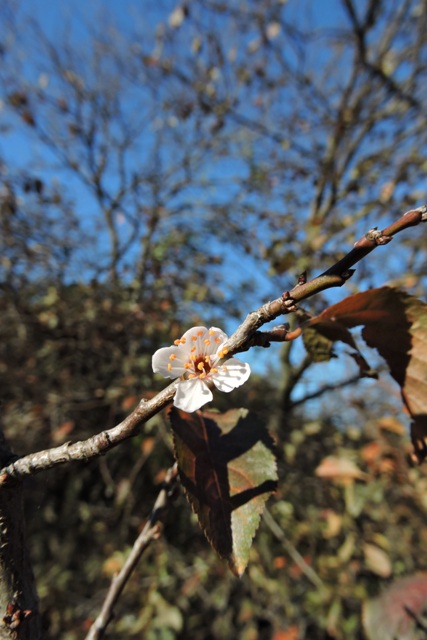
I have the first blossom on by Myrobalan Plum tree, not just own, but a lot of individual blooms. This is one of my Springwatch species and the average date for the first blossom to appear is the 19th February.
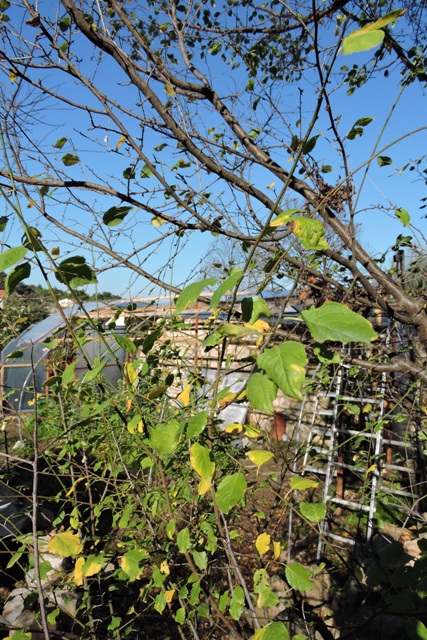
This tree still has most of its leaves from last year, which because of the weather have not dropped.
My old yellow plum also has green leaves which are still producing chlorophyll. These have all usually fallen by the end of November, but even with some windy days, they remain.
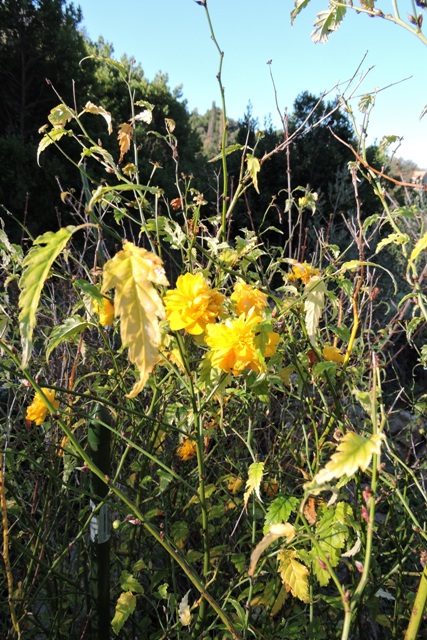
I have a large Kerria japonica, Batchelors Button, which has been flowering continuously since September.
A little further down the border, the Alstromeria are still in flower.

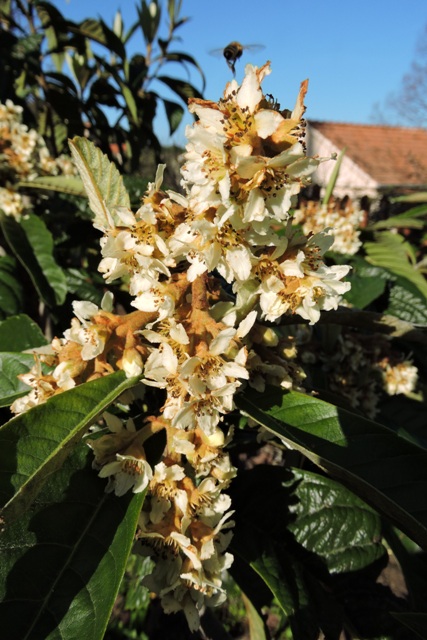
At the end of the orchard the Loquat trees are in full bloom, and being pollinated by honey bees. This is a little late. They usually flower in early December so I presume the very warm autumn and early winter had delayed their blossom.
My planting of new bulbs in front of the Polytunnel are all now showing. I planted them on the 24th November, so just six weeks ago.
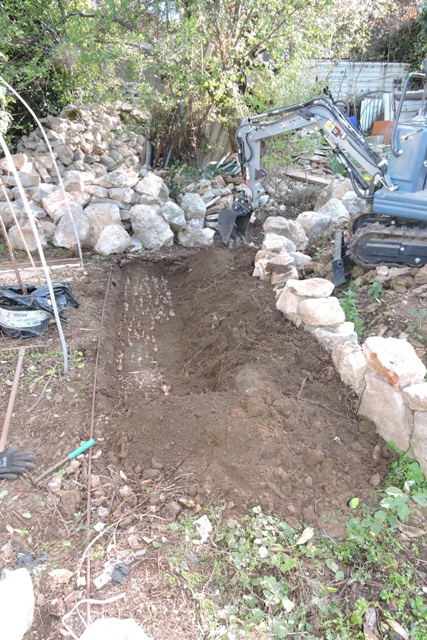

There will be a nice here display later in the year.
And with that thought, it is the end of another week. We have some rain forecast from Monday, so I am planning to fix the treads when I can’t work outside.
But as spring has clearly already started, I have no shortage of outside jobs, some of which like tree pruning, are becoming urgent. NCG
2 Responses
Marcy
Hi, I am so excited to see the finished stairs. This was a real journey in building, and the detail is such fun. I can’t picture how they will go up that opening unless it’s a ladder, but I know you will walk us through the process.
The flowers are exquisite. My favorites are the Loquat and the plum. We still have snow on the ground here from that winter storm over Christmas and New Year’s, but it’s gradually melting.
I took my home off the market in November but will resume the sale process next week. I’m so ready to go where there is no snow. I can deal with the rain, not the bitter cold and snow.
I look forward to seeing how those stairs are going to work, and the lovely flowers that you are planting in front of the polytunnel. I would love to see a picture of the completed polytunnels again. Such a mark of superior craftsmanship and creativity.
Wishing you a very Happy New Year!!
Ian
Norman – “Lang may yer lum reek” literally translates to “Long may your chimney smoke!”
(well-known Scottish phrase).
Happy New Year – Iain & Carole