Logging operations
This week:
Logging operations; Rockery walling; Hydroponics ; Greenhouse; Climate change;
Definitely an outside working week this week. We have had nice warm sunshine, even though there has been a cold Bura blowing mid week. But nothing especially strong. I was able to abandon my NATO Wooly-pully and have been working in a Tee-Shirt too.
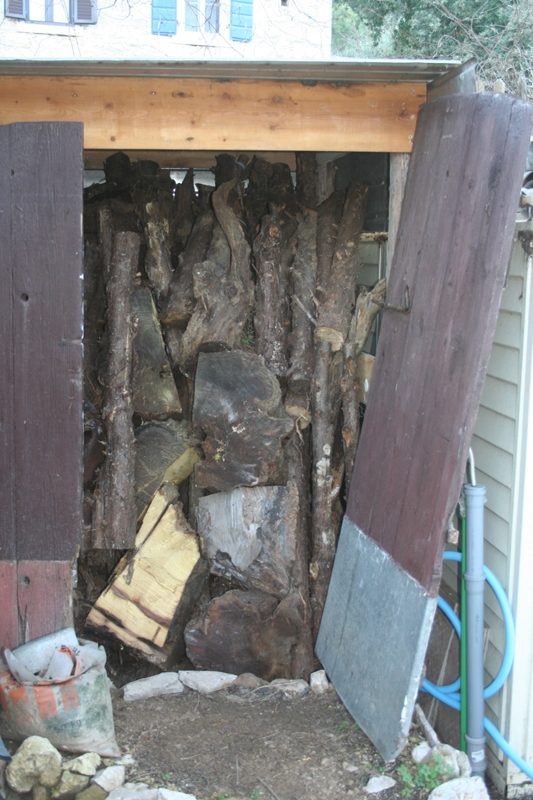
I started and finished the week involved in logging operations. To clear a working space I started removing logs from a pile in the Top Orchard into the wood shed.
I’ve burnt through 3/4 of the wood that I cut last year, which has made room for timber that has been stored under a plastic sheet.
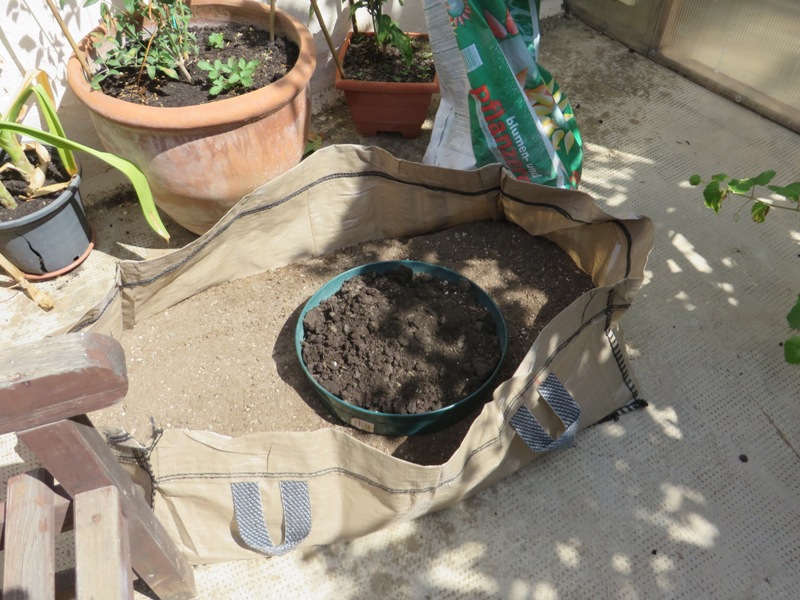
This has allowed me to make a start on completing the retaining wall around the garden sheds. I had another one and a half cubic metre of logs to move, once I had cut the last of the wood for this winter.
At the moment I am only lighting the wood stove around 17:00 for three hours, so I’m not using much wood. This has been an unusual week for so early in the year too. I have not needed a fire on three evenings after really warm days.
But it is anyone’s guess what the next four weeks will be like. Last year we had a cold snap at the end of February, which brought snow. However in 2017 the average February weekly high was 14ºC and in March the temperatures were up to 20ºC.
The average last frost date for Dol is 14th February and in previous years my last fire has been around the 7th March, so only four weeks away.
But next week we are going to have a strong Bura blow in starting on Tuesday, which will bring warm sunshine during the day but ‘gin clear’ nights. So I can’t completely give up on a fire just yet.
The buds are swelling on the plum trees, so I just hope the cold will slow them down a little. Last year they were in full blossom and got caught by the snow. The result was I had no plums.

Rockery walling
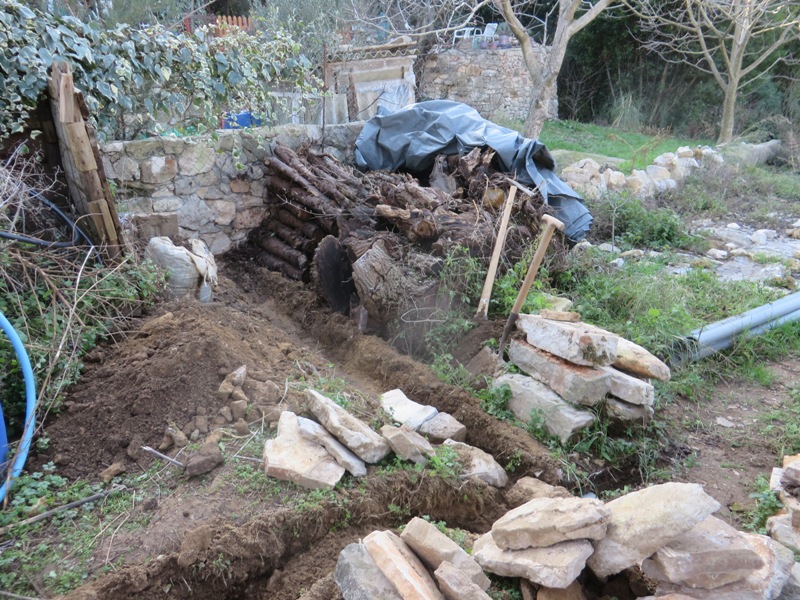
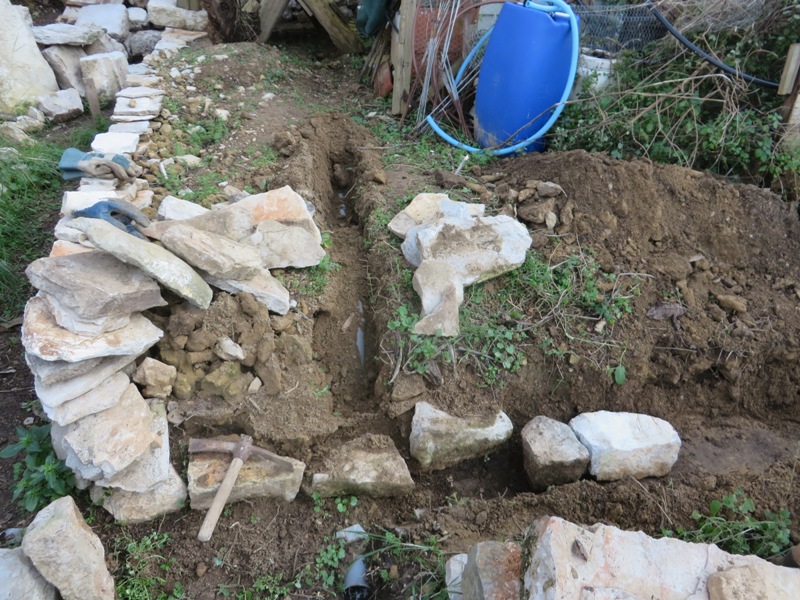
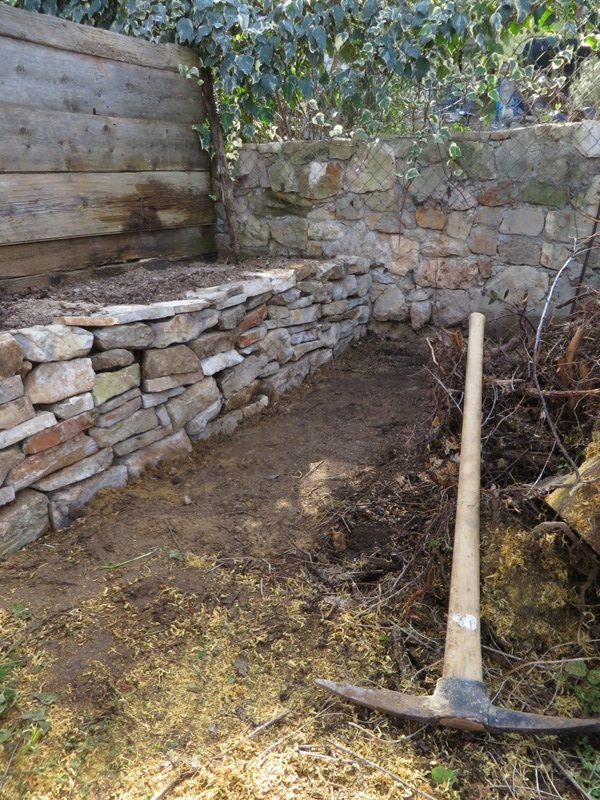
The first job was to dig out sandstone debris which came from inside one of my Konobas. A pick axe broke it up nicely and then it was easy to shovel away. I then laid some large foundations stones directly onto the earth.
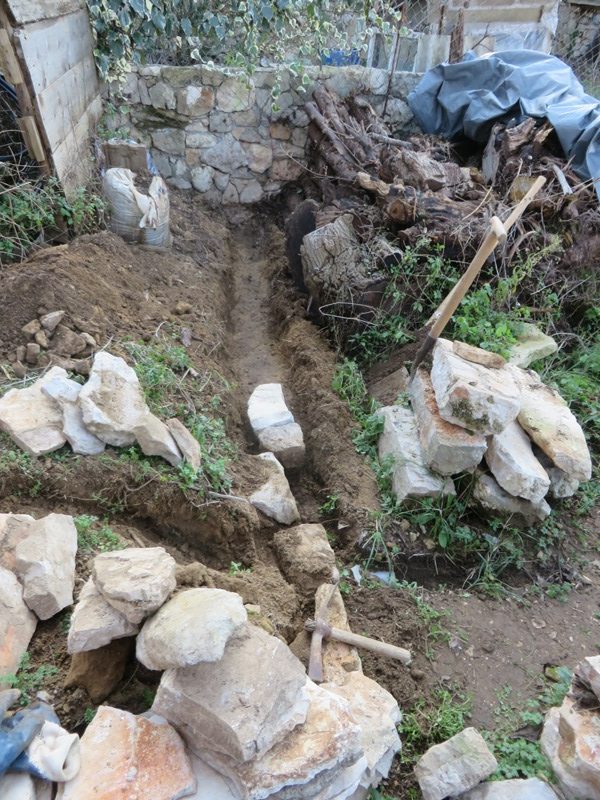
I have no shortage of stone and it is only a low wall, but it delineates the working area outside the gardens sheds from what will be the scenic garden.
I completed the long length last year, but needed somewhere to store the logs before I could complete the right angle corner and finish it.
I went on a Yorkshire dry stone wall building course many years ago. One of the the learning points that the master waller drilled into the students was that ‘once you select a piece of stone, don’t put it down until it is placed in the wall’.
It is actually very good advice, because it makes you focus on selecting the right piece of stone from the pile.
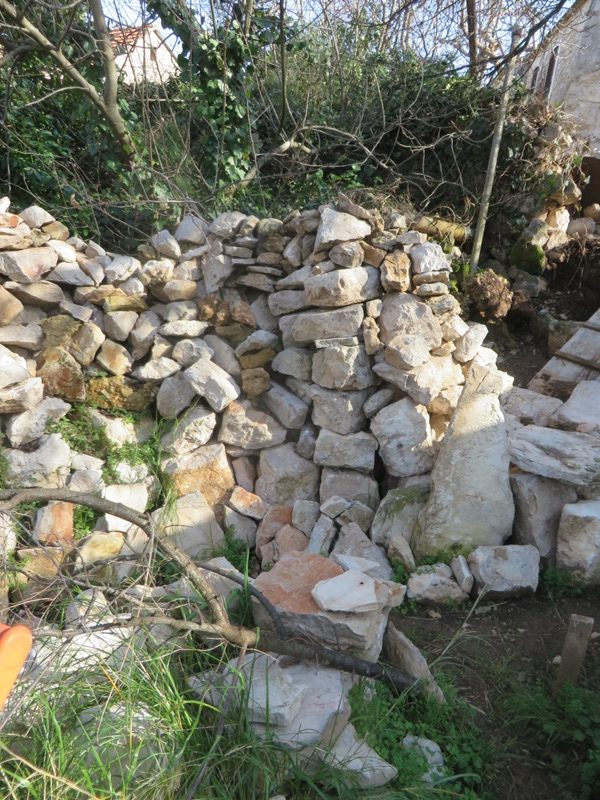
I spent time sorting longer pieces, that had at least two flat surfaces, then moving them to the building area.
This meant that I could lay several stones in a sequence. I didn’t use a line to keep the wall straight, rather I used my eye, knowing that slight imperfections will make it look a little less “constructed” and more natural.
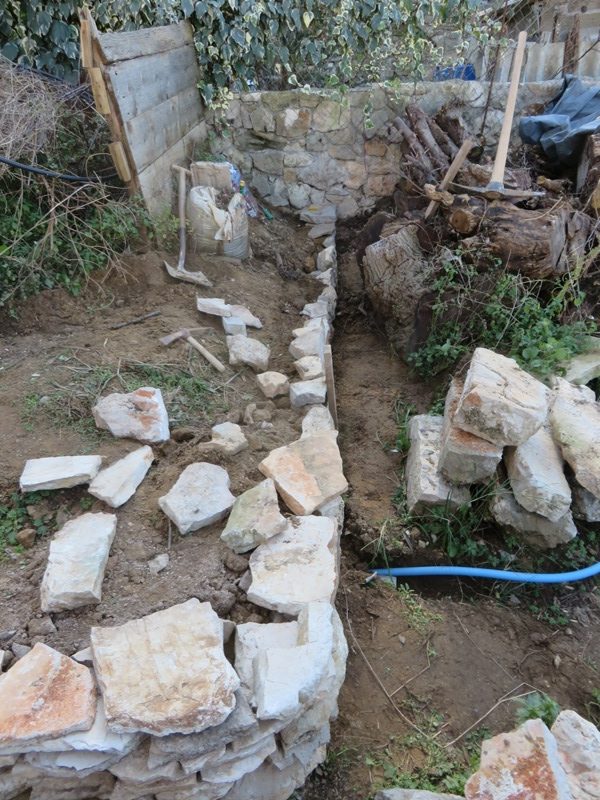
I did use my long spirit level to keep the top fairly level with the marking pegs I set up. After three days I had the wall completed.
The next job was moving the remaining log pile into the wood shed. This is my supply of logs for next winter!
A set of substantial door hinges are on my list for the next Bauhaus visit too…
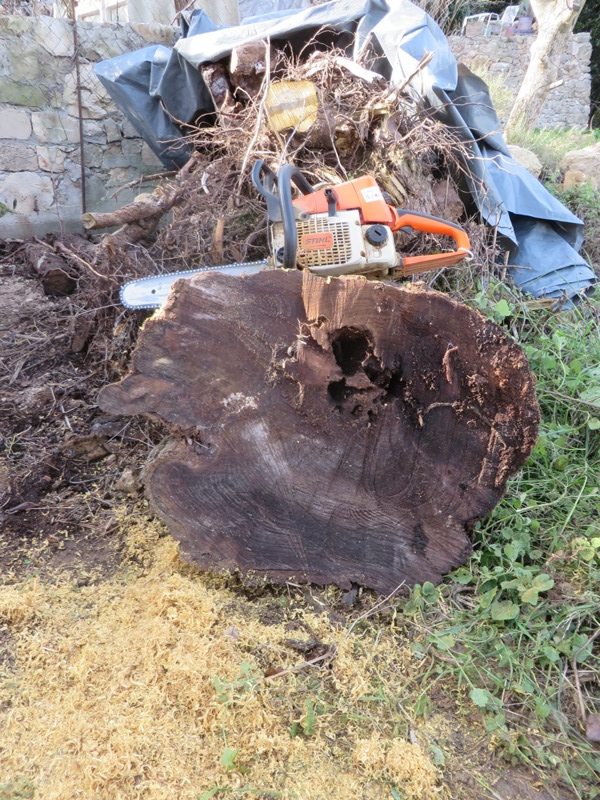
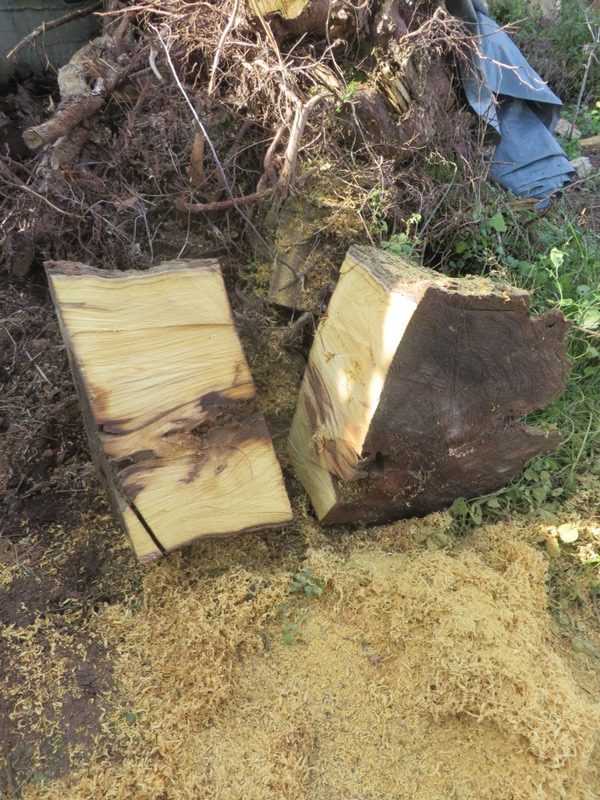
There were two very large sections of tree trunk which I couldn’t lift, so on Saturday I used the chain saw to reduce them to a manageable size, then I moved them.
This has effectively given me a clear working area.
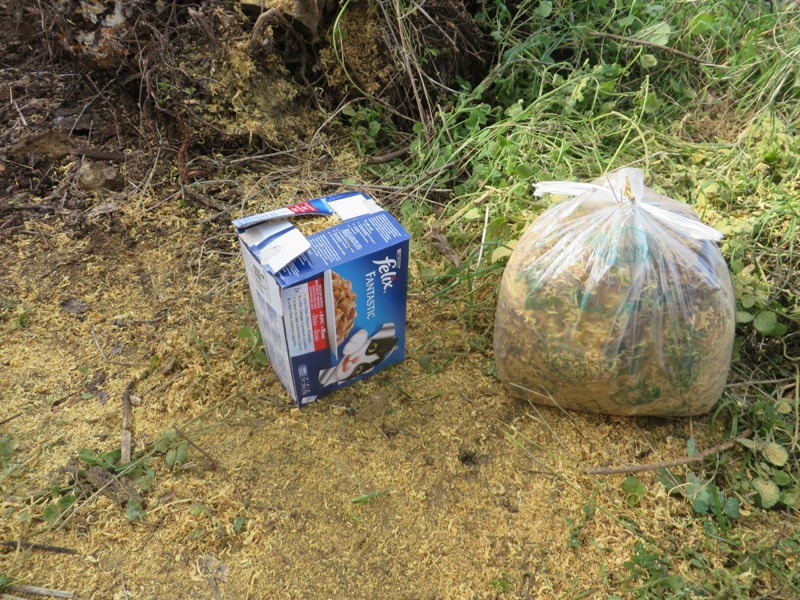
I try and make sure nothing goes to waste, so all the wood shavings from the chain saw are collected, to be burnt. At the suggestions of a friend, I fill the cat food boxes with highly compressed shavings, then burn them like logs on the fire.
The log shed has a capacity of over 6 cubic metres and is now fairly full. There was not enough space for the tree stumps my neighbour gave me to burn, so they have been piled up above the new wall and will be sheeted to keep out the rain.
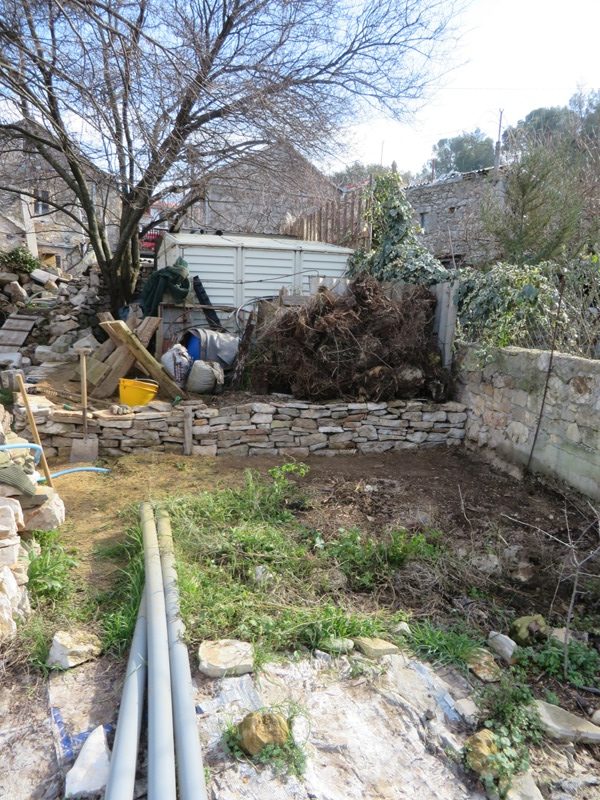
The Top Orchard has been a “work in progress” for too long. The problem is that there are always so many jobs to do, but the area of the garden sheds is around one sixteenth of the full orchard.
With this area almost finished I realised that I had answered the old question; “How do you eat an elephant?” Answer; One small bite at a time…
Fully one eighth is being used for architectural salvage and is under stone, but I realised this week that I have almost cleared the sixteenth part round the sheds. The next sixteenth part is where the logs were and will become a garden. A further sixteenth is where the pond will go. If I can get three sixteenths finished by Spring, I will be happy.
The area where I had stored the logs is not so much a difficult corner, but rather one which has a number of environmental considerations. It is south facing but is sheltered to the south by a small wall. The orchard is almost a completely frost free area. A large, old plum dominates this part of the orchard, providing shade in summer from the sun which is almost vertically overhead. In the spring though, when the sun is lower and there are no leaves, the orchard warms quickly.
I’ve brought the rain water harvest system down here so that it floods into a Swale, keeping the garden area moist with water from the roofs and courtyard. I want to install a small ornamental pond here too, with a bog garden and nice ornamental grasses.
This is where will place the compost heap as well, but with a leachate runoff, so all (any) good stuff from the composting process will be drained into the area around the outside of the wall to benefit the plants and shrubs.
I have been gathering plants, shrubs and trees for 12 months, and many have been over wintering outside.
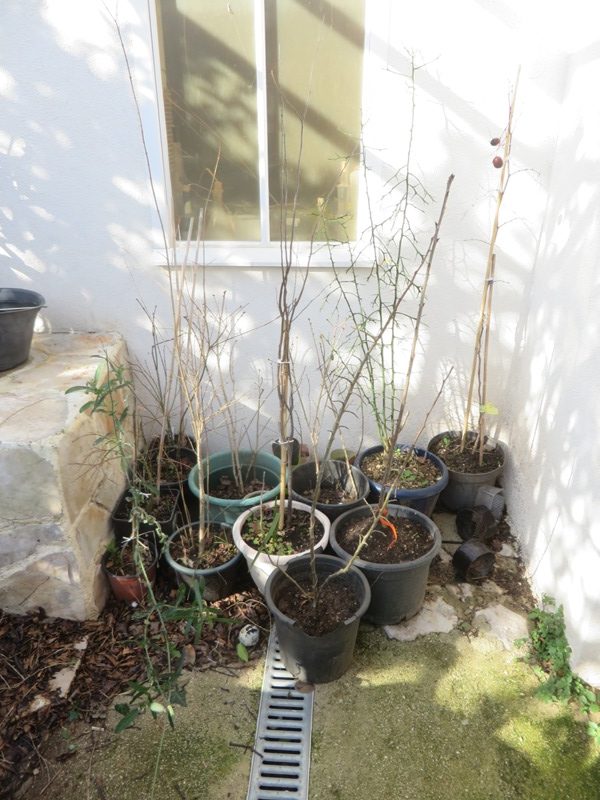
Close to the kitchen is a sheltered spot where I have a number of trees and shrubs in containers – an outdoor nursery area for acclimatisation. Three of these are Japanese Maple, Acer palmatum.
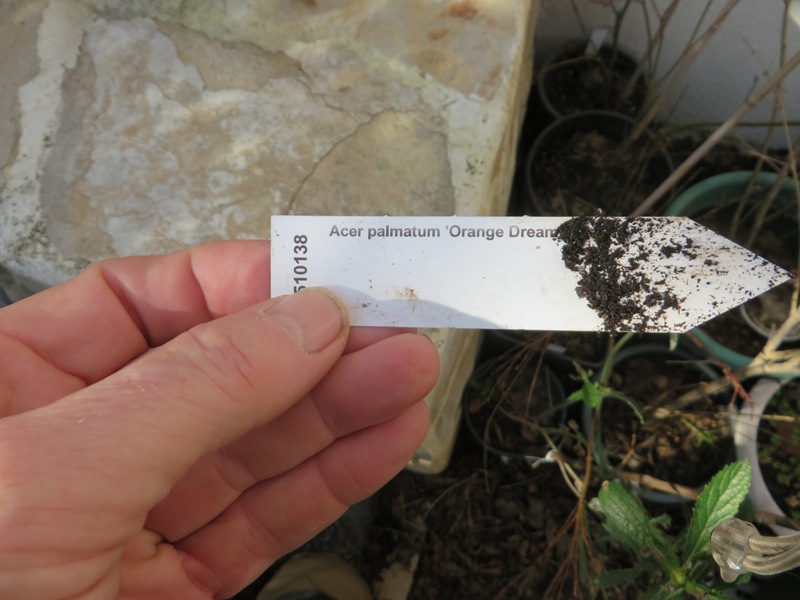
Everything I buy which has a label, keeps the label until it is planted into it’s final position. Then the label is transferred to my planting map.
But I had to look and see exactly which maples they are, to decide on their finished position. Plants grown from seed spend time in the greenhouse, including their first winter, then go outside for their second winter, before being planted in their final position.
In a couple of weeks I will be planting Aubretia seeds, so this plant can naturalise and hang over the stone walls.
But for now, some weed removal is all that is required to make the plot ready.
Hydroponics
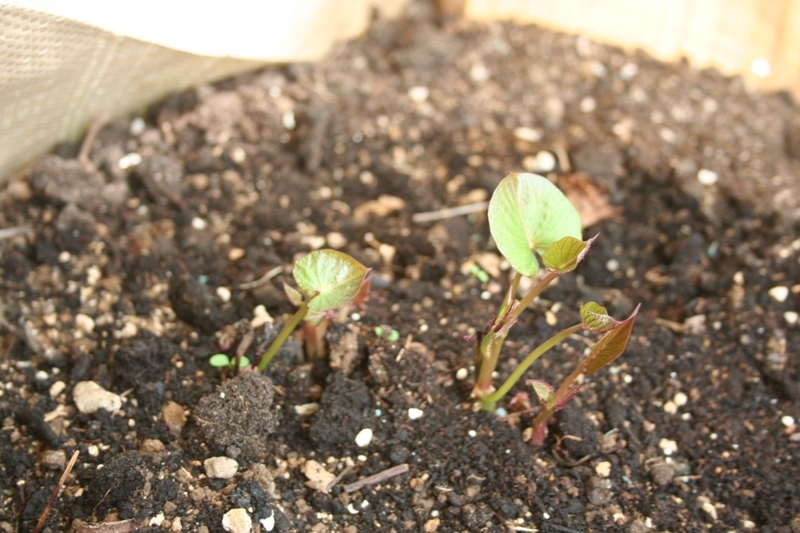
I had a look at the tomato seeds I planted on Monday – just less than three days after putting them in gauze, in a plastic bag on my permanently warm UPS.
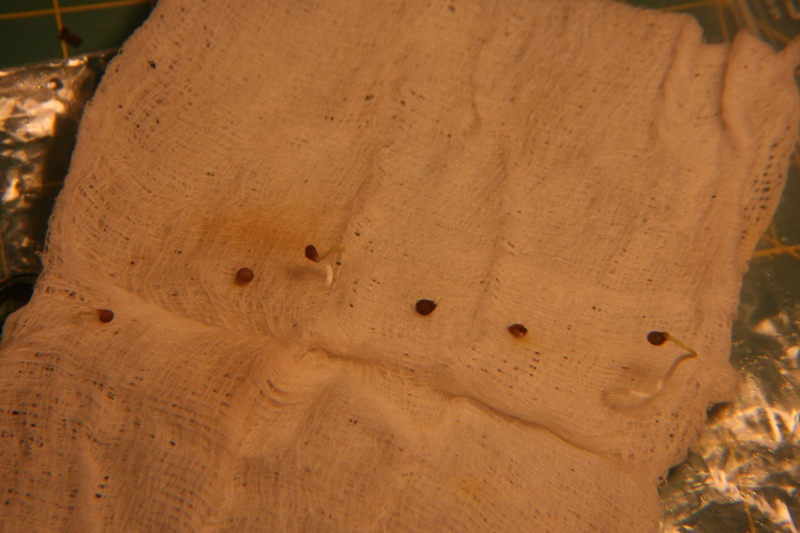
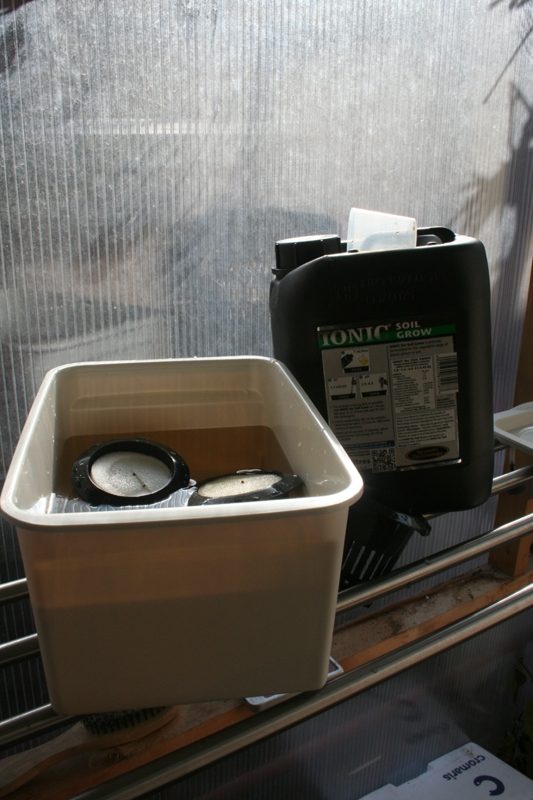
Four of the six seeds had sprouted, so on Tuesday morning, I set up one of the hydroponic units and warmed water in bottles in the sunshine before mixing the nutrients.
When I opened the pack, two of the seeds had grown roots of more than 10mm. But this being my first time with this system, I hadn’t appreciated how difficult it is to transplant them into their permanent sponge home.
I followed the instructions about soaking the sponges, but although the packs come with tweezers, I used a pair of cross locking tweezers. Bad mistake!
As I gripped the root, the cross action spring was too strong and it squashed the fragile root. So I reverted to the normal tweezers that were supplied with the Hydroponics kit..
I also discovered that although the instructions say “use gauze”, I am using medical grade gauze, and the holes are too big. A second seed broke at the head as I tried to gently remove it from the gauze. Perhaps Muslin Cheesecloth would be a better medium to start the seeds in.
I did manage to get two seeds out and into the sponge rings. But then the instructions were a little vague about how deep they go into the sponge. Clearly there is going to have to be some trial and error here before I get it right.
But three days from opening the seeds packet to immersing seedlings in the growth fluid is really not bad going, so I must be doing something right…
A further check in the middle of the week and the remaining two seeds have failed to germinate, so I placed six new seeds in the gauze, but this time with an absorbent paper liner, to prevent tiny roots becoming entwined in the mesh. This is learning by doing…
Greenhouse
Although throughout these weekly musings, I talk about the positives, I do have failures. Yes, I know, feet of clay and all that (I can’t bake Scones either), so I removed one of my failures this week.
Last August I filled a Marshall’s grow sack with soil and planted some Sweet Potatoes, Ipomea batatas, that were sprouting.
The grow sack has been at the front of the storm porch ever since. This is just outside the greenhouse door and fully protected with glasswall and a bubble wrap roof insulation.
By the middle of September I had several shoots, which soon reached the top of the porch. I kept the grow bag watered and fed until Christmas when the leaves started to die back.
You may recognise Ipomea as a genus of flowering vines and I know from planting Sweet Potatoes outside, they flower before the tubers are ready for harvest. My vines had no flowers.
A little bit of exploration around the base of the stem this week suggested they had died off, probably because it has not been warm enough.
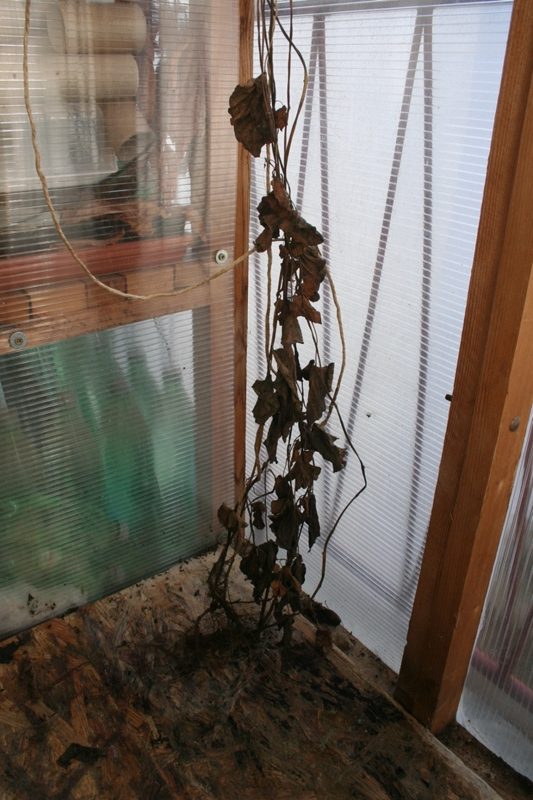
Although the storm porch is completely enclosed and is south facing, it only has the characteristics of a cool greenhouse and Sweet Potatoes are sub-tropical. So my plan for home grown sweet potatoes for Christmas failed.
This week I’ve removed the big grow sack and found there were just two tiny potatoes that had formed. I might be able to get them to grow, but they are really not much use. As I need somewhere for the Hydroponics, and with fine weather I cleared the area, swept and tidied it and made space for the hydroponic vats.
The soil will get used again, I was even wondering about planting something now. I need to investigate my seed bank and see what I have that is suitable…
Another minor disaster this week was my heated propagator cover. I was in the greenhouse clearing some empty seed trays on the back wall shelving when there was a crash behind me.
Callie, my youngest feline who loves climbing, had jumped up onto the perspex cover, which had collapsed under her weight. She was sitting in the empty propagator looking rather surprised. Fortunately nothing was broken, more the glue I had used to hold the various pieces together when I built it has dried and gone brittle.
Rather than try and re-glue it I decided on a more permanent fixing. So after buying some 20mm “L” section aluminium channel, I cut the pieces to size, one for each outside and inside corner and then bolted the pieces together. The perspex is now held between the two aluminium sections in a sandwich.
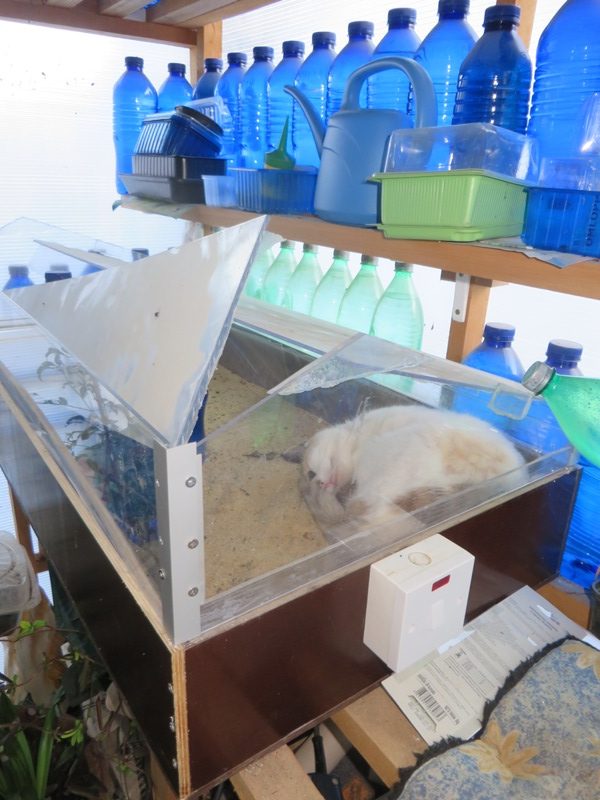
Felines are quick learners and Callie has found out that she can move the top cover and sneak into the currently empty propagator. Please don’t tell her where the warming cable switch is, because I’ll never get here out!
Next time I go to the mainland I’ll try and get a piano hinge for the top which would then make it completely Callie proof. It’s a good job I haven’t actually planted any seeds yet!
Climate change
And while on the subject of the greenhouse, gasses and climate change, there was a very interesting article on the BBC this week.

The UK Met Office says that there is a high probability that in the next five years, the world will exceed the 1.5ºC threshold for irreversible climate change. This you may recall is the limit that the Paris Agreement on Climate Change has said is a critical tipping point.
Part of the article includes a zoomable global map, showing where records were broken last year. It turn out that while Dol didn’t experience any “hottest since records began” extremes, there were a number of days when the temperature was the hottest ever recorded for that date. NRC
2 Responses
Andy Obridge
I envy your enthusiasm Norman, or is it persistance? I’m afraid, after failing at seeds, I tend to buy plants.
I must have very natural walls though, quoting you “knowing that slight imperfections will make it look a little less “constructed” and more natural”
Lets hope the weather does as predicted although it will be a first! Best result I had from my olives was after heavy snow in February. First time in 50 years and maybe as long again!
Msrcy
Loved seeing the finished wall. It’s beautiful. I can hardly wait to see what is happening with the gardening and hydroponic garden. You are always so busy and it’s just coming along so well. Thank you for sharing all of this. I’ll pass along the climate change article. Cheers.