A disappointing week
This week: New ‘F’ Squad member; Window construction; One job leads to another; Repairing tyres;
The forecast was for rain on Monday morning.
I did a couple of jobs outside then realised the sun had gone and the sky was looking very threatening.
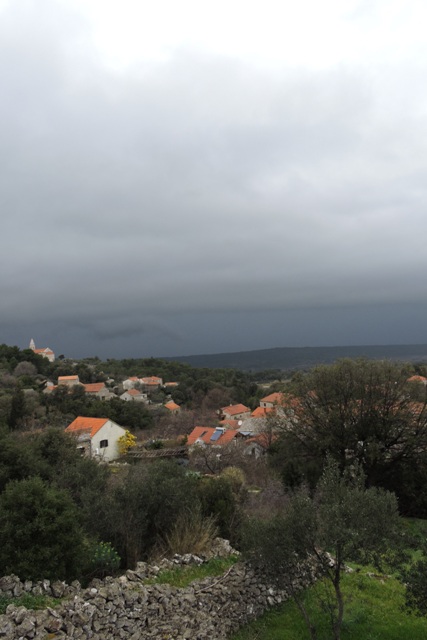
It was becoming darker by the second as I took a series of photographs of the approaching shelf cloud and storm. To the north the island of Brač is completely hidden by the curtain of rain.
Most of our rain comes from a south easterly direction, and then from the west. A storm from the NNW is most unusual.
Rain drops were just starting to splatter the ground as I quickly took this photo then rushed indoors.
I needed the lights on because the sky was so dark.
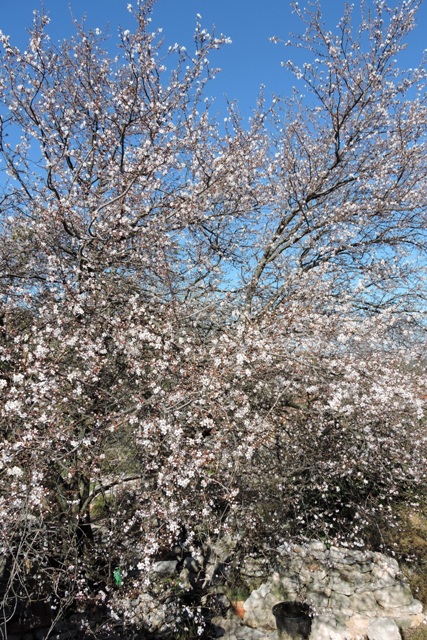
On other days we have had bright warm sunshine. My Myrobalan Red Cherry Plum is in full blossom at the moment, and is covered in honey bees.

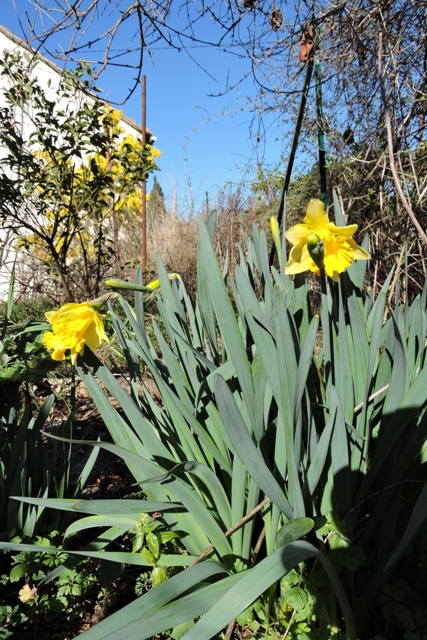
Elsewhere my first Daffodils have come into flower this week.
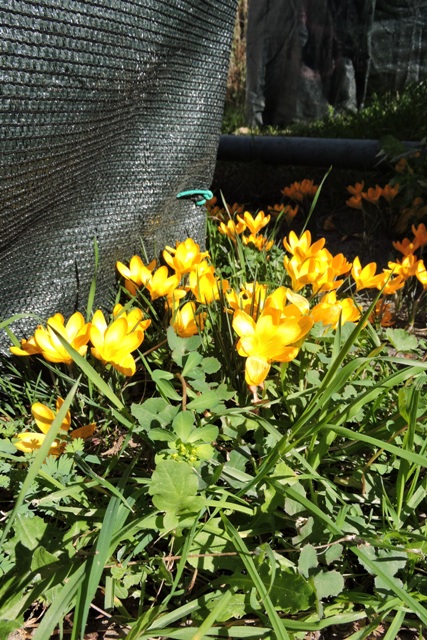
I also have my lovely yellow Crocus in full bloom, a carpet between the citrus protection in the citrus orchard.
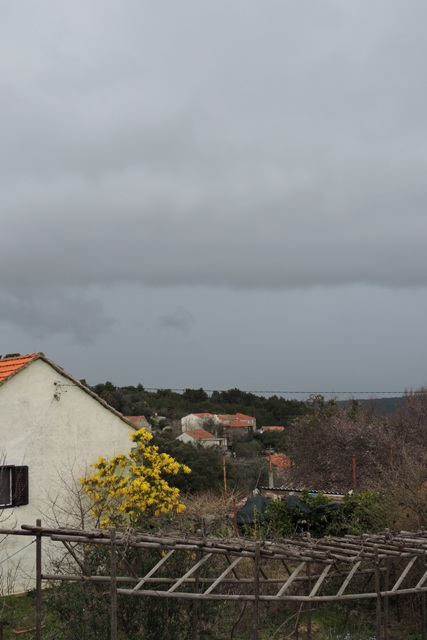
There were several things which were supposed to happen this week, however none of them have actually taken place. So it has been a disappointing week.
My double glazed units which I ordered in November for the new Utility room, should have been delivered and fitted on Thursday.
They are still in Dubrovnik. This is because the crucial curved top piece has not been delivered from Zagreb.
It will be another 10 days I’m told, before they will be delivered and fitted.
My baby Rhinoceros should also have come, but it too is still in Zagreb. But next week, perhaps, Inshalla…
New ‘F’ Squad member
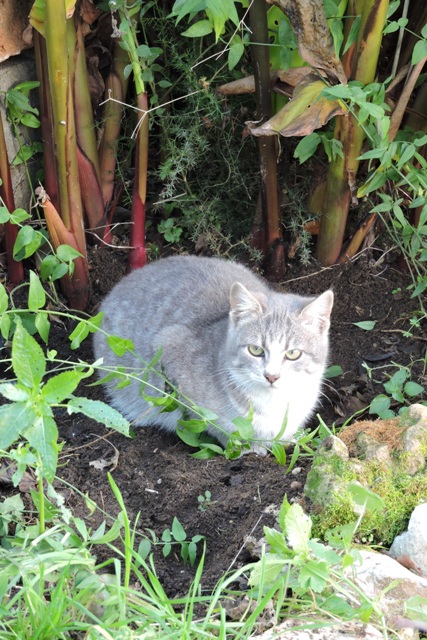
Two months ago, on New Year’s Eve, I had to do a quick errand in the car.
As I opened the courtyard gates there was a silver flash in front of me and a shimmering silver fur ball rushed up the snicket between the buildings.
I looked up the snicket and there was a tiny face peering round the corner back at me, crying. The moment I moved, the face disappeared into the grass.
When I came back home, the face was peering at me again, this time from my garden wall.
I blamed my neighbours for sending another stray over the road to me! But when I went over for a New Year coffee, she wasn’t one of theirs.
Within three days she had learned to use the cat flaps in the doors. Then where the food could be found, of course.
With lovely markings and being extremely wick, I gave her the name Živa, “Quicksilver”. Because that is what she looks like and she moved at the speed of Mercury, the Greek Messenger of the Gods.
Sadly the island is over-run with kittens, so no one wants to “home” her. It very quickly became apparent that she was adopting us and was staying.
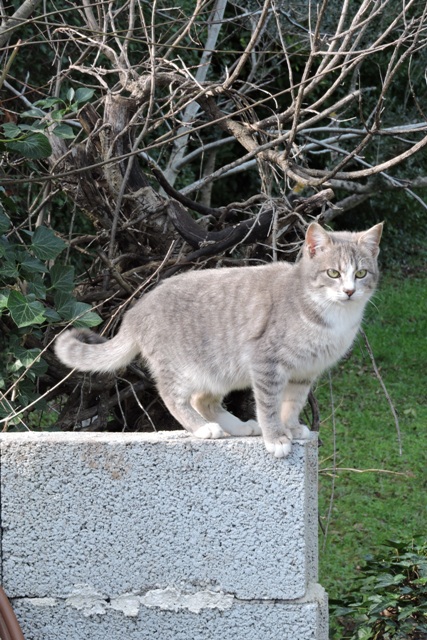
Živa has made the effort to get on with everyone, although her bouncing does sometimes take the adolescents by surprise.
When female cats have a litter of kittens, they nurse and teach them for so long, then one day leave them to fend for themselves.
I suspect this is what happened. The vet told me that with my others, they probably give off a scent pheromone of safety and a stress free home, so that’s why she turned up at my gate.
The human nose holds about 5 million olfactory sensors, while the average cat has between 80 and 200 million, in two nasal sense organs.
So while when we meet people or go somewhere new, we use visual clues and body language to tell us about the place and if we feel welcome, its a cat’s nose which does the same job for them.
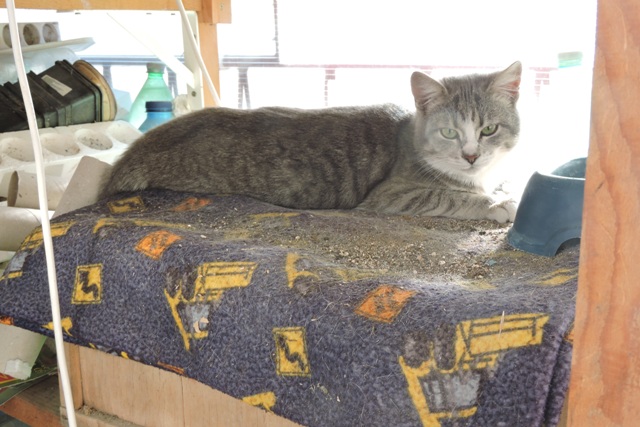
We went to the vets on Monday as she came into season last Saturday. The spaying went well, but she had a problem with her breathing under anaesthetic and had to be given oxygen.
After some x-rays, the Vets are concerned about some lung scarring and possible parasites in her gut.
So we are on some strong antibiotic syrup for a week.
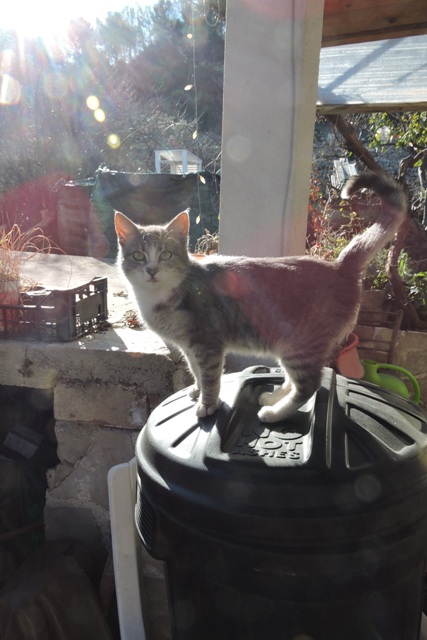
Meanwhile, everything is still a game. Apart that is when the sun is shining and there is a comfy spot on top of the citrus wind protection, to sunbathe.
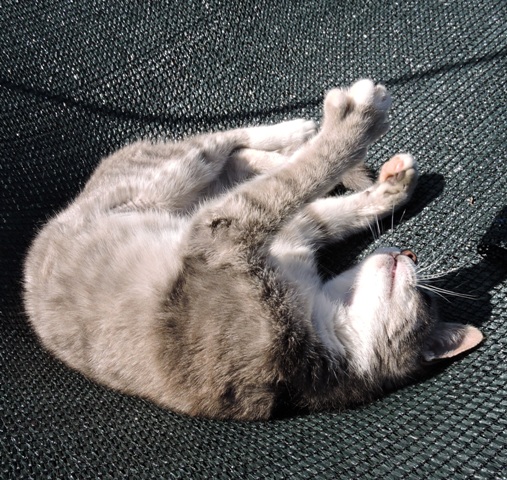
At Volat, Rosa said that she hadn’t been able to find anyone who would take her. So it looks as though I have a new, full time member of the “Felines” squad…
Window construction
With some much needed rain on Monday, 16 litres / square metre, everything was a bit wet on Tuesday morning for any serious garden or orchard work.
But never being short of a job or three, I did more work on the small window construction for the cottage.
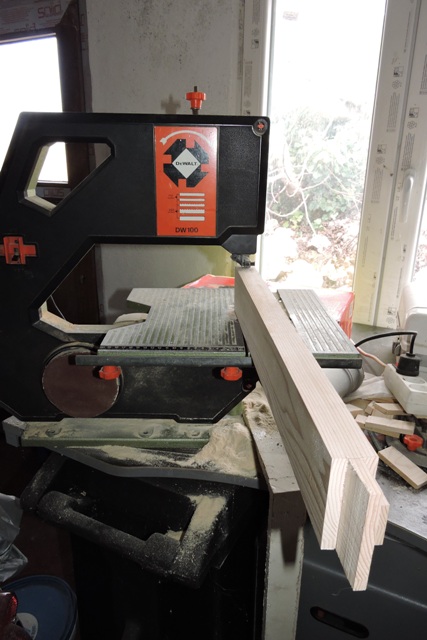
I always measure three (or four) times and then just cut once. So setting up the marking gauge for the mortice joints was a slow but painstaking task.
All the four pieces of the frame are exactly the same dimensions, having been passed through the thicknesser machine at the same time.
Conventionally on wooden windows with Mortice joints, the cross pieces are called rails and the verticals are called styles. Rails join with a tenon going into a mortice on the style.
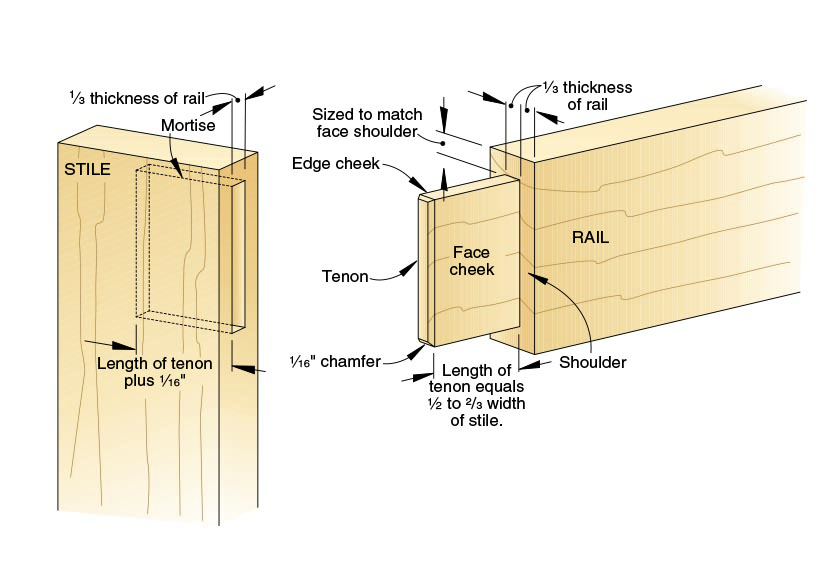
However because this window is going to be mounted on the outside of the wall, to allow the maximum amount of widow area for the small opening, I have reversed them.
This is so that rain will have no vertical cracks on the top or bottom rail to work into. This apart, I made conventional tenon pieces.
Each tenon is exactly ⅓ of the width of both the rail and style.
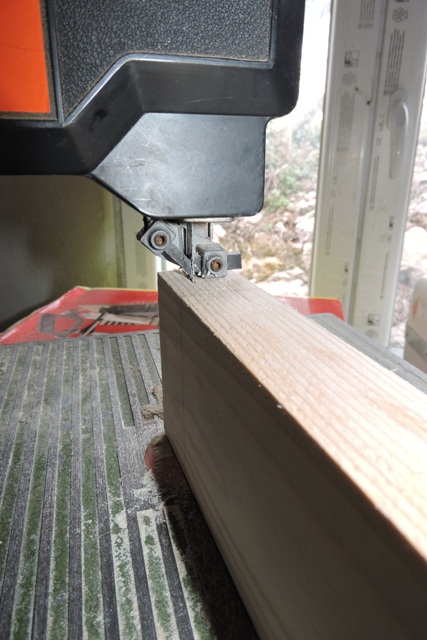
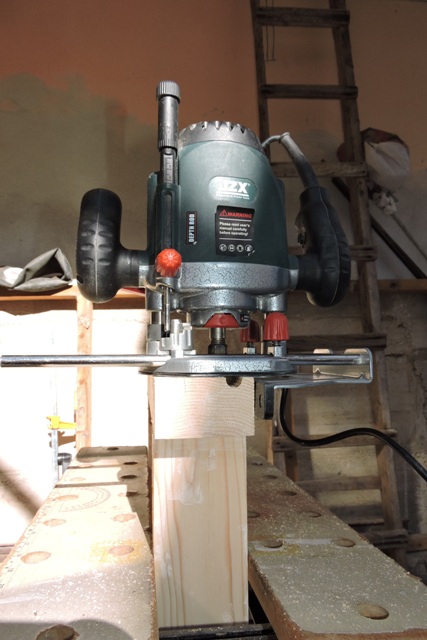
After carefully scribing all the ends with the marking gauge, I used my band saw to cut the waste to leave a perfectly square tenon. Without changing the marking gauge, I scribed the top and bottom bar.
With the sun shining, I moved out into the courtyard for the messy bit of cutting the mortice holes with my routing machine.
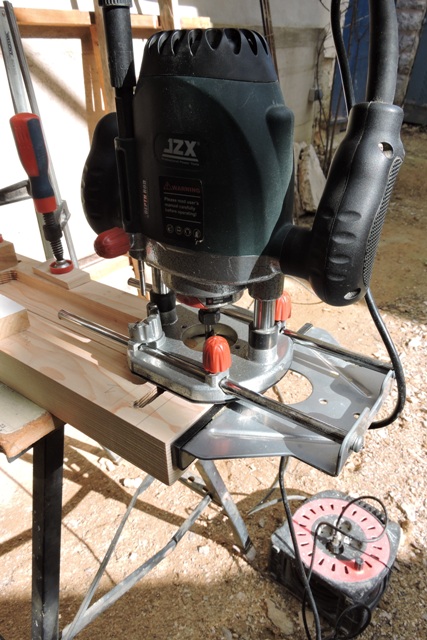
This makes short work of cutting a square hole, the mortice, for the tenon to fit into.
Lastly because the router leaves rounded corners, I squared them off with a hand chisel and mallet.
There is still a place for hand tools, even with all the current automation available.
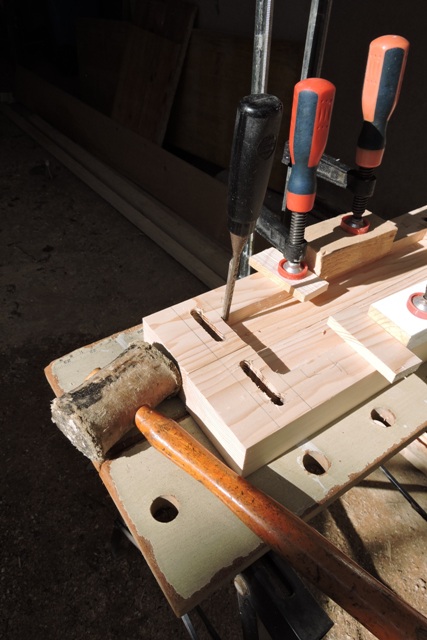
A trial fit showed me that the tenons were slightly over size. This is what I expected.
It is far, far easier to sand a little bit off a tenon, than it is to cut a whole new piece of wood to fit because the tenon is loose in the mortice.
I glued the four parts of the frame together and put them into my frame clamps. Even before clamping, the corners are perfectly square.
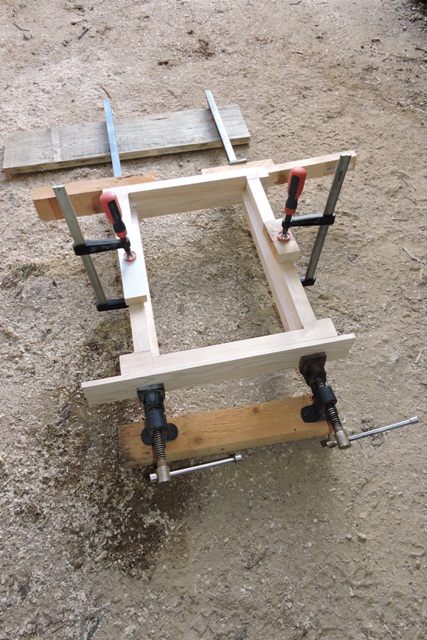
The clamps tightned up the joints and held everything in place while I let the glue set for 24 hours.
This building is probably the oldest of all my property, dating from the mid 19th century. The walls are somewhat less than even, so I offered the dry frame up to the wall, to see where I needed to adjust the inside edges to fit, before painting.

The answer was nothing. On the inside the frame is barely visible.
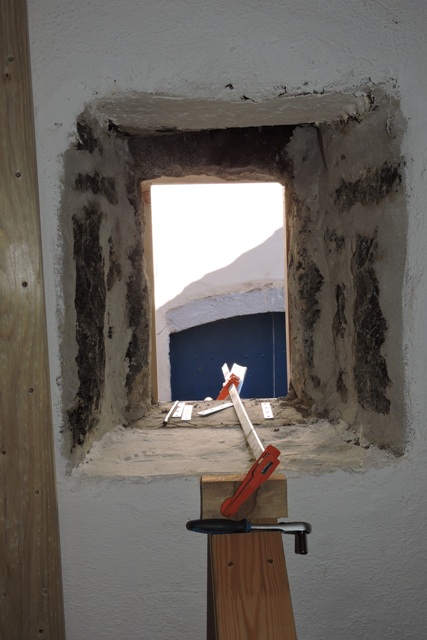
The wooden frame touches the wall just about everywhere. There are just a few very small gaps which will easily be filled with exterior silicone.
I then made a frangible top piece. This wooden cover is shaped so that rain water will run off. I will screw it to the frame rather than gluing it in place.
The idea is that if anything rots, this piece will be first and it will be easy to replace.
The last job of the day was to cut drip grooves on the underside ledges. It is all ready for painting next week.
One job leads to another
I’m putting in the framework for the poly tunnel in the Top Orchard.
Once again, it is my own design, based on what materials I can easily obtain on the island, its position, its planned use and the winter / summer conditions in the orchard.
Lying against a 2.5 meter wall, it gets sunshine even in winter. Of course in mid winter the amount is small because of the southern hills, but any solar radiation is better than none.
In summer it will receive almost 14 hours of sunshine.
So my design is for a wooden frame at each end, made of the cheapest wooden lats on the island. The hoops are steel reinforcing bar, used in construction and covered in plastic tubing.
There will be a 50% permanent cover of UV resistant thermoplastic panels and the other 50% will change according to the seasons.
In winter, plastic sheeting will create a barrier, to keep the inside warm. In summer it will be shade material, to allow air movement and keep the temperature down.
Inside there will be an assortment of crops to take advantage of the microclimate, from early tomatoes to late season and winter salads.
The steel hoops are all in place, so now I am constructing the first of the wooden end walls.
I dug out a trench of topsoil and started to back fill it with stones, as the hardcore to go under the wooden frame and entrance door.
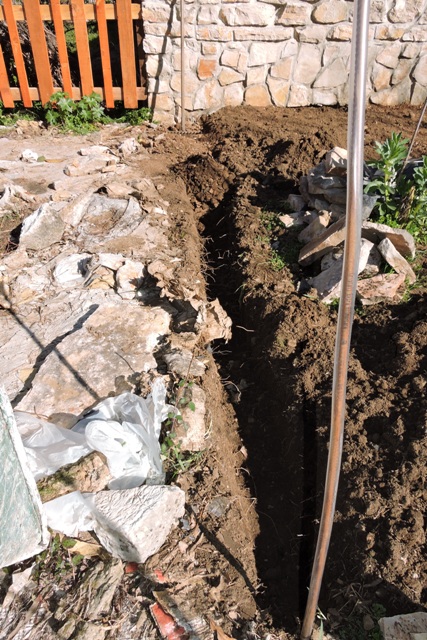
After two wheelbarrow loads of hardcore, I noticed that the tyre on my barrow had split and parts of the innertube were showing.
So I levelled the hardcore I had already laid, turned the barrow over and got ready for the next job on the list.
Repairing tyres
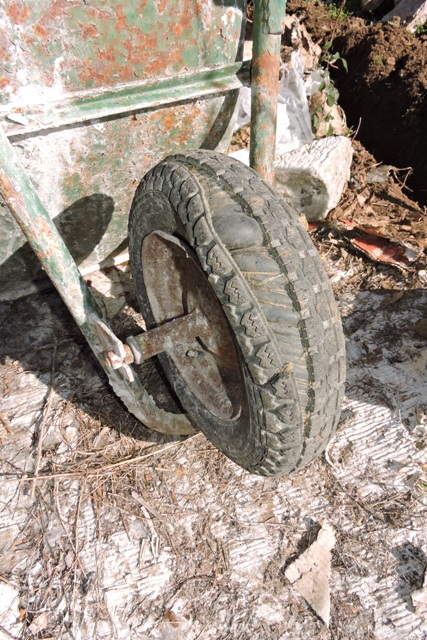
The construction of the wheelbarrow is simple which makes maintenance very easy.
Removing the whole wheel required just two nuts to be slackened off. Then the whole wheel and axle comes out in one piece.
With the sun warming the courtyard, I used my tyre levers to remove the outer casing. The tread has completely split and the old tyre is only fit for the waste bin.
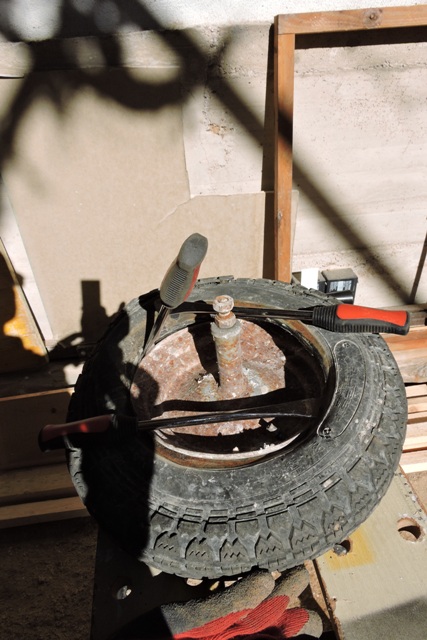
I removed the rubber inner tube, which fortunately hadn’t been damaged. A few more trips over rough ground in the orchard, and I would have been repairing a puncture, or replacing the tube as well!
Going into my store, I discovered that I didn’t have any replacement tyres to fit. I only have smaller ones, for the sack barrow and trolley, so I went into town and bought the last that Volat had.
I also bought some Rust-Oleum surface treatment and white tape.
After lunch I cleaned the surface corrosion off the inside walls of the wheel rim with my powerfile.
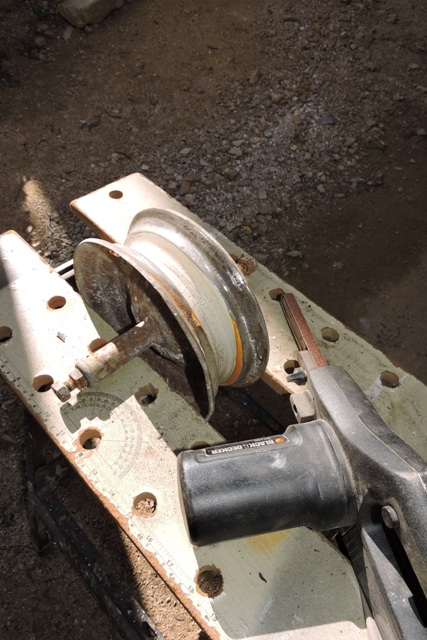
It really wasn’t too bad and three coats of Rust-Oleum filled the pits which were present.
The rim is old and substantial, so I didn’t bother with the outside surfaces. While the Rust-Oleum was curing I removed the axle.
The axle rotates between two thick rubber bushes. I cleaned them and then treated both with silicone grease.
You can’t put a hydrocarbon grease onto the rubber, because it will perish it. Finally I tightened the securing nuts.
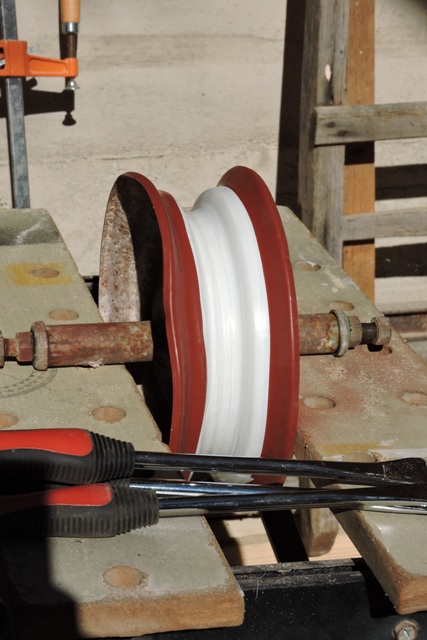
The cleaned and newly painted hub was then left outside overnight to allow the Rust-Oleum to thoroughly dry.
With warm sunshine on Friday morning, I put both the wheel rim and the new tyre in full sun to thoroughly warm through. Being warm makes the retyring process easier.
With a new inner band wound around the inside of the rim, I applied boiling water to the new tyre and eased it over the rim, aided with a little neat washing up liquid. Next the inner tube went back in, followed by the other rim of the new tyre.
Using a battery pump, I applied a little compressed air, checked to make sure the inner tube was not pinched and inflated the tyre.
The inner tube was marked “Made in Yugoslavia” and was dated 1985. There were no puncture repairs and I suspect the tyre was from the same year.
So after 35 years of service, it’s not done badly
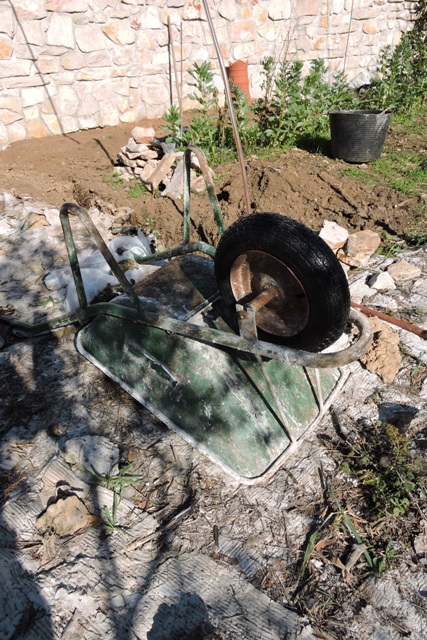
With the wheel back on the barrow, I was back in business, working to backfill the trench from where I left off yesterday.
We are now ready for the next 35 years! NCG
3 Responses
Brian Homans
Love your window frame – excellent work. I am also a fan of Rustoleum. I restored my 1957 Ferguson tractor in 1988/90 and took everything back to bare metal. All surfaces were painted with two generous coats of Rustoleum (two different types) before spraying the gloss grey. Although it lives under cover, after 32 years, there is still no sign of any rust anywhere.
Marcy
What an interesting blog. I love you window. Your carpentry snd mechanical skills never cease to amaze me. The new baby is so beautiful. She looks very loving as well. She found a good home. 😃 Your flowers are always beautiful and happy. Thanks for sharing and have a great week.
HYDER SAKOTA
Very cool
Regards to Ziva
All the best Norman and thank you for sharing
😘🌹😍